Setting up your Automatic Pricing Calculator
This guide applies to the easy-pv.co.uk and easy-pv.ie versions of Easy PV. The information provided here may not be accurate for easy-pv.com.
With Easy PV you can configure pricing rules to automatically calculate project prices. Rather than having to amend and change your service costs on each project, you can spend time setting up your pricing rules so the automatic pricing calculator will do it for you.
Pricing settings can be accessed via My Account > Preferences > Financial > Change pricing settings or if you are part of a Pro team, the owner/admin can do this via Pro Account settings > Financial > Change pricing settings.
To turn off automatic pricing click on the use pricing calculator toggle. You can also switch between automatic pricing and manual pricing on a per-project basis via the financial task.
Configuring for your project
You can set material pricing based on the cost of materials plus a markup (best for complex pricing depending on the number of panels, roof dimensions, travel distance, etc.) or based on custom lookup tables (ideal for simpler pricing using only a few panels/inverters combinations).
On top of the cost of materials, you can set up additional charges for the delivery and installation. The installation cost can be further specified with costs for scaffolding, electrical, roof type, and travel to the site.
-
Choose if you use a markup or lookup table for calculating the cost of materials.
-
Tick the box for each additional cost you want to include in your pricing (information on configuring each of these is below).
-
Choose the format in which you want to display the price of goods in the quote.
Lookup tables or markup
Option 1: Lookup tables
When you have chosen lookup tables on the first price settings page, before clicking next you can also choose to use a markup-based pricing for any designs that don’t match one of the lookup tables you have entered.
When you click Next, you can then create your lookup tables for different combinations of solar panels, inverters and batteries. Different costs can be specified within each combination for different numbers of panels.

Lookup tables are most useful if you install just a few different system combinations (i.e always use Trina with Growatt). If you need more than a few lookup tables, it’s probably more efficient to use the ‘markup’ method.
Option 2: Cost of materials plus a markup
When Markup has been chosen on the first pop up screen, clicking Next will bring you through to the following page where you can input levels of markup for different sizes of projects.
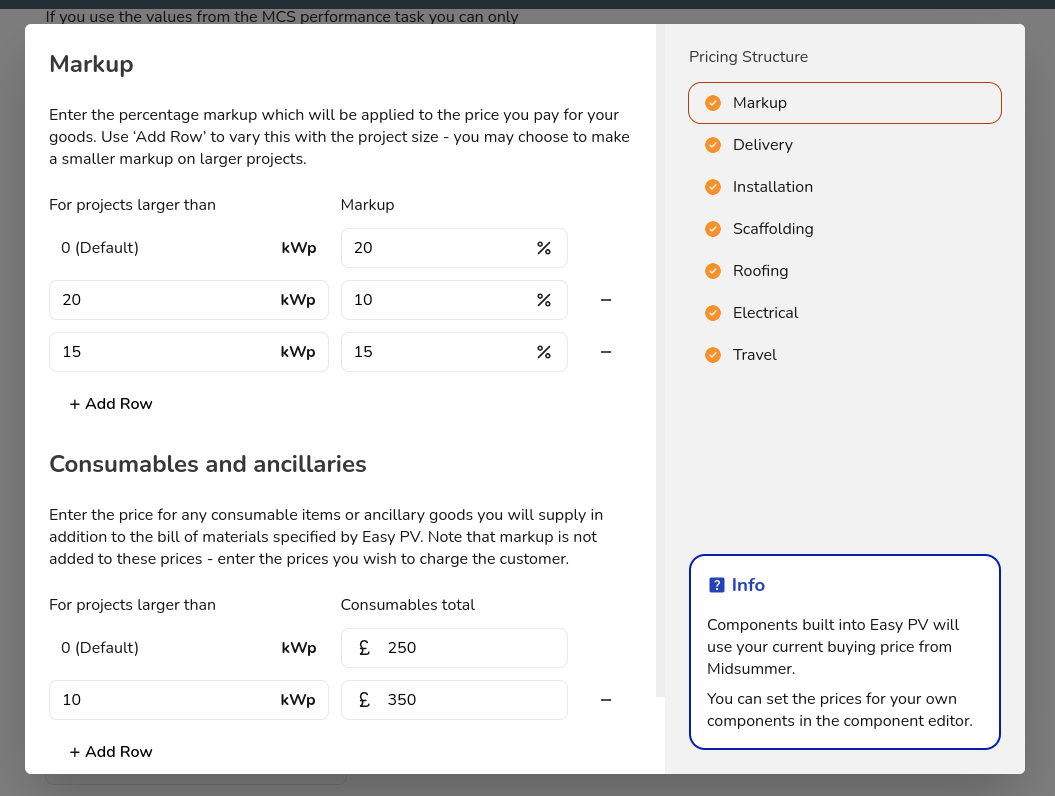
You will also notice a section for Consumables and ancillaries. This includes items not included with the PV kit such as zip ties. Throughout this calculator, you will be able to click +Add Row to create rules and changes to your costs depending on project size or travel distance.
Configure required costs
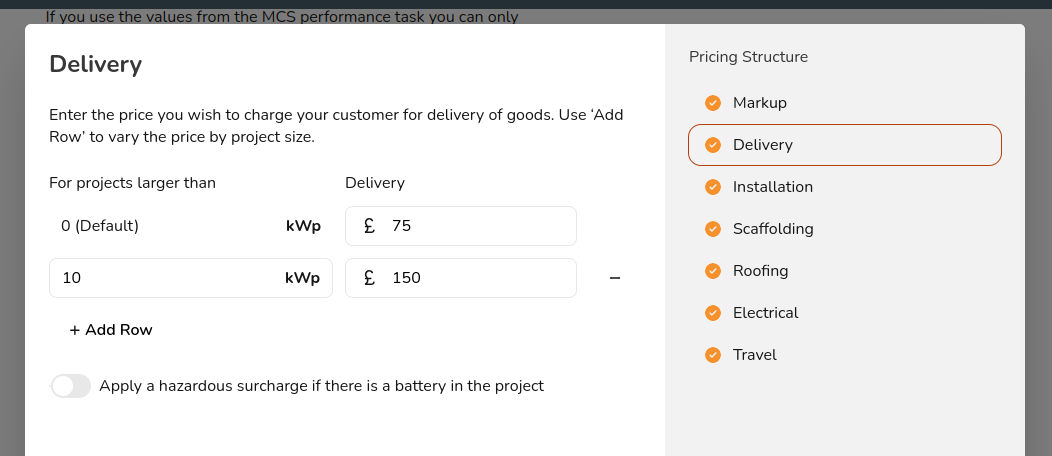
Delivery
You can determine an appropriate default delivery cost and hazardous surcharge fee (when a battery is added to a project) for various project sizes.
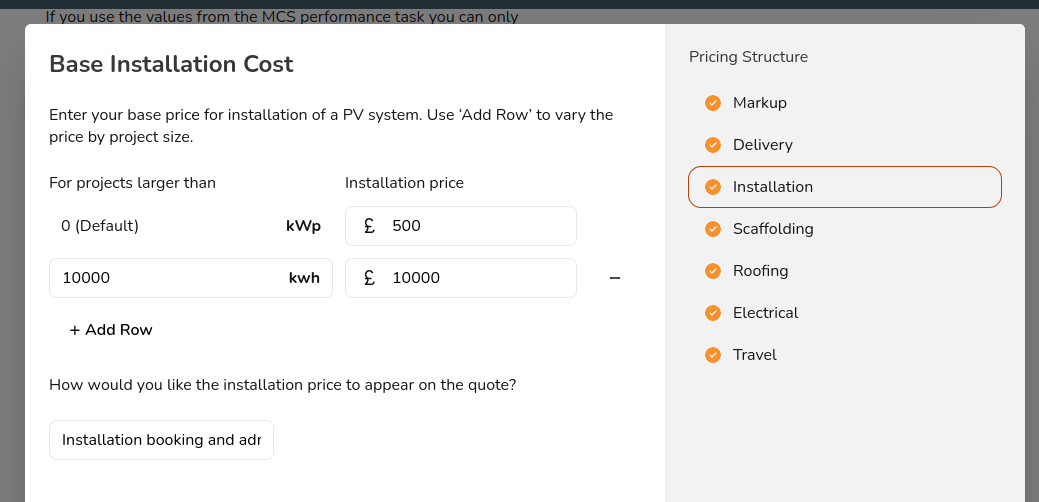
Installation
Here you can add a base installation cost which may cover all of your services (scaffolding, electrical, etc.) or you can set those up separately. You can also choose what text is displayed on the quote for this line item.
Configure optional costs
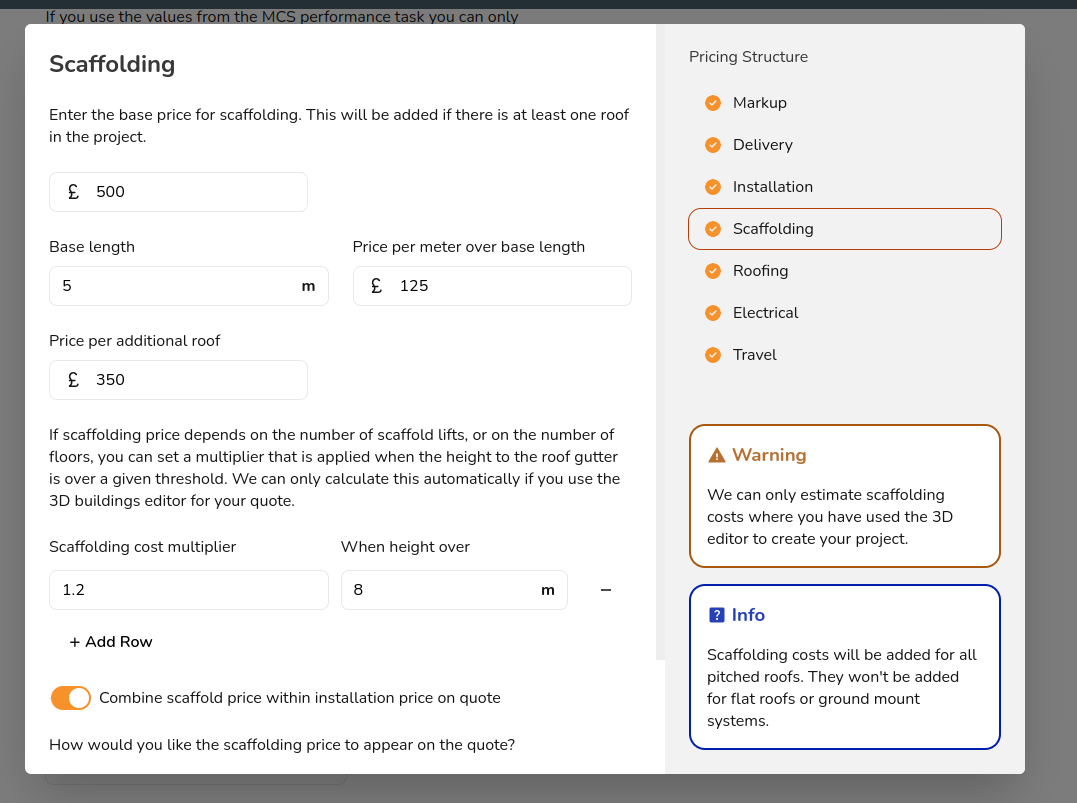
Scaffolding
In this section, you can set a base scaffolding fee and an extra cost for each additional roof. You can also set parameters for max length and height and have an additional charge or multiplier if those parameters are exceeded.
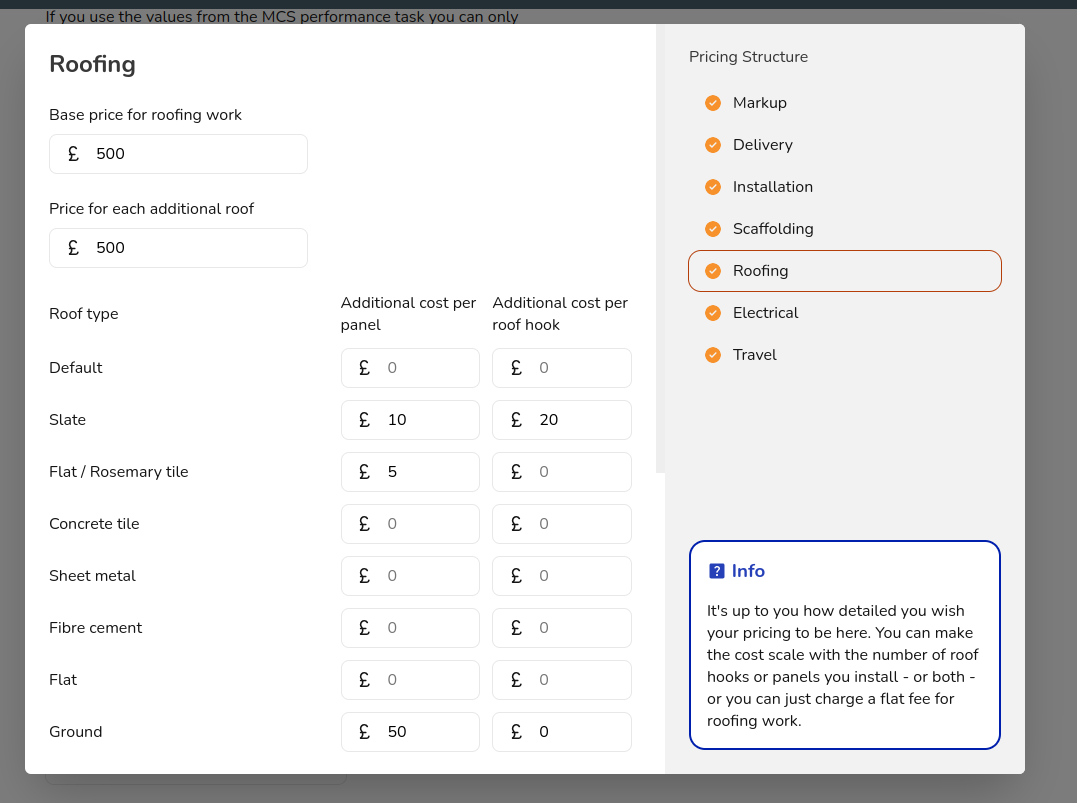
Roofing
For roofing , you can add a base cost and fee for each additional roof. You can set additional charge per solar panel depending on the roof type. Finally, you can add a cost for per each extra such as in-roof panel, optimiser, etc.
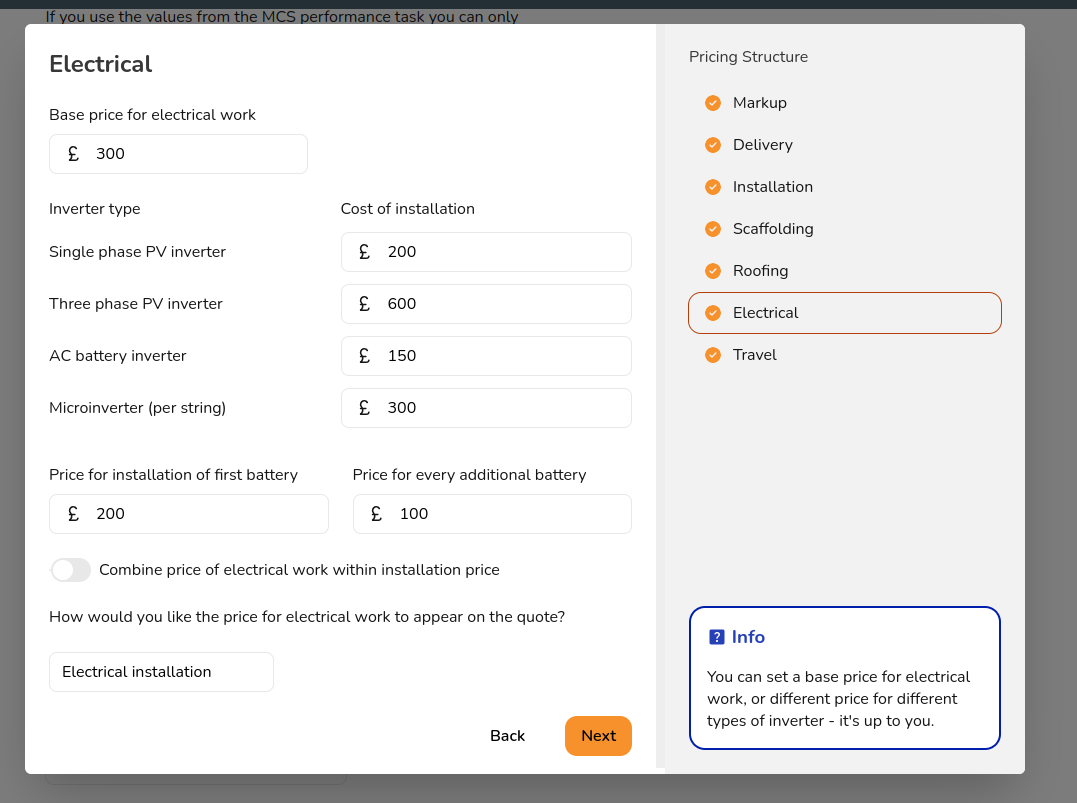
Electrical
Similarly, you can add a base electrical cost, additional fees for the installation of different inverters, and a cost for the installation of a battery.
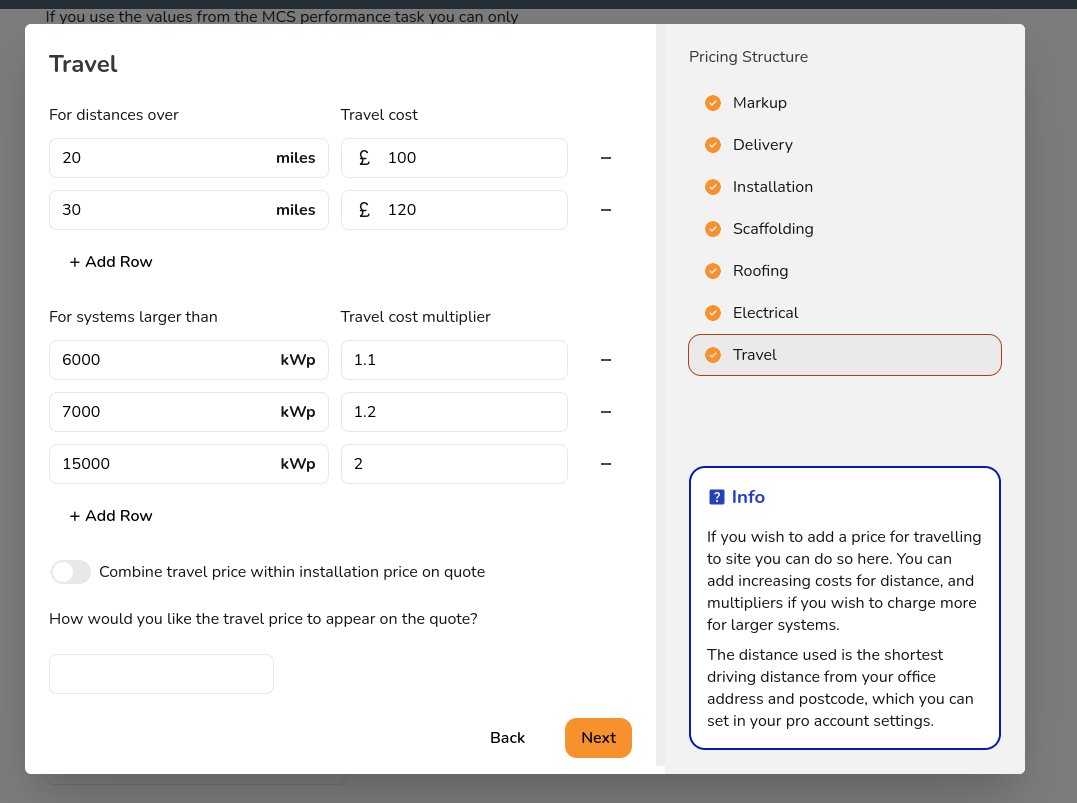
Travel
You can add costs for travel to site based on the distance (which Easy PV automatically calculates if you have input the project location and your company location!). You can also set up a travel cost multiplier for larger systems.
Configure other costs
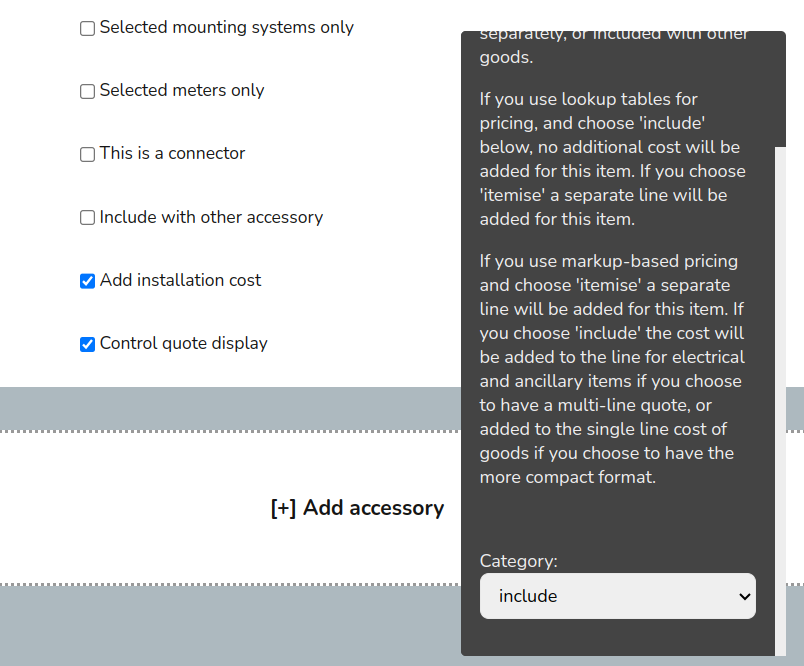
If there are costs you want to include on every project that you can't factor into any of the above sections then you can do so by adding a new accessory custom component.
- Create a new accessory, name it with whatever additional service you want to include
- Do not fill in the 'price' box
- If you would like the item or service to be included on all projects, then select the second option 'Include by default' in the rules. If you do not want to include by default you will be able to select it on a per-project basis in the electrical task.
- Then scroll to bottom of 'rules' and check the following options:
- Add installation cost - this is where you fill in the price and name of the item or service

-
Control quote display - this is where you can decide how it will display on the quote

- Add installation cost - this is where you fill in the price and name of the item or service
- You can also have a look at the other rules available on accessories and decide whether you would like to include or not include the item (for example, only include with specific inverters).