Quick Roof
This guide exploresWith Easy PV’PV's Quick Roof design mode “Quickyou Roof”,can model a roof without using satellite imagery making it a good option if the satellite data isn't accurate or available. Simply model the roof using the dimensions, pitch and roof covering.
Quick Roof is selected when you first create a project, input project details and under Design Mode select Quick Roof. Then click Create in the variousbottom toolsright. at
Overview
In the roofs task you can create and edit your disposal2D roof model. Below shows where you can do the following:
Creating your model
Initial roof details
When you first open a Quick Roof project, you will be prompted to createfill precisein some initial roof details:
- Select the roof type and
complexroof covering (for pitched roofs): this determines what mounting options are available to select. - Input roof
designs.dimensions: width, height, pitch and orientation.Orientation is taken in degrees from south going clockwise. Read more about setting the right orientation.
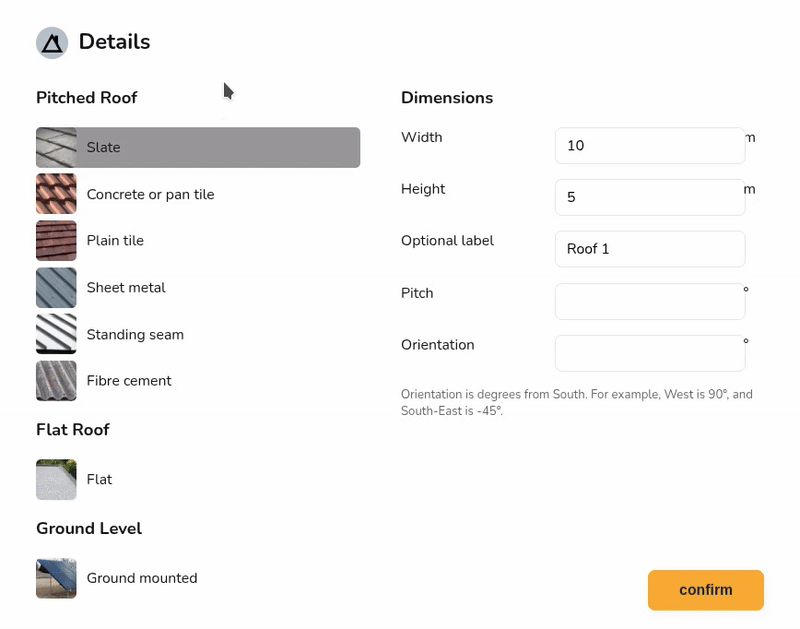
These details can be adjusted from this menu or from the model directly.
Adjusting roof shape
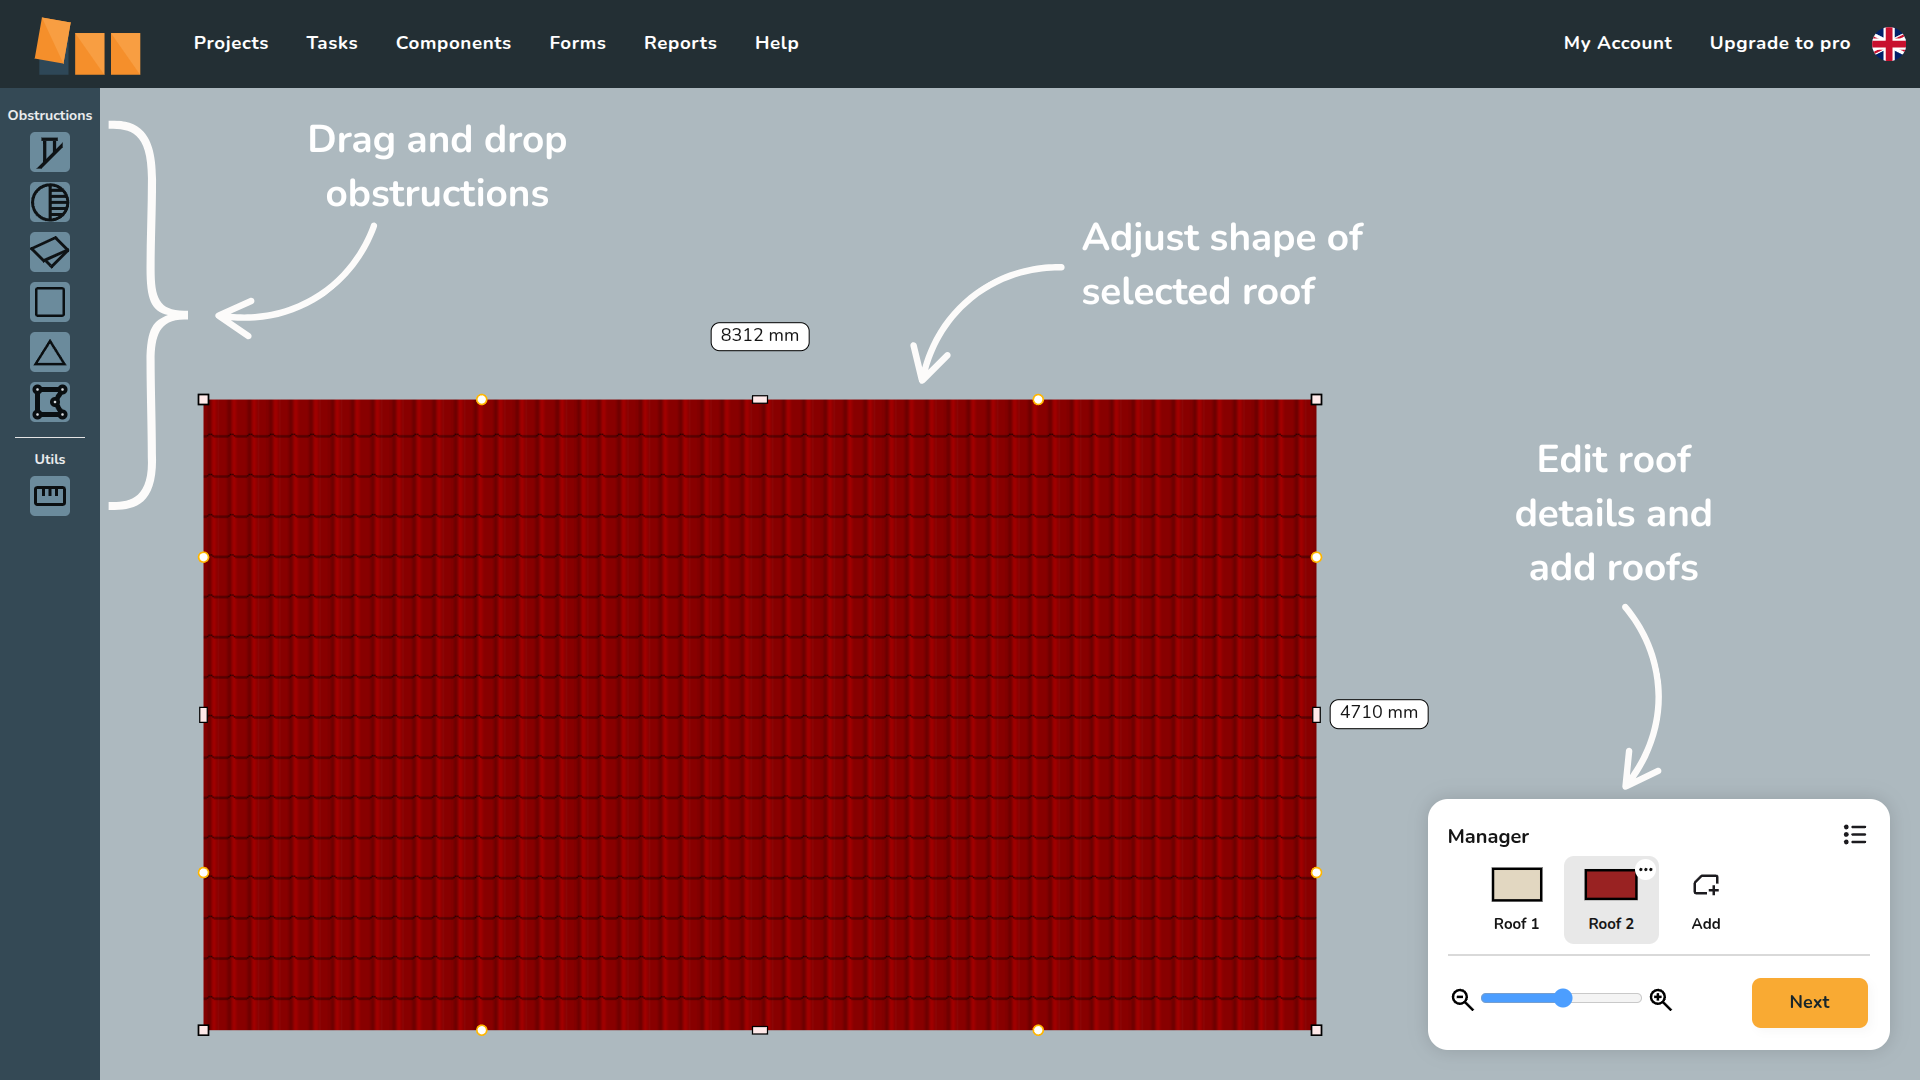
When creating a roof in the roofs task, there are a variety of different handles you can use to accurately adjust the shape of a room. Read about each option below.
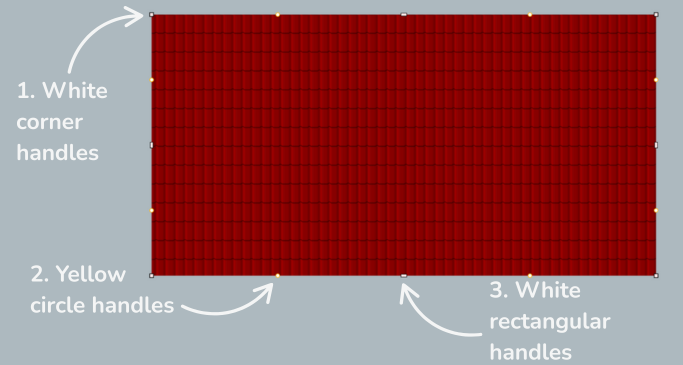
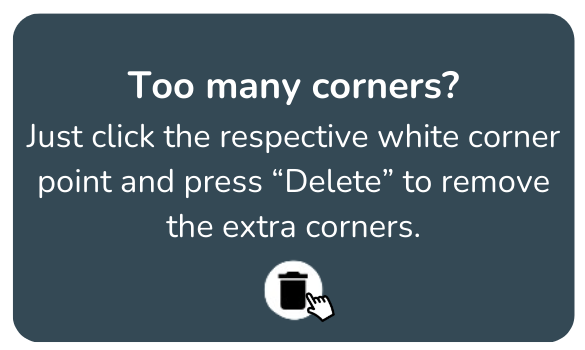
Edit via theWhite corner points
handles
Click anywherethe white corner handles to show dimensions of the associated roof sides. You can then click on the roofvalues to getmanually thechange editingthese.
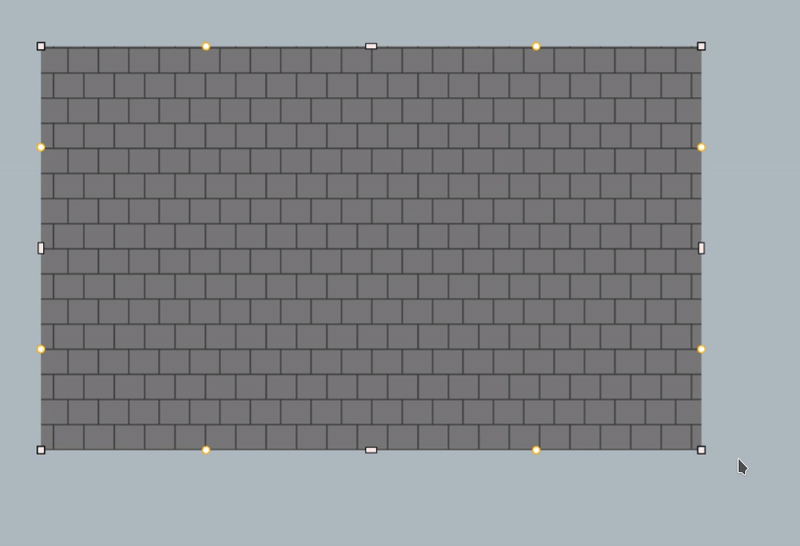
Click show. Clicking and draggingon the white corner pointshandles allowsto youswitch between a square and circle handle:
- Use the square corner handles to resize
yourtheroof.roofwhilst keeping the adjacent sides at the
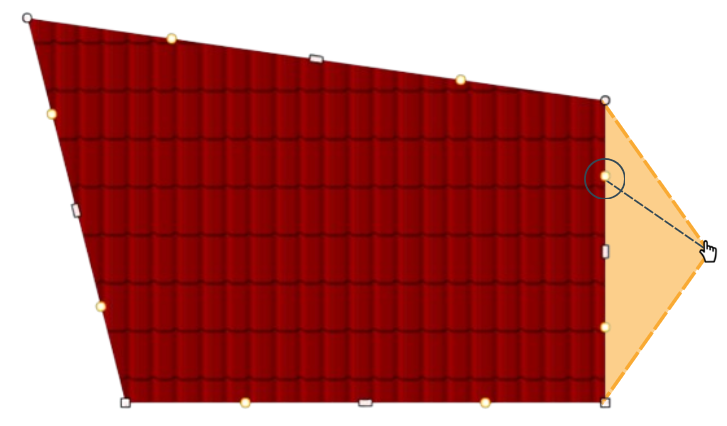
Selectingsameoneangle. - Use the circle corner handles to move that point independently of the
cornerother pointswilltobringcreateupangledthreesides.options:
![]()
Fixed corner angle: the angle of the corner will stay fixed when you drag it (see below, left).
![]()
Free corner angle (default): corners move freely when dragged (see below, right).
![]()
Delete corner: this removes the corner, e.g. it would turn a rectangular roof into a triangle.
Edit roof dimensions: clicking on the white corners brings up the dimensions for the adjacent sides. If you click on this value, you will be able to input the precise dimensions for that side.

Add corners by dragging the orange points
Clicking and dragging the orange points allows you to add extra roof edges to the roof. This is great for creating unusually shaped roofs.
2. Yellow circle handles
Edit
Click viaand drag the whiteyellow rectanglescircle Thehandleswhite rectangle icons on each sideto allow you to amendsplit a roof edge and create irregular shapes. These will then convert to white handles which you can delete if needed.
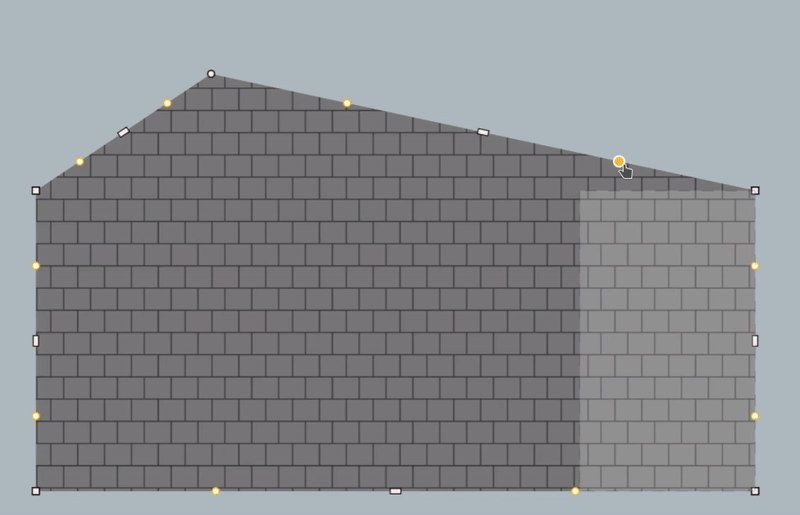
Read more about the width/heightsnapping guide (transparent rectangle) used here in the next section.
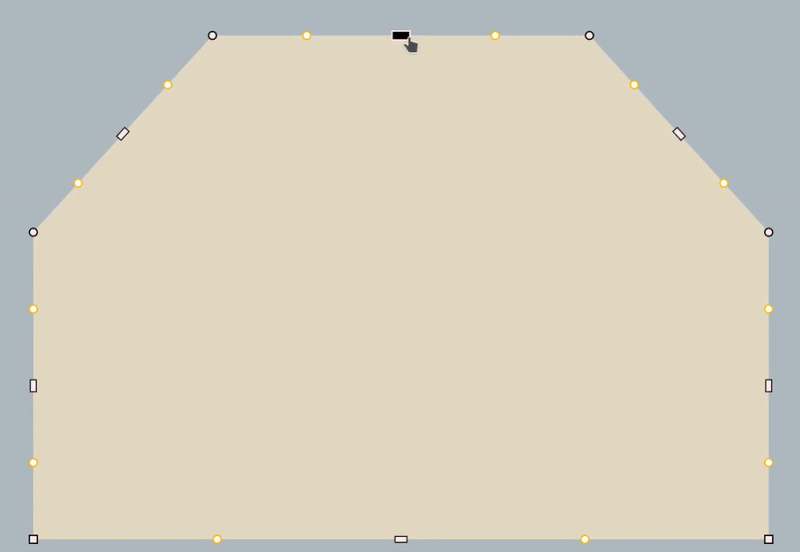
3. White rectangular handles
Click on the white rectangular handles to toggle between a square and curved cornered handles:
- Use the square cornered handle to extend a wall out.
- Use the curved cornered handle to extend the adjoining wall independently of the others.
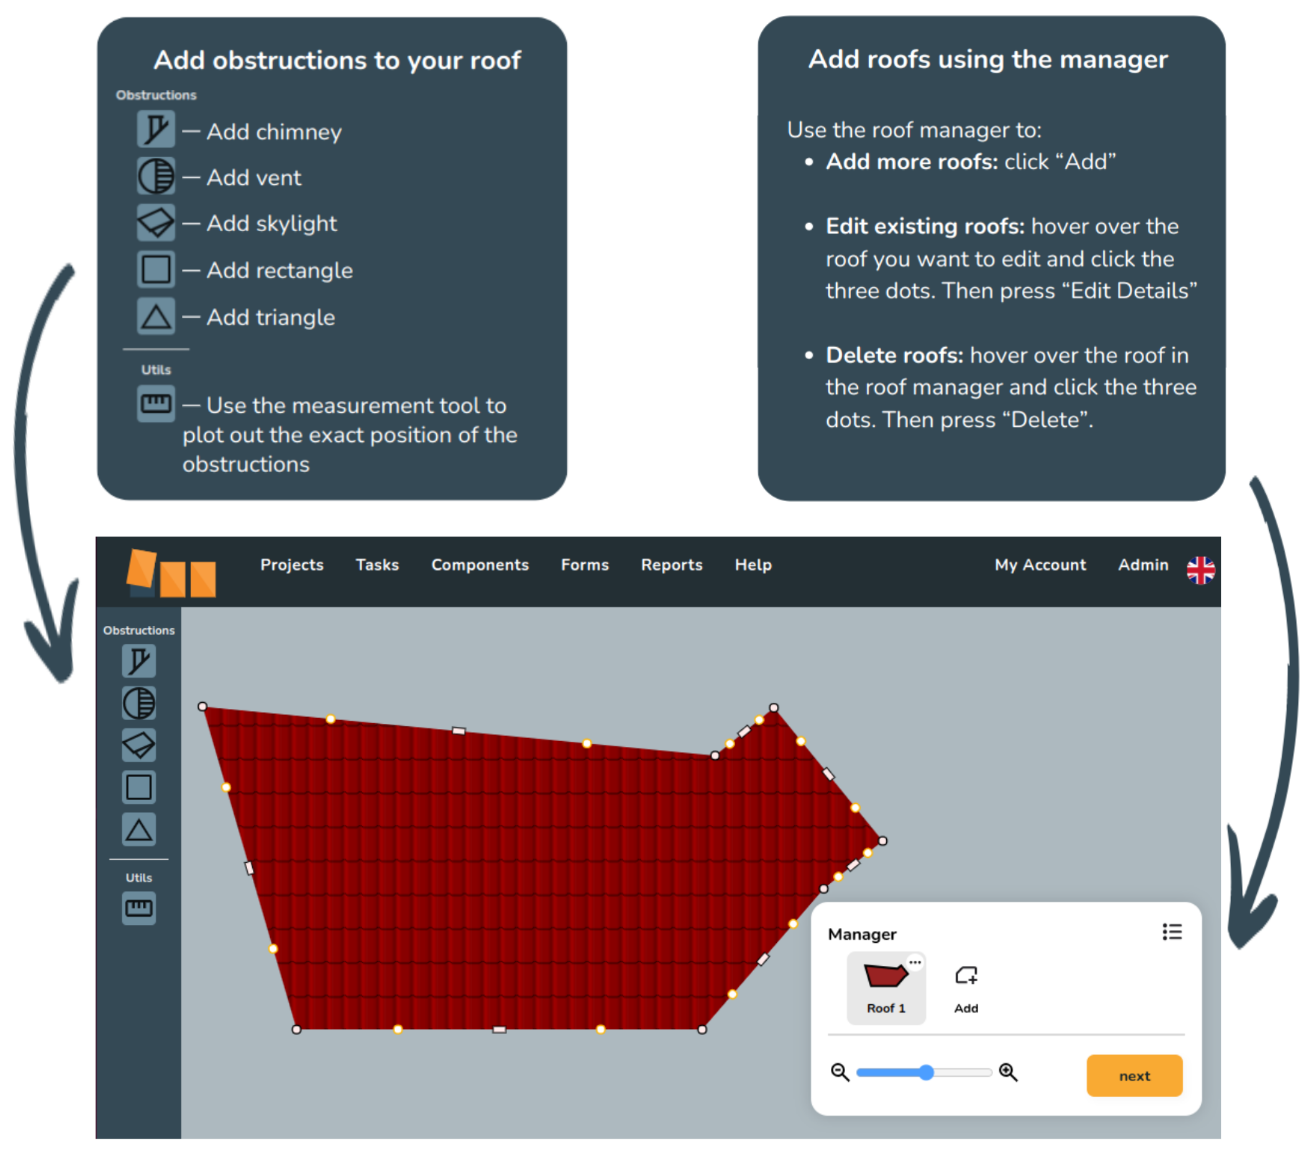
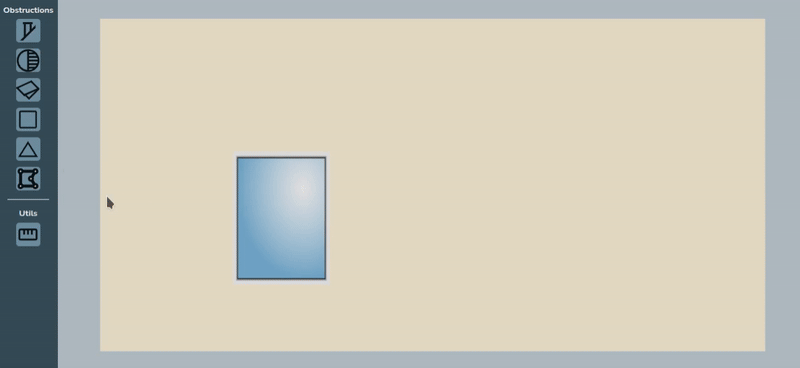
Adding obstructions
Once you have your overall roof shape, you can add obstructions. Including obstructions will help when planning where to place panels in the Panels task. Drag and drop any obstructions and use the snapping guide to ensure the obstruction positioning is correct.

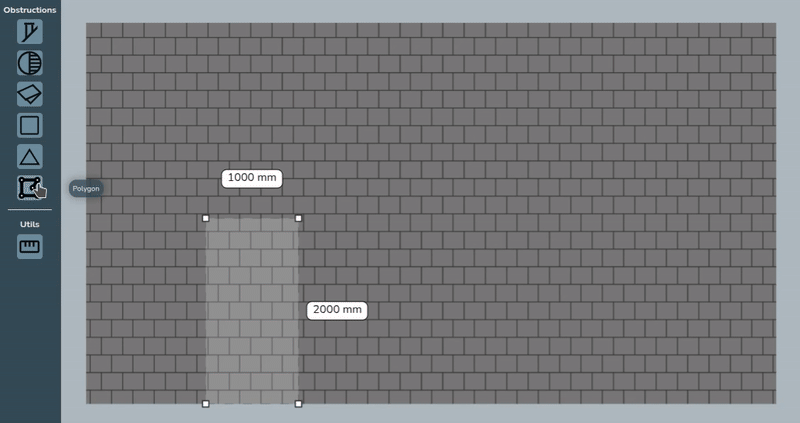
Here is an example of using the snapping guide to position a roof light. Use the same white handles described above to resize the snapping guide and obstructions.
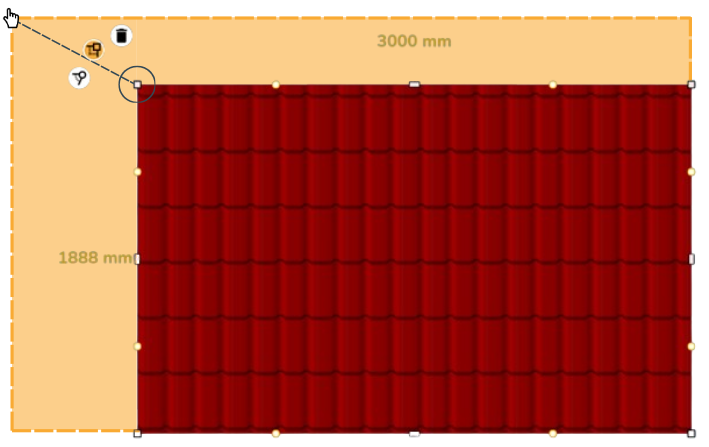
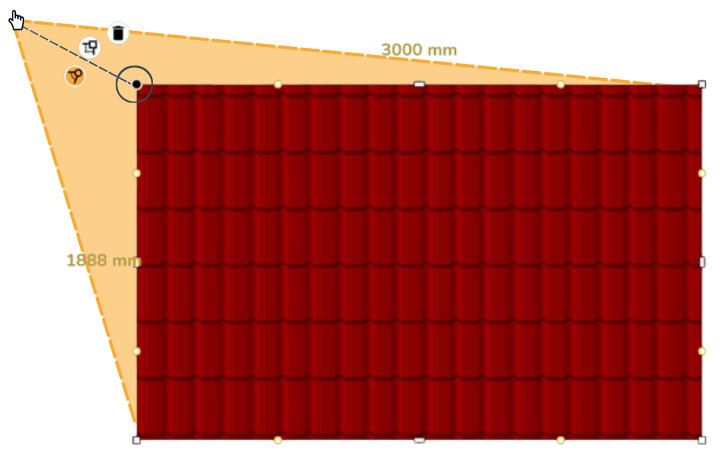
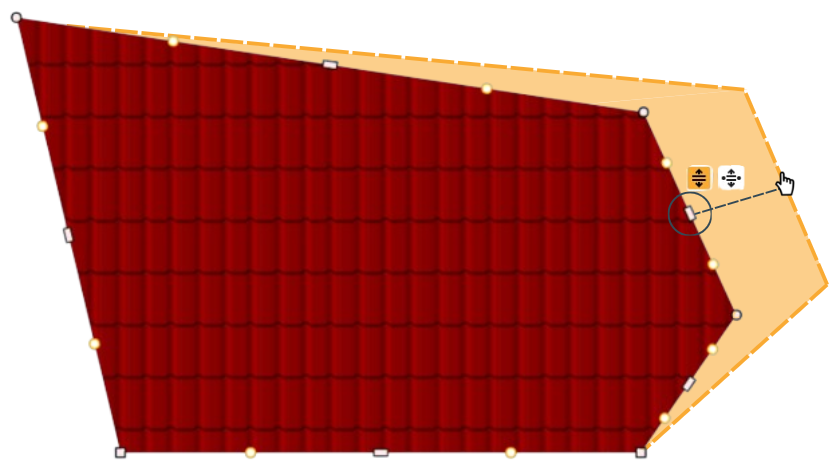
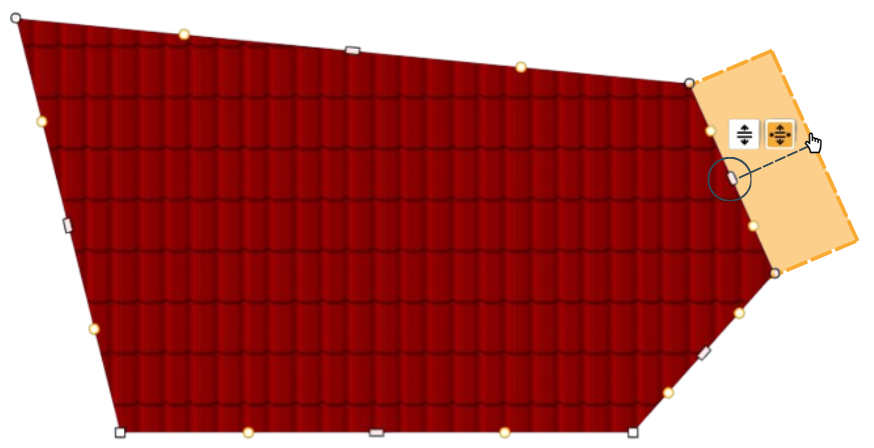
If you clickare onmodelling a more irregularly sized obstruction, you can use the polygon obstruction which uses the same white rectangle,and ityellow giveshandles youas twothe options:roof. You can use the snapping guide to ensure the dimensions are correct when creating irregular shapes.
Elongates the whole roof (see below, left)

Creates a new set of corners: drags the selected roof edge out, staying parallel to the adjacent white points (see below, right)
Some final tips for the finished roof