
Performance task
The performance task uses the system data, location and shading information to estimate the annual generation of the system.
This output is then used in self-consumption calculations to estimate the self-consumption and grid independence. These values are then used to estimate the financial benefits of the system.
Getting started with the Performance task
You can access the Performance task via the Tasks drop-down menu or from the task list on the left of the project overview page.
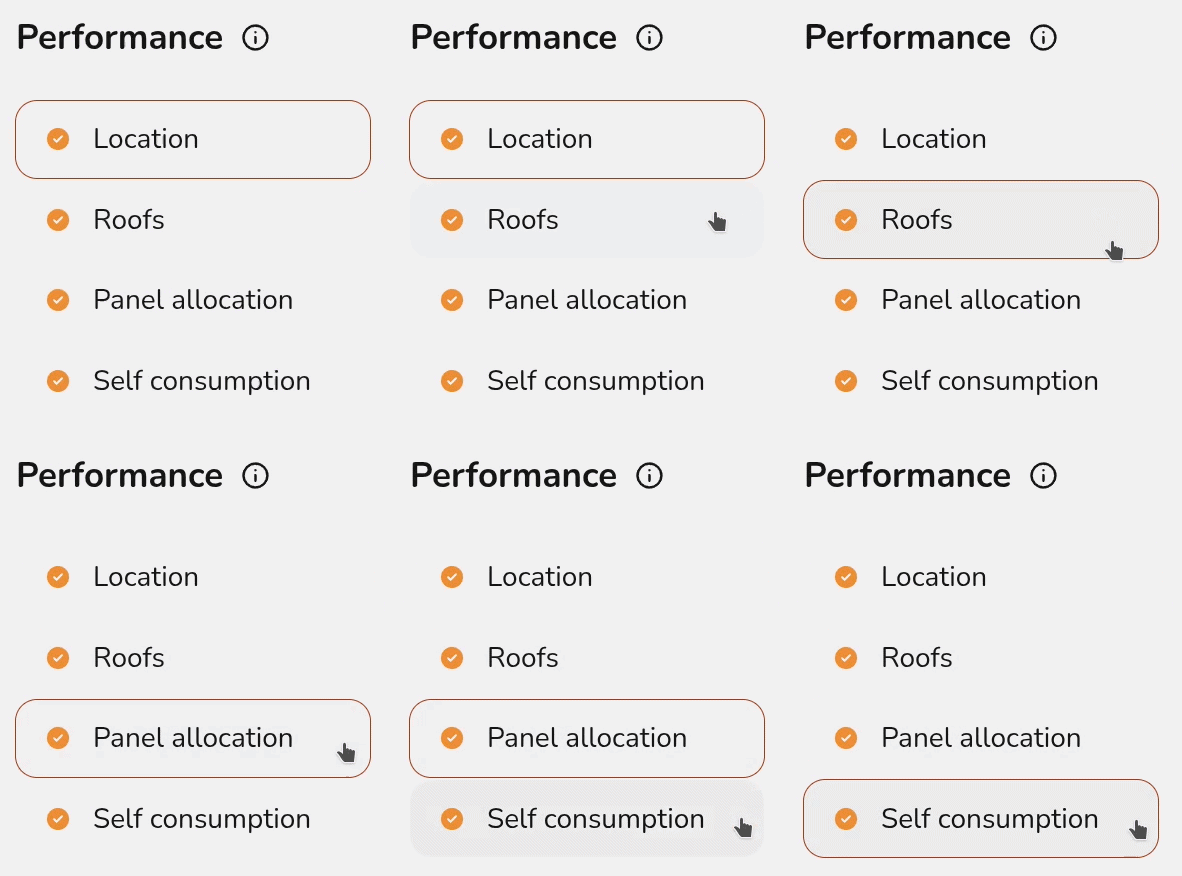
When you first open the Performance task, you'll be shown a popup that lets you configure the settings you want to use.
Select Edit inputs in the top right to re-open this menu and update your inputs.
Performance inputs
Expand each section below for more details on each setting.
Location
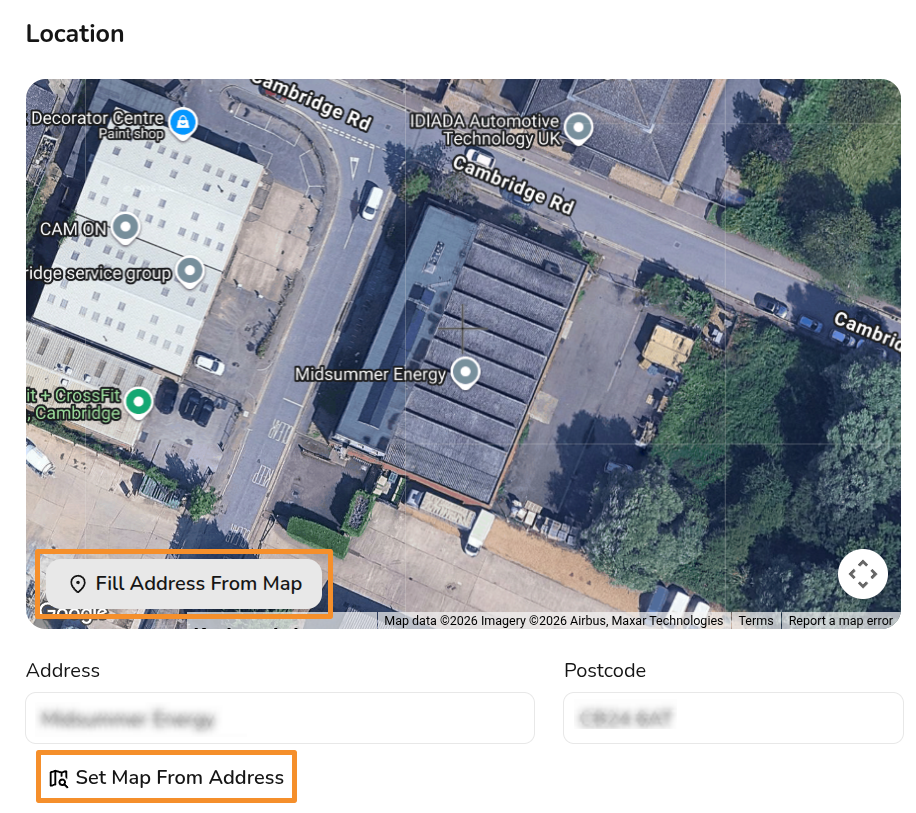
This section may show as ticked and completed already if this information can be pulled from the start of the project. A postcode is necessary for performance calculations, since where in the world the system is located determines how much sunlight it will get. If there is no postcode for the location of your system, choose the nearest one you can find.
Choose from:
Fill address from map: Zoom in on the map to find the correct location, then click here to fill in the addressSet map from address: Fill in the address and then set the map. Navigating to the next section will set the map automatically.
Roofs
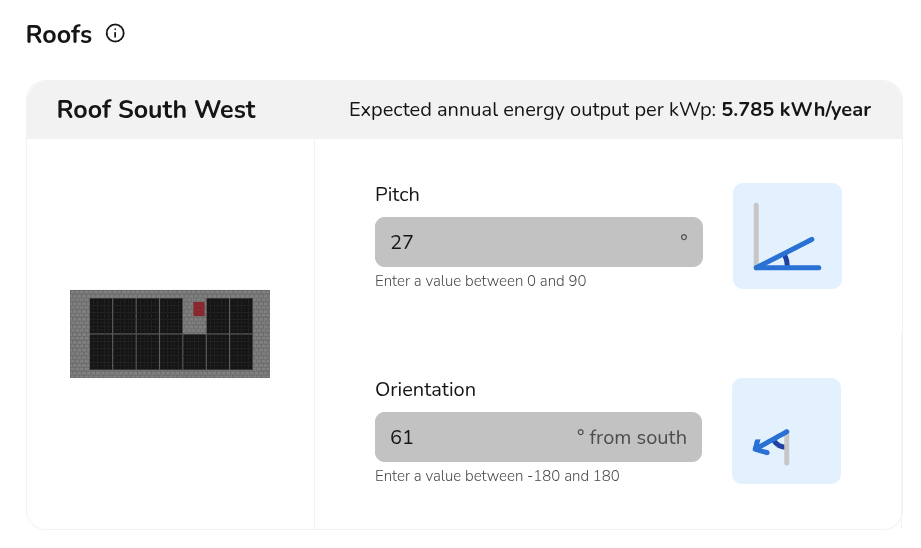
This section may show as ticked and completed already if the pitch and orientation can be populated from earlier in the project. If you are creating a flat roof system or using quick roof mode, you may need to input pitch and orientation if it hasn't already been filled in. These values, together with the location, are used to determine the output of the system.
Pitch and orientation will be greyed out if you are designing in 3D or Roof outline. These values can be edited in the Buildings or Roofs tasks respectively.
Panel allocation
This section will depend on how you have configured your settings and the system you are designing.
- If you have selected for your panels to be automatically allocated, then panel allocation will show as completed
- If you have selected suggest allocation then here you can choose to edit the allocation or select
Nextto accept the allocation and close the window. - If you have manual allocation selected then you will need to allocate the panels here. In some situations, auto-stringing is not possible and manual allocation will also be required.
Read more: How to Manually Allocate Panels.
Self-consumption calculation (optional)
easy-pv.co.uk
A self-consumption model is available for all users in the Consumption Task. For UK users, this can be provided in addition to the MCS calculation, which is completed here in the Performance task.
This process follows MCS guidelines defined in MCS 032 to predict self-consumption of the generated PV electricity. UK companies installing under MCS will need to provide this calculation when it can be used.
- Annual electricity consumption of the property
- The lookup tables for this calculation only permit values between 1500kWh and 6000kWh. Use the consumption task for more detailed consumption calculations or for values that fall outside this range.
- For the most accurate results use a value from past electricity bills. Where possible, consumption data should be taken before the installation of electric heating / hot water or electric vehicle charging.
- Occupancy archetype
- Properties that are occupied during the day will typically consume more PV-generated electricity directly. Properties that are empty during the day may benefit more from battery storage that can store PV-generated electricity for later use.
- Proportion of battery used for ancillary services such as backup power or arbitrage
- If there is a battery on the project, this question will appear. If the entire battery capacity will be used to increase self-consumption, this value should be 0%.
- The lookup tables for this calculation only support a usable capacity of less than 15.1kWh, in this case use the consumption task for more detailed consumption calculations.
- Is additional self-consumption anticipated?
- The MCS calculation does not account for consumption arising from "non-typical domestic loads" such as electric space heating, swimming pools, heat pumps, electricity power diverters, electric water heating and electric vehicles.
- You can enter any value here, but the calculation assumes that a maximum of 95% of the generated electricity is available for self-consumption so the value in the results table will be capped to the remaining available generation capacity.
Read more: Differences between MCS and Easy PV self-consumption.
Click Done when all inputs have been completed.
Note: designing in 3D and configuring your settings to automate panel allocation and sunpath diagram calculations will streamline much of this task.
Navigating the Performance task
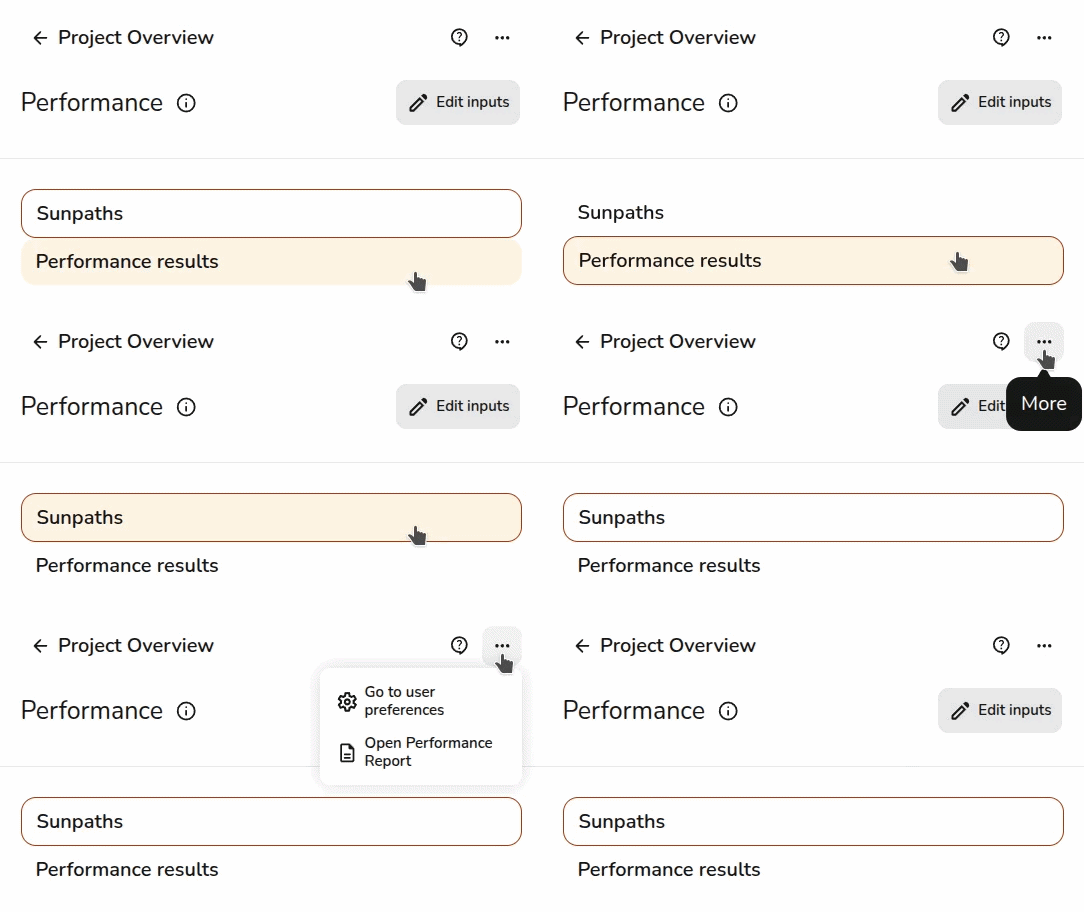
The right-hand sidebar contains options to switch between the Sunpaths and the Performance results:
As well as the following:
Click to update the location, pitch and orientation of the roofs and panel allocation- Open help page
Go directly to this help page if you're ever having trouble - Three-dot menu:
- Go to user preferences
Adjust which performance dataset is used, sunpath and panel allocation automation, and MCS self-consumption defaults - Open performance report
See MCS performance table with sections A, B, C and D (if MCS self-consumption completed and selected in Financial task)
- Go to user preferences
Sunpaths
At this stage, you need to model any shading that may affect the output of the panels. A sunpath diagram is a map of the sun's position in the sky throughout the year and any objects that cast shade onto the array. This is converted into a shading factor that adjusts the estimated panel output.
Automating with 3D
If designing in 3D or Magic mode, the shading can be calculated automatically. If you would like to manually edit the sunpaths then toggle off Auto calculate sunpaths.
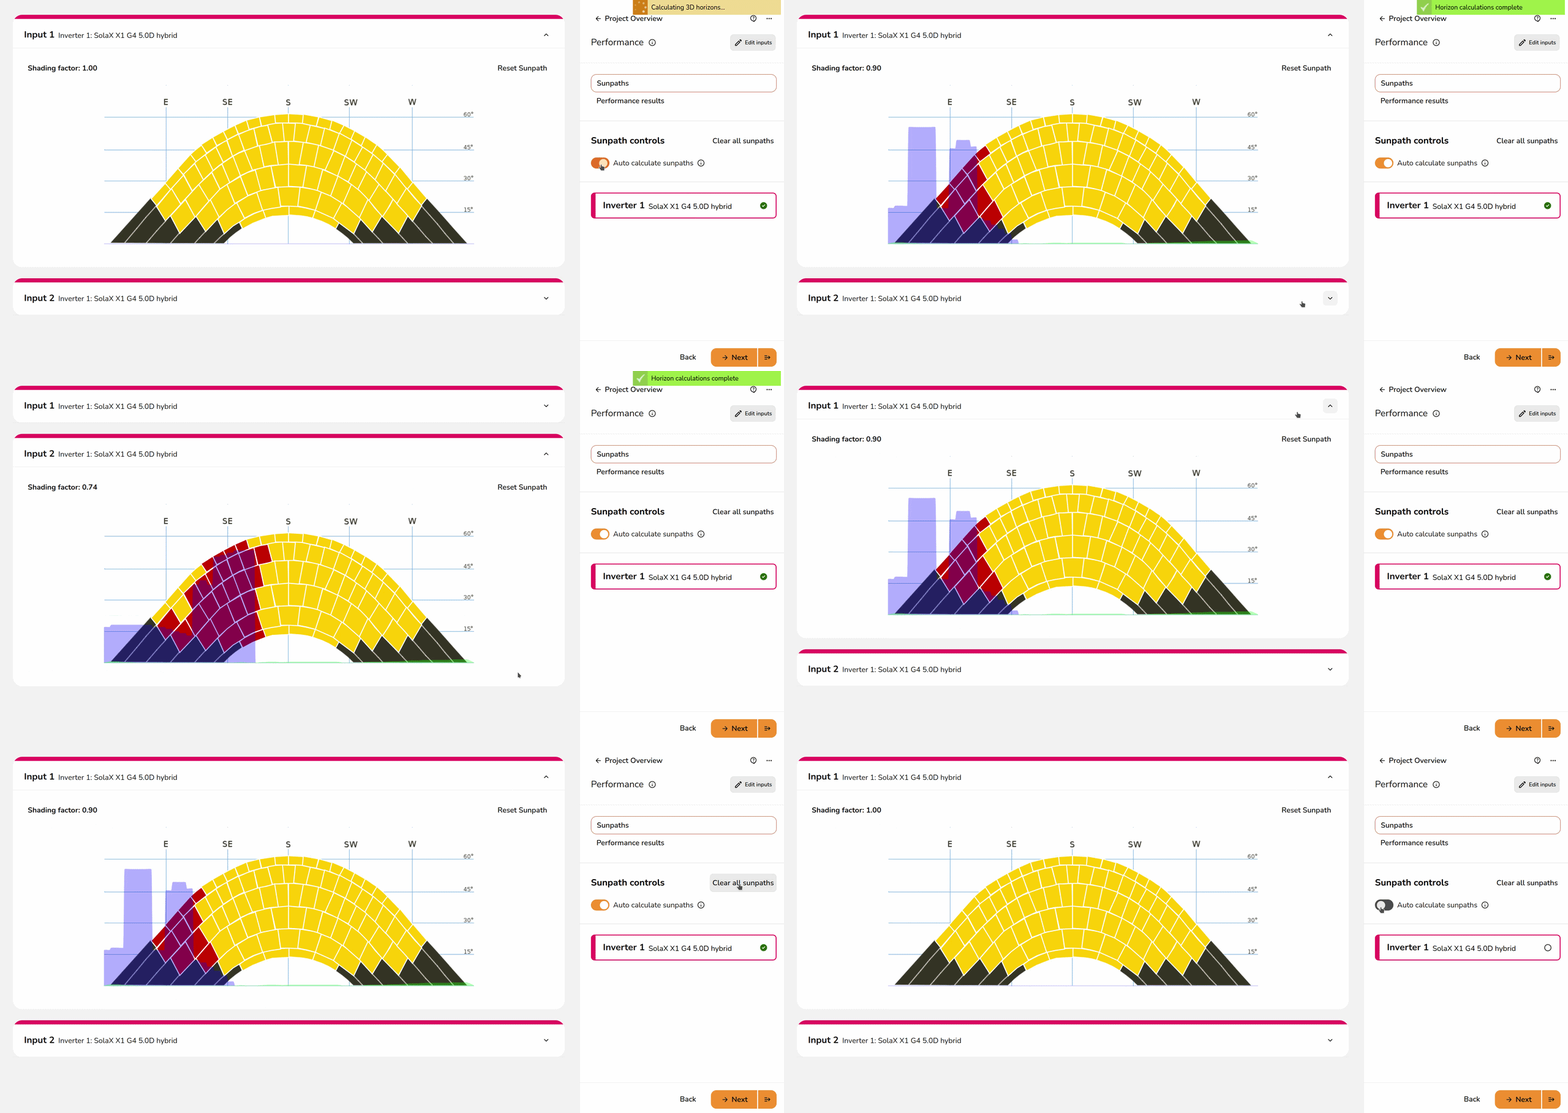
Note: You will need to make sure you have modelled any surrounding trees or buildings in the Buildings task for the shade to be calculated automatically.
Read more: Differences between design modes.
Manually editing sunpaths
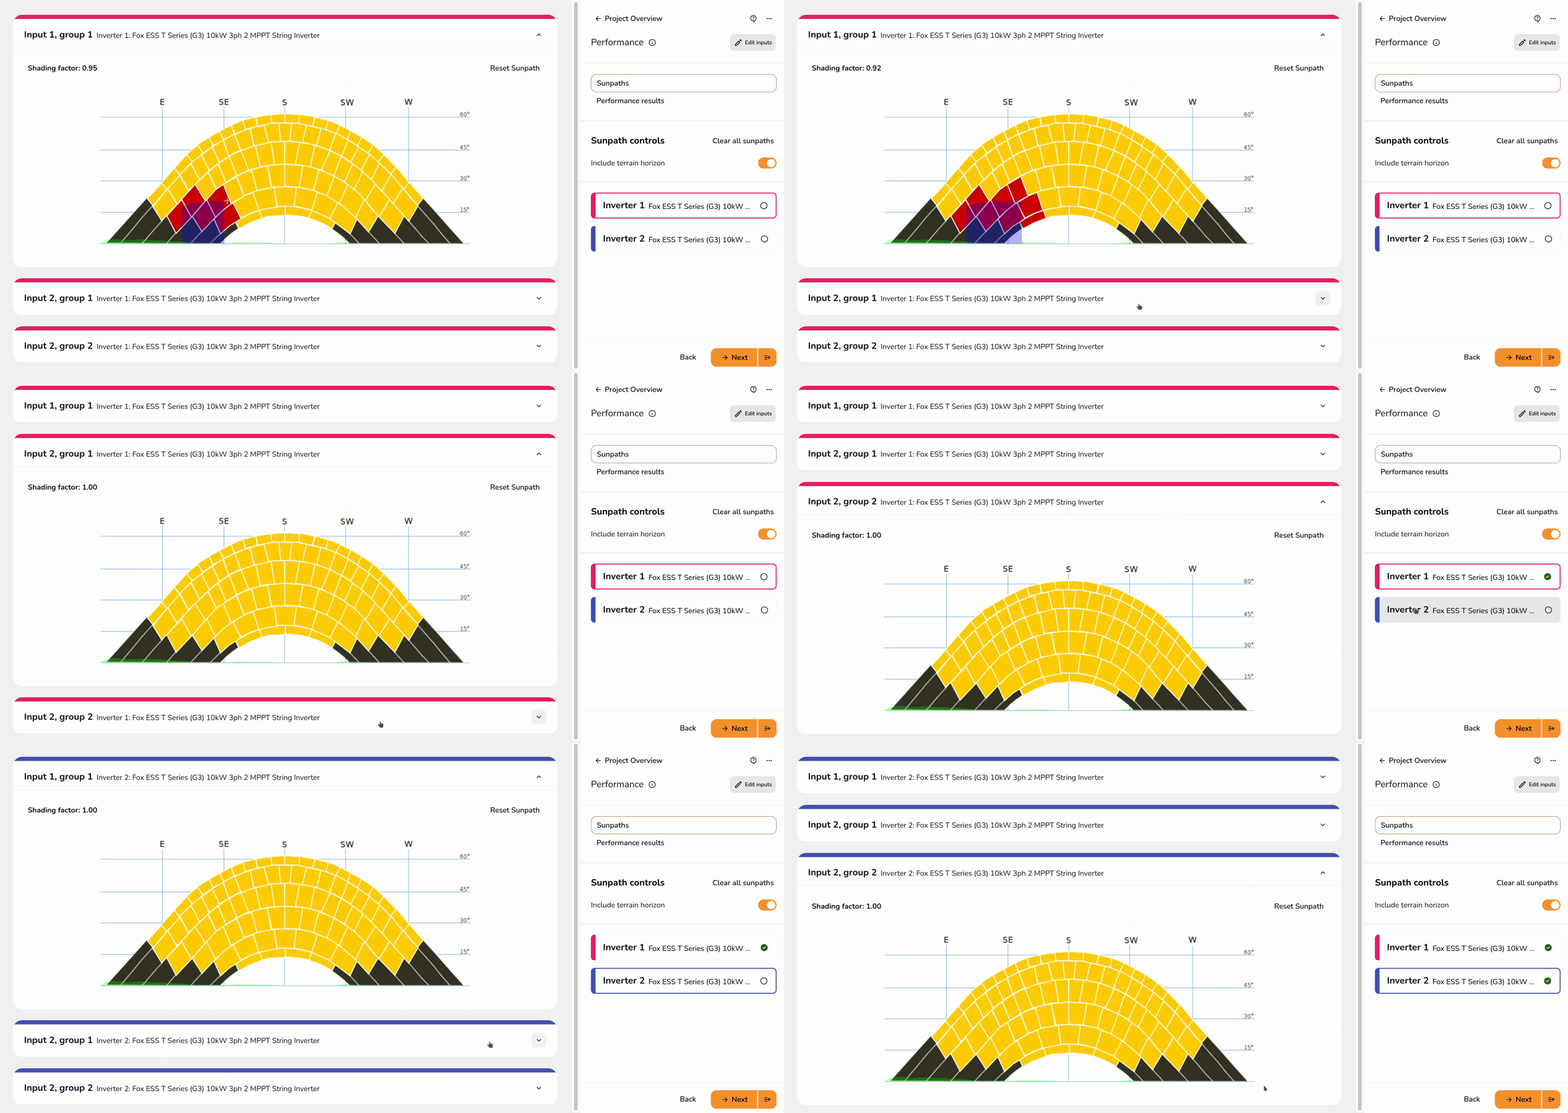
If designing in 2D, you will need to manually create the sunpath diagrams. Click between the groups to expand each diagram and click and drag on the diagram to model any shade.
Performance results
The results shown depend on the selected performance calculation method. The method can be edited in your user or pro account performance settings.
Expand the sections below for information on each calculation method.
MCS performance and self-consumption results
easy-pv.co.uk
When using the MCS calculation method, the performance estimate is based on MCS 032.
A. Installation data
This section details the installed capacity, orientation of the system, inclination of the system and the location.
B. Calculations
Using the installation data and the shading factor, an estimated annual output is calculated. To adjust the shading factor, navigate to the Sunpaths tab.
C. Estimated PV self-consumption – PV only
The estimated self-consumption for the system with PV only is taken from the MCS lookup tables, depending on the values above and those input in the task.
D. Estimated PV self-consumption – with EESS
The estimated self-consumption for the system with PV and battery storage is taken from the MCS lookup tables. This section will not show if there is no battery storage, navigate to the inverter task to include battery storage.
E. Additional benefits from PV and EESS
If additional consumption is anticipated or some of the battery capacity is reserved for ancillary services, that will be detailed here. This section will not show if that is not the case, to edit those inputs select Edit inputs in the top right and select the Self-consumption tab.
NREL performance results
easy-pv.ieeasy-pv.co.uk
Section A details the installed capacity, orientation of the system, inclination of the system and the location. These inputs can be adjusted by clicking the pen icon in the top right.
In section B, the data in section A is used to estimate the output per kWp for the unshaded array using the NREL's PVWatts calculator. The percentage of output lost from shade is then subtracted from this value. This is then multiplied by the kWp of the input to calculate the estimated generation per input. To adjust the percentage lost, navigate to the sunpaths tab.
Still Need Help?
Contact Support: If you've got further questions, get in touch with our support team at help@easy-pv.co.uk (UK) or help@easy-pv.ie (IE). If you are experiencing a bug, to help us look into your issue faster, please include the email address of your account, the name of the project and screenshots of any unexpected behaviour.