Performance task
This guide applies to beta.easy-pv.ie versions of Easy PV. The information provided here may not be accurate for easy-pv.co.uk, easy-pv.com and easy.pv.ie.
The performance task uses the location, roof inclination and orientation and shading information to estimate the annual output of the system. This is then used in the consumption task to estimate how much of what is generated will be used directly, used to charge a battery or exported to the grid which is needed to estimate the financial benefits of the system.
Navigating the performance task
The right hand sidebar contains options to switch between the sunpaths and the performance results:
As well as the following options
|
|
Update the location, pitch and orientation of the roofs and panel allocation |
 |
View all options including editing performance preferences and opening the help page |

Editing inputs
Certain inputs are required for the performance estimate to be calculated. Designing in 3D and configuring your settings to automate panel allocation and sunpath diagram calculations will streamline much of this task.
Location and roofs
First, if not already input when creating the project, you will need to set the location. If you are creating a flat roof system or using quick roof mode, you will also need to input pitch and orientation data. Both this and the location data are used to determine the output per kWp of the system.
Both the location and roofs section may show as ticked and completed already if this information can be pulled from earlier tasks in the project. The
Panel allocation
This section will depend on how you have configured your settings.
- If you have selected for your panels to be automatically allocated, then panel allocation will show as completed. If location and roofs are also already completed, then the modal will not open when opening the task.
- If you have selected suggest allocation then here you can choose to edit the allocation or select Done to close the modal.
- If you have manual allocation selected then you will need to allocate the panels here. Further information about manual panel allocation can be found below.
How do I manually allocate the panels?
- Select the current roof and inverter input from the lists on the left.
- Click or drag over panels to allocate them to an inverter input.
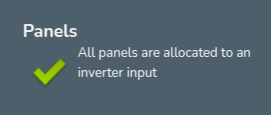
- When the right number of panels have been allocated, the text on the inverter input will show in green.
- Once all inverter inputs have the correct number of panels, all inputs will be in green and this message will show at the top.
Below all your inverters and roofs, you can then click next.

Additional things to note:
- All panels connected to an input must share the same pitch and orientation. Panels incompatible with the selected string will be be unselectable.
-
Use the
 icon to reset the allocation on the inverter or individual inverter inputs.
 - Below where it says Next, you also have the option to use auto-stringing.
If automatic allocation is selected and the location and roofs tabs are already completed, then the input window will not open. Click the pen icon to open the window.
Sunpaths
The sunpath diagrams maps the path of the sun across the sky at different hours in the day for different months of the year. For each point on the sunpath diagram, Easy PV calculates the amount of solar radiation reaching the panels from direct and diffuse radiation. For shaded regions, where direct radiation is radiation is fully blocked, the system calculates how much diffuse radiation still reaches the panels. The shading factor is then calculated by taking the proportion of solar radiation that reaches the panels after accounting for these shading losses.
Automating with 3D
If designing in 3D or magic design mode, the shading can be calculated automatically, provided any trees or obstructions have been modeled. Otherwise, you will need to manually draw on the sunpath diagram what shade is on the panels at different points in the year.
Switching between inverters and inputs
On the top left you will see each of your inverters, below this for each inverter you will see each input on the inverter. A sunpath diagram is calculated for each input.
Performance results
Section A details the installed capacity, orientation of the system, inclination of the system and the location.
In section B, the data in section A data is used to estimate the output per kWp for the unshaded array using the NREL's PVWatts calculator. The percentage of output lost from shade is then subtracted from this value before it's then multiplied by the kWp of the input, to calculate the estimated generation per input.