Tariffs
Setting tariffs is an essential part of ensuring the financial benefits can be calculated as accurately as possible for your customer. These can be created, viewed and edited in the consumption task or the financial task. You can also set up default flat rate tariffs in your account financial settings. This guide will detail how you can set these up.
Create new tariff
When creating a new tariff, you first must choose the name of the tariff - this will show up on the customer proposal in the consumption section.
The scope of the tariff determines where the tariff is available to use. Free users will have the option to make the tariff available just for the project in use or for all projects, Pro users will have the option to make the tariffs available for the whole team. This option cannot be changed once the tariff has been created.
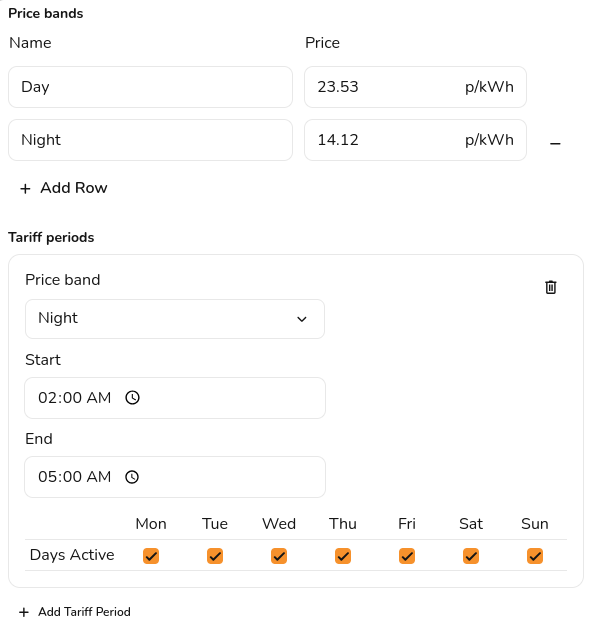
The first band you enter will be used as the base rate - any time period that doesn't have a price band applied will be priced at this rate. Add any additional rates in the price bands section. In the tariffs period section you will be able to select the different price bands and indicate when they apply. For some tariffs different rates might apply at the weekend, you can select the days for which the tariff period applies.
Example flexible tariff:
After your tariffs have been created, you can edit or delete them by selecting 'View all tariffs' and selecting the three dots in the corner:
Self-consumption calculation
Once you are happy with the consumption and tariffs, select submit. You can then explore how the PV generation, consumption within the property, state of charge of the battery (if a battery is included) and import and export of electricity from the property change through the seasons and over the course of each day.
To edit consumption task inputs, select the pen icon in the top right corner.


