
Inverter task
In this task you select the inverter and batteries you'd like to use and how many panels to allocate to each MPPT. You can also choose whether you want to include optimisers.
Choosing an inverter
Can't find what you're looking for? See how to add custom inverters.
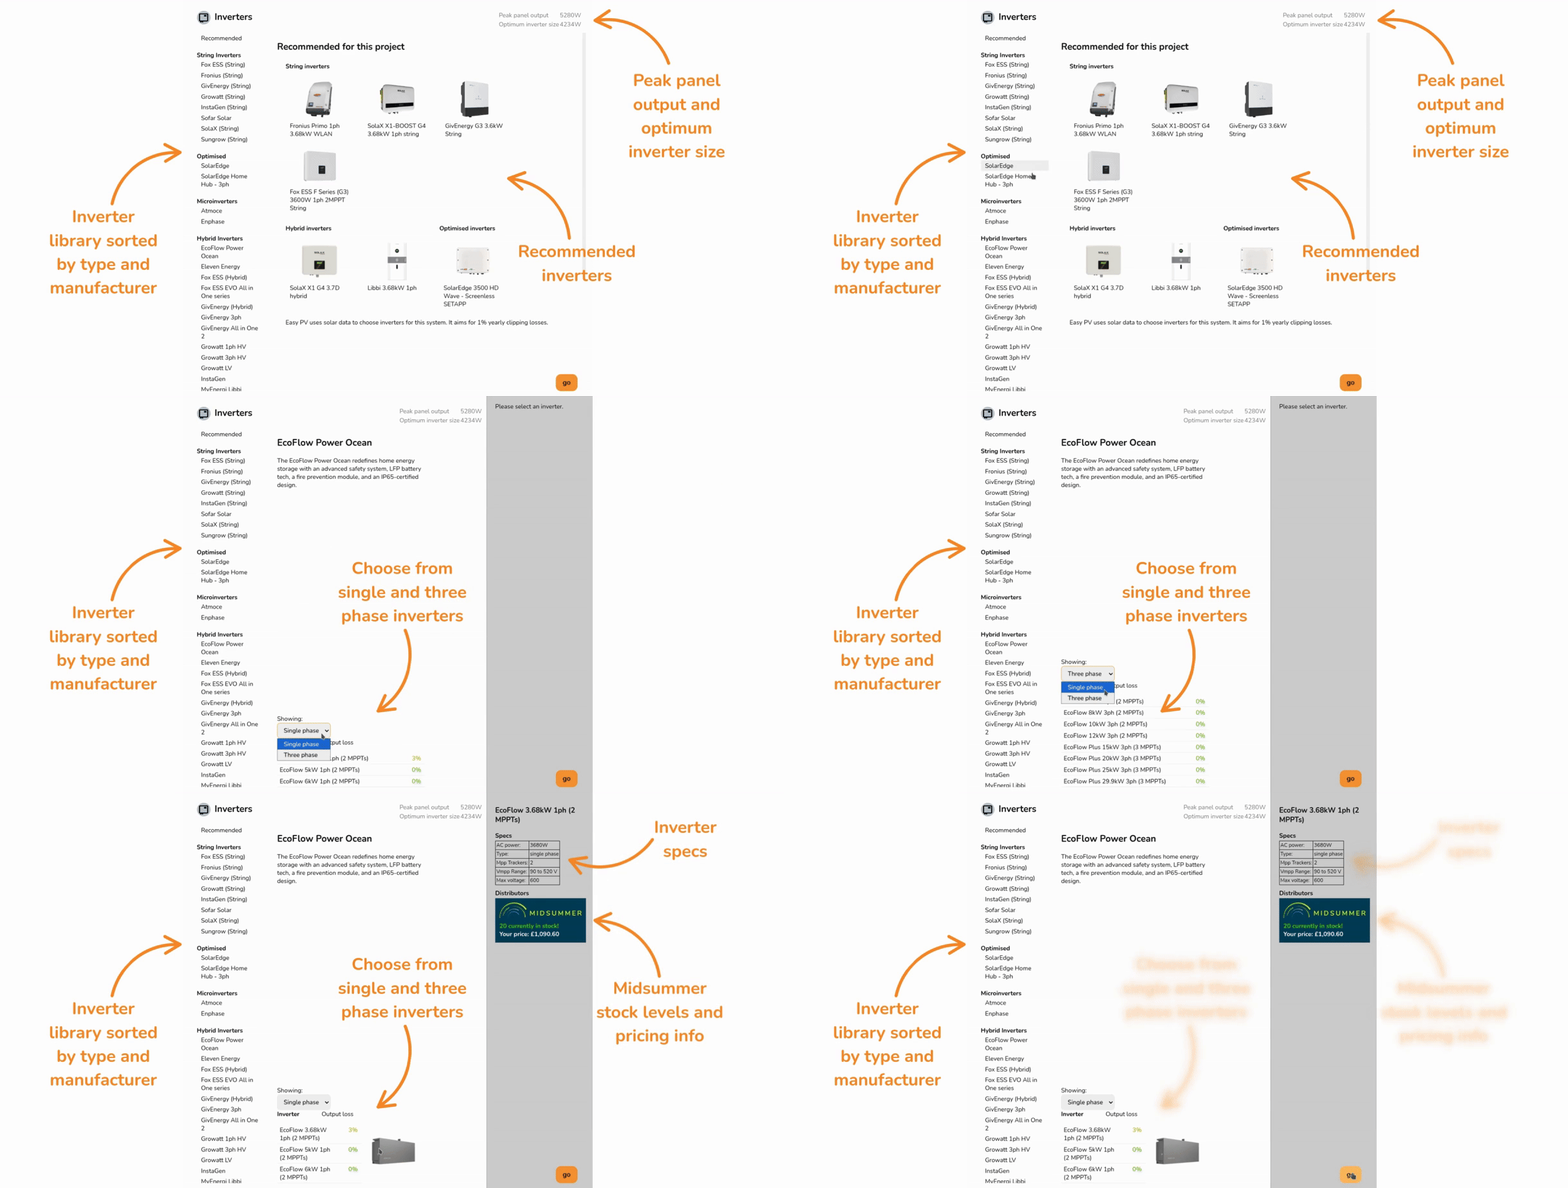
When you open the inverter task, a menu will pop up with the following information:
- Inverter recommendations: Recommended based on array size, number of inputs and cost. Choose from string, hybrid, optimised inverters.
- Peak panel output and optimum inverter size: The installed capacity of the system and optimum inverter size based on solar data for project location.
- List of inverter manufacturers: List of all inverter manufacturers stocked by Midsummer, sorted by type.
If you select a manufacturer from the list on the left, you can then:
- Choose between single phase and three phase inverters for that manufacturer.
- View the output loss percentage for each inverter, which you can use to choose an appropriately sized inverter.
Once selected, you'll see the specs for the inverter and Midsummer stock and price information on the left. Click on the Midsummer box to view the full listing with datasheets, warranty and more.
Click Gogo in the bottom right once you've chosen your inverter to add it to the project.
Tip: Connect your Midsummer Wholesale account for accurate pricing. Not registered? Sign up here.
Panel allocation
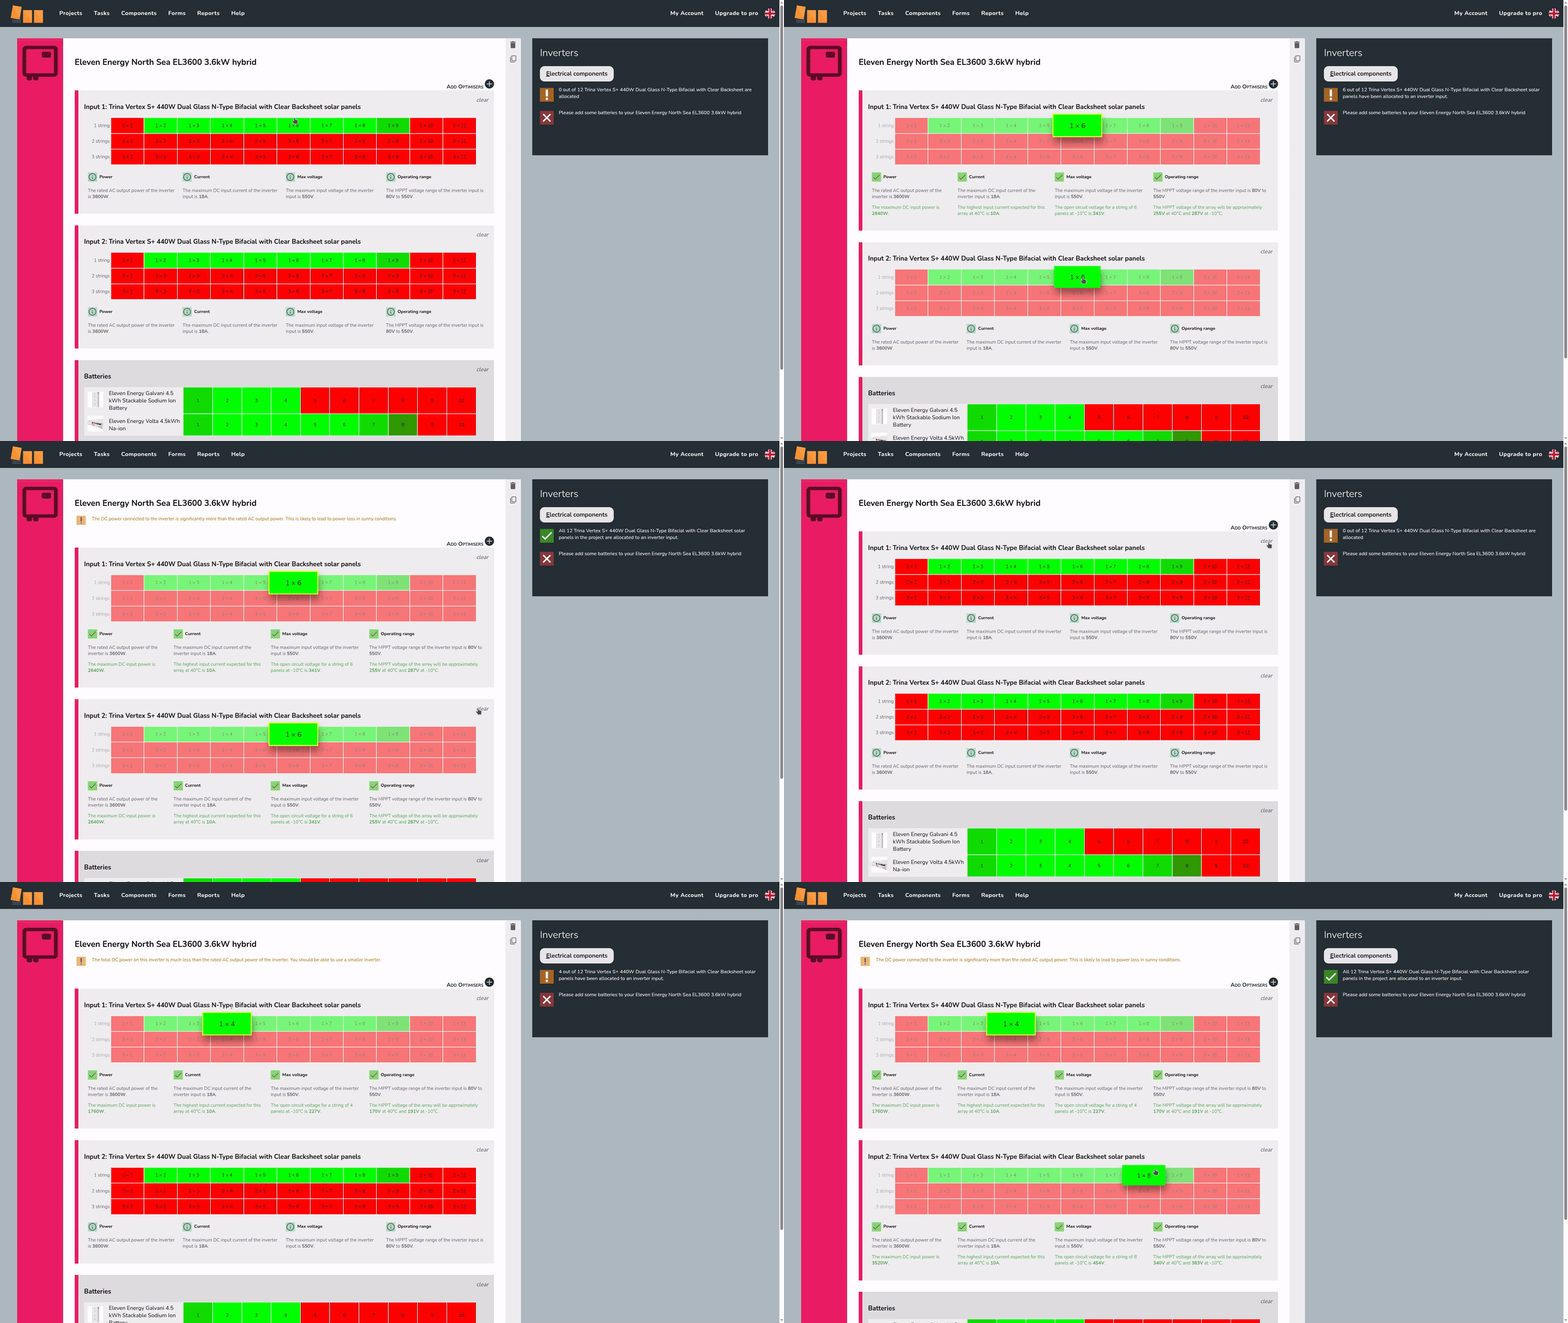
Once you've chosen your inverter, the next step is to select how many panels you want for each MPPT. If the inverter was from the recommended section, this step will be completed for you.
In the top right you can see how many panels you need to allocate. On each inverter you will see the different combinations that can be allocated to each string. Once the right number of panels have been allocated, a green tick will appear.
Multiple string arrangements are typically possible. Below shows an example with 12 panels, selecting 1x6 (1 string of 6 panels) to each input and then 1x4 and 1x8:
Electrical compatibility
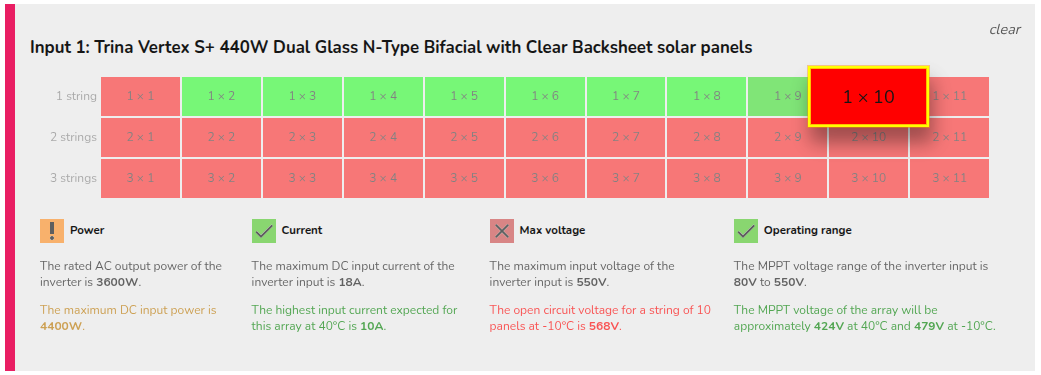
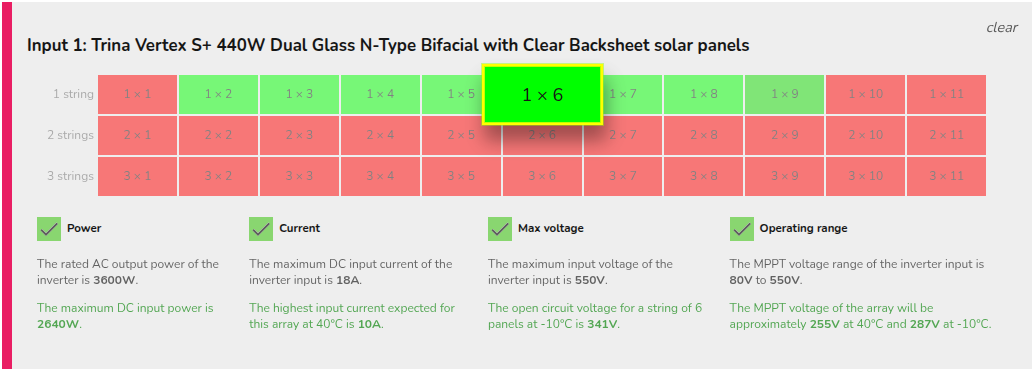
The fornumber of viable inputs will vary depending on the selectedthe arrangementinverter is shown belowand the stringingpanels options. This indicates which limiting factors for that input are met or exceeded.chosen. For each input, some options will show in red, indicating the arrangement does not pass the electrical checks, and others in green, indicating the arrangement does pass all the electrical checks Easy PV is doing. The
Electrical ofcompatibility viableinformation inputs will vary depending onfor the sizeselected ofarrangement is shown below the inverterstringing options. This indicates which limiting factors (power, current, max voltage, operating rage) for that input are met or exceeded.
Example: passed and thefailed panels chosen.
check

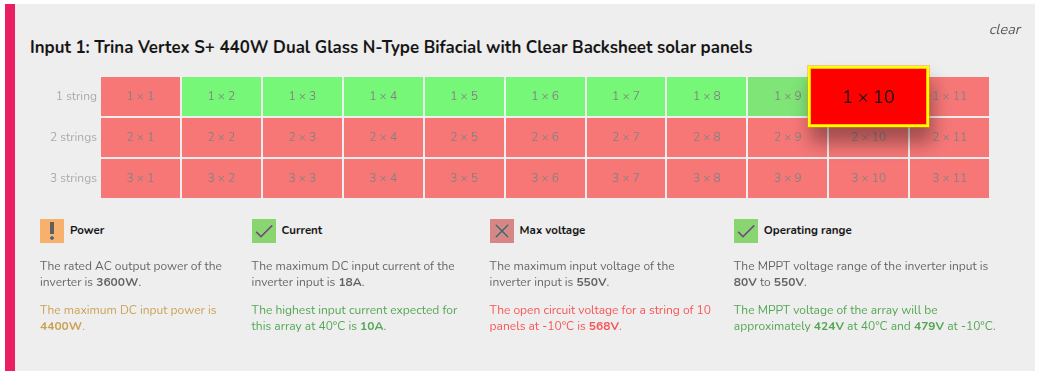
Not electrically viable
: with this arrangement, the max voltage for the MPPT is exceeded:
Electrically viable


Not electrically viable
:with this arrangement, the max voltage for the MPPT is exceeded:
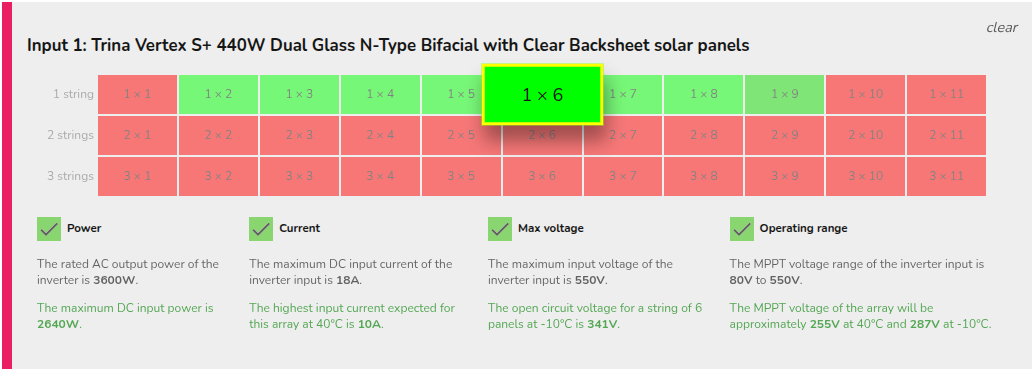
Electrically viable
 Electrically viable: with this arrangement, all checks on power, current, max voltage and operating range have passed:
Panel allocation is then completed in the Performance task.
Adding battery storage
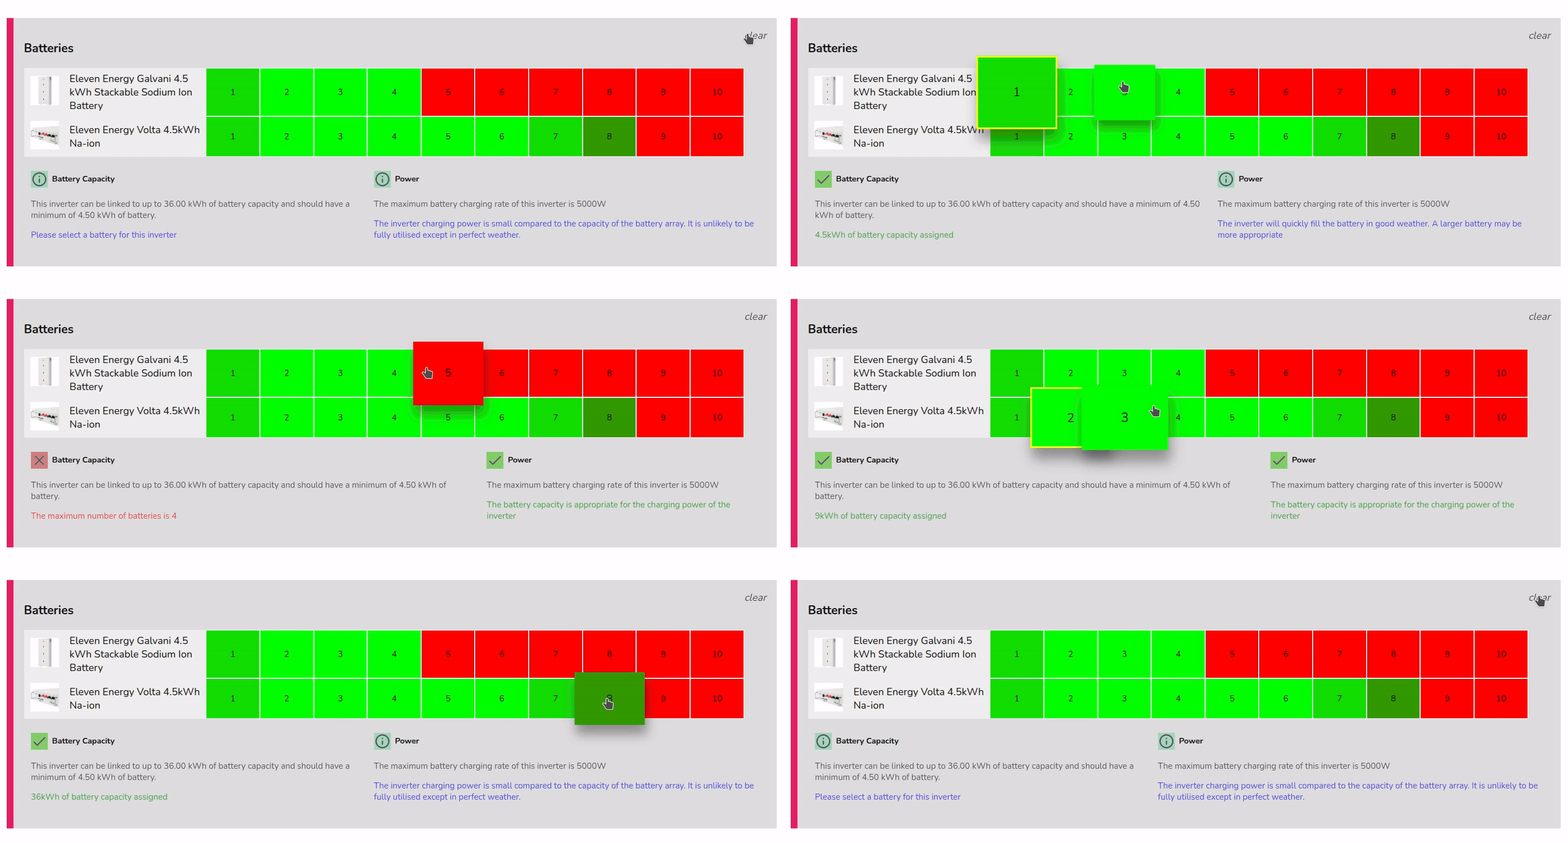
You can add battery storage to hybrid or AC-coupled inverters. In each case, you will see a list of compatible batteries for that inverter, with the options most suitable for the system shown in green. Darker green options are compatible but may not be optimal.
When you make a selection, warnings about the battery capacity and maximum battery charge rate will display below to help in choosing an appropriate size.
Battery only: On every project, you will need either a string or hybrid inverter (as battery only projects are not yet supported).supported. If you have an AC inverter, you will also need a string inverter.
Looking to add batteries later? You can skip adding a battery to a hybrid inverter if the plan is to install one at a later date. Simply add the inverter and don't select a battery. A warning will appear when going to the Electrical task, just click OKOK to continue.
Additional options
 | Delete inverter :This is in the top right of each inverter.  |
| Clone inverter :This is in the top right of each inverter. Cloning will also copy stringing arrangements. |
| Add : This is to the top right of the first input on compatible inverters. After adding, select from the drop-down which optimiser you want to use. This will add one optimiser per panel. |
| Add : Click this to add another inverter. This is to the bottom right of the last inverter. This will re-open the inverter selection menu. |


Note: Using optimisers or microinverters will also mean you need to manually allocate panels in the Performance task.
Still Need Help?
Contact Support: If you've got further questions, get in touch with our support team at help@easy-pv.co.uk (UK) or help@easy-pv.ie (IE). If you are experiencing a bug, to help us look into your issue faster, please include the email address of your account, the name of the project and screenshots of any unexpected behaviour.