Panels, inverter and electrical
Panels task
After your roofs have been created and selected, the next step is to add panels to them. This is done in the Panels task. In this task you choose the panels, the layout and the mounting system you'd like to use.
Choosing a panel
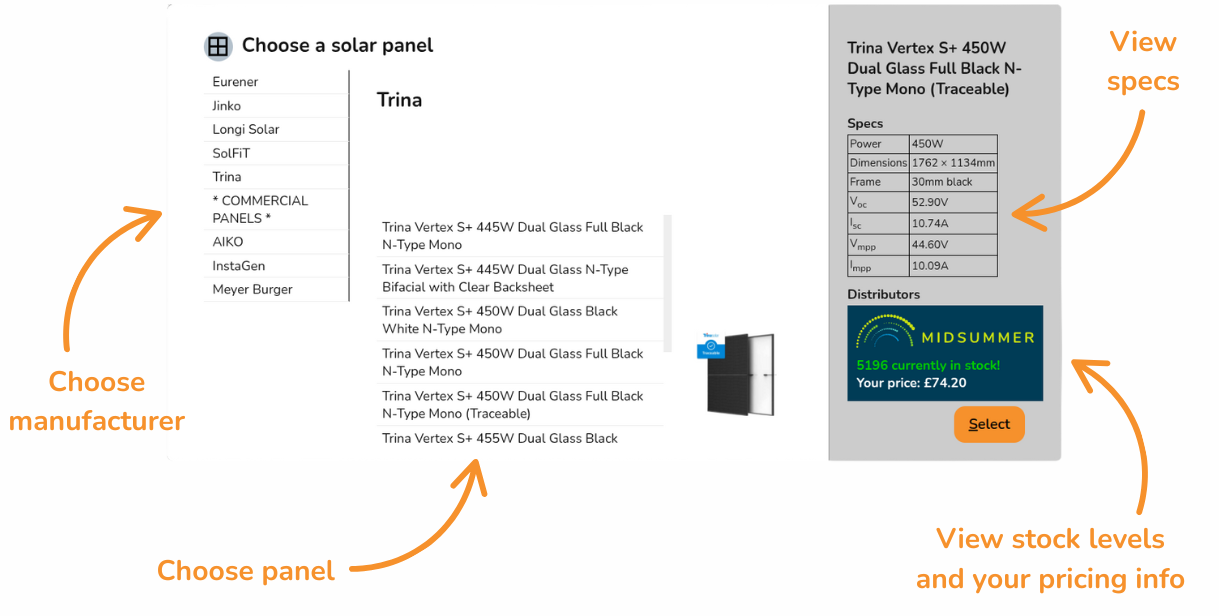
When you open the panels task, you'll be prompted to select a panel to use. Select from the manufacturers on the left and then from the individual panels in the middle. You may need to scroll up or down to see the individual panels.
Can't find what you're looking for? Add custom panels.
Once selected, on the right you can see the specs for the panel and Midsummer stock and price information. Click on the Midsummer box to view the full listing with datasheets, warranty and more.
Click Select in the bottom right once you've chosen your panel
Connect your Midsummer Wholesale account for accurate pricing. Not registered? Sign up here.
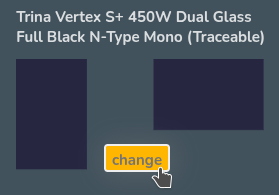
Once you have selected a panel, you can click change on the leftside menu to reopen the panel menu.
Creating panel layout
There are three ways to add panels to a roof:
|
Drag and drop to place panels individually
|
|
|
Click on a panel and use the arrow keys to add adjacent panels
|
 |
|
Click auto-fill options to fill the roof with portrait or landscape panels
|
 |


Auto-fill options will avoid obstructions and place as many panels as possible within the configured margin.
To remove panels, you can:
|
Double click to remove an individual panel
|
 |
|
Shift + Click + Drag to select multiple panels and Delete/Backspace to remove them
|
 |
|
Click the clear roof option to remove all panels
|
 |


Choosing a mounting system
Once the roof has panels on it, you can choose from the available mounting options on the right. The mounting options displayed will be compatible with the roof and panel size and layout.
When selected, Easy PV will specify the necessary mounting components. Depending on the mounting system, you may also have additional options to configure the components further (rail colour, preferred hook, bird blocker etc.).
This mounting kit list does not take into account structural considerations. Adjustments needed to the number of hooks can be calculated in the structural task (UK only) or otherwise.
If the mounting system you want to use is not available, select No mounting. For flat roofs, you will have additional options to configure the panel layout, including east-west options.
Multiple roofs
Once all roofs are completed click Next onto the inverter task.
Inverter task
In this task you select the inverter and batteries you'd like to use and how many panels to allocate to each MPPT. You can also choose whether you want to include optimisers.
Choosing an inverter
Can't find what you're looking for? See how to add custom inverters.
When you open the inverter task, a menu will pop up with the following information:
- Inverter recommendations: Recommended based on array size, number of inputs and cost. Choose from string, hybrid, optimised inverters.
- Peak panel output and optimum inverter size: The installed capacity of the system and optimum inverter size based on solar data for project location.
- List of inverter manufacturers: List of all inverter manufacturers stocked by Midsummer, sorted by type.
If you select a manufacturer from the list on the left, you can then:
- Choose between single phase and three phase inverters for that manufacturer.
- View the output loss percentage for each inverter, which you can use to choose an appropriately sized inverter.
Once selected, you'll see the specs for the inverter and Midsummer stock and price information on the left. Click on the Midsummer box to view the full listing with datasheets, warranty and more.
Click Go in the bottom right once you've chosen your inverter to add it to the project.
Connect your Midsummer Wholesale account for accurate pricing. Not registered? Sign up here.
Panel allocation
Once you've chosen your inverter, the next step is to select how many panels you want for each MPPT. If the inverter was from the recommended section, this step will be completed for you.
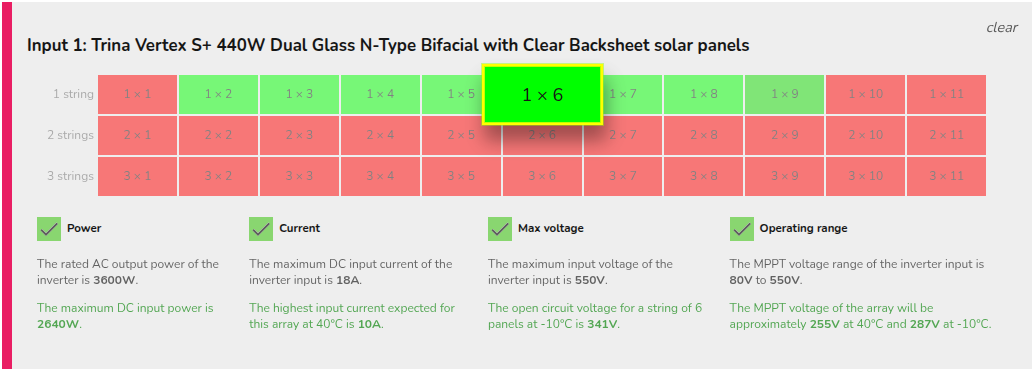
In the top right you can see how many panels you need to allocate. On each inverter you will see the different combinations that can be allocated to each string. Once the right number of panels have been allocated, a green tick will appear.
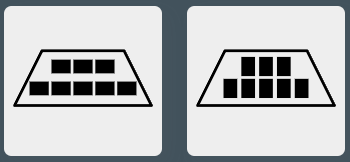
Multiple string arrangements are typically possible. Below shows an example with 12 panels, selecting 1x6 (1 string of 6 panels) to each input and then 1x4 and 1x8:
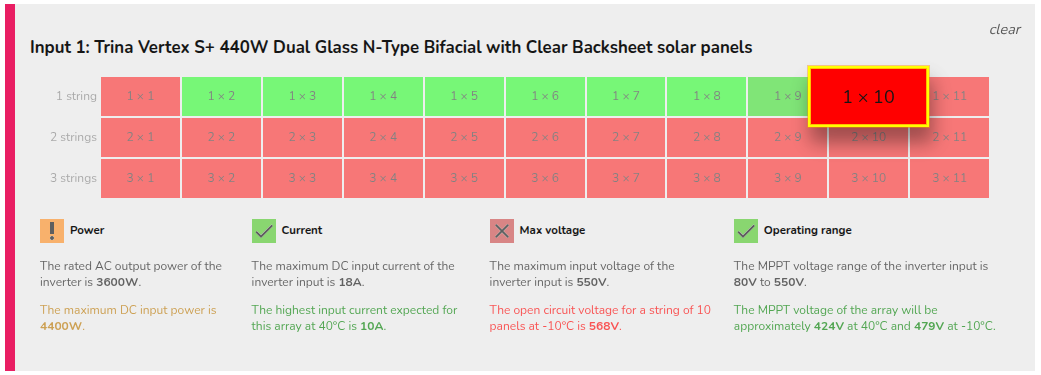
Electrical compatibility information for the selected arrangement is shown below the stringing options. This indicates which limiting factors for that input are met or exceeded. For each input, some options will show in red, indicating the arrangement does not pass the electrical checks, and others in green, indicating the arrangement does pass all the electrical checks Easy PV is doing. The number of viable inputs will vary depending on the size of the inverter and the panels chosen.
|
Not electrically viable
|
|
|
Electrically viable
|
 |


Panel allocation is then completed in the Performance task.
Adding battery storage
You can add battery storage to hybrid or AC-coupled inverters. In each case, you will see a list of compatible batteries for that inverter, with the options most suitable for the system shown in green. Darker green options are compatible but may not be optimal.
When you make a selection, warnings about the battery capacity and maximum battery charge rate will display below to help in choosing an appropriate size.
On every project, you will need either a string or hybrid inverter (battery only projects are not yet supported). If you have an AC inverter, you will also need a string inverter.
You can skip adding a battery to a hybrid inverter if the plan is to install one at a later date. Simply add the inverter and don't select a battery. A warning will appear when going to the Electrical task, just click OK to continue.
Additional options
|
Delete inverter This is in the top right of each inverter. |
|
|
Clone inverter This is in the top right of each inverter. Cloning will also copy stringing arrangements. |
|
|
|
Add optimisers This is to the top right of the first input on compatible inverters. After adding, select from the drop-down which optimiser you want to use. This will add one optimiser per panel. |
|
|
Add a different inverter This is to the bottom right of the last inverter. This will re-open the inverter selection menu. |
Using optimisers or microinverters will also mean you need to manually allocate panels in the Performance task.
Electrical task
This is the final stage of the kit builder and is where you specify isolators, cables, meters and any other kit needed in the system. Most components are pre-selected automatically based on your panel and inverter choices. You can review and adjust them as needed.
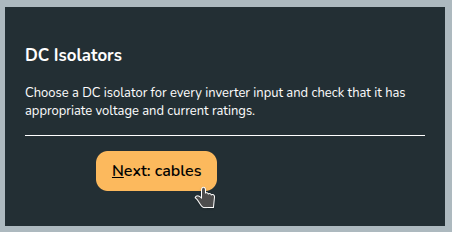
DC Isolators
Choose a DC isolator for each inverter input.
- Click on the Current and Voltage sections to view full details.
- Use Match all DC isolators... button to bulk edit DC isolators for that inverter.
Once selected, you can click onto the Cables section
DC cable and connectors
Specify the length of run and cable cross section of the DC cable to check voltage drop.
- Enter the DC cable run lengths and select the size.
- Use Match all DC cable runs... button to bulk edit cable size and lengths for that inverter.
SolShare
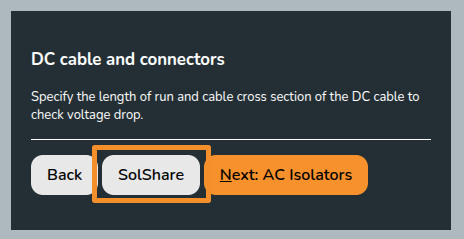
- Select which inverters you wish to be paired with SolShare
- Select how many connections the SolShare will be supplying.
If the selected inverter is not compatible with Solshare, you will not be able to add one. For guidance on designing a SolShare system, chat to your Midsummer account handler. SolShare requires a minimum of 6x single-phase or 2x three-phase connections. The site must have a multi-service distribution board (MSDB) supplied by 1x incoming supply to enable SolShare system to work. Read more about Solshare here.
AC Isolators
Specify an appropriate AC isolator for each inverter in your project, and check that it has an appropriate current rating.
Meter
In this section, you'll be able to select from compatible generation meters.
If no meters supplied by Midsummer are compatible, you will only have the option to select No meter thanks. You can also add a custom meter.
Extras
Add monitoring, immersion controllers, battery storage and accessories to your project.
Any extras required for components you've already added to the system will be selected automatically. Increase the count of any other extras you'd like included in the project.