
Editing and creating tariffs
This guide covers how you can manage and create tariffs in Easy PV. Setting tariffs is an essential part of ensuring the financial benefits can be calculated as accurately as possible for your customer.
Tariffs can be created, viewed and edited in the Consumption task or the Financial task. You can also set up user-level default tariffs in your account financial settings or if you are a member of a Pro team, this will be set by a Pro team admin in Pro account financial settings.
Overview
Creating a tariff
Tariffs can be set up in individual projects from the Financial or Consumption task or in User/Team financial preferences.
Flat or single-rate tariffs
Step 1. Set the name of the tariff
This name will appear in the quote wording.
Step 2. Set the scope of the tariff
Set when you want to be able to use this tariff:
- User-level: For any of my projects
- Project-level: Only for this project
- Team-level: Available to my team
Note: Once the scope of the tariff has been set, this cannot be edited.
What is the scope of the tariff for?
- These will only be viewable on the specific project it's created for
- A good option if you frequently change the tariffs on each project
- These can be used for any projects and set as a default in your financial settings
- A good option if you aren't sure what tariffs your customer is on and want to use standard values
- User-level tariffs will not be shared within shared projects

- If you are a member of a Pro Team, you will be able to create Team-level tariffs
- These will work much like the User-level tariffs but will show for all members of your team
Step 3. Input the price bands
Enter a value for the base rate and click Save.
Variable or multi-rate tariffs
Steps 1 and 2
Follow steps 1-2 as above.
Step 3. Input the price bands
The first band you enter will be used as the base rate - any time period that doesn't have a price band applied will be priced at this rate.
Click + Add row and enter each different tariff rate. The names of each price band will be displayed on the proposal.
Step 4. Add tariff periods
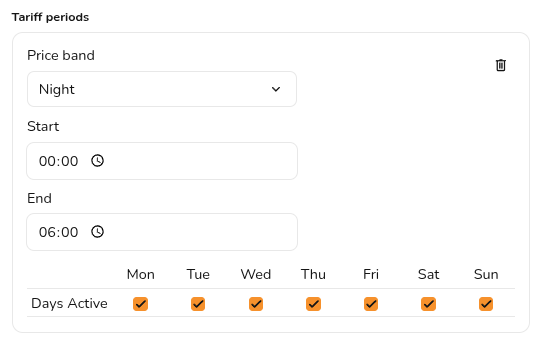
In the Tariff periods section click + Add tariff period.
Select a price band and enter the start and end time. For some tariffs different rates might apply at the weekend, you can select the days for which the tariff period applies.
Using tariffs in a project
In Easy PV, certain tariffs can only be used with certain self-consumption calculations. The tariffs selected on a project are therefore associated with certain self-consumption methods. Variable or multi-rate tariffs can only be used with the Easy PV self-consumption calculation, whereas flat or single-rate tariffs can be used with any method.
Learn more: The differences between MCS and Easy PV self-consumption calculations.
View and edit tariffs
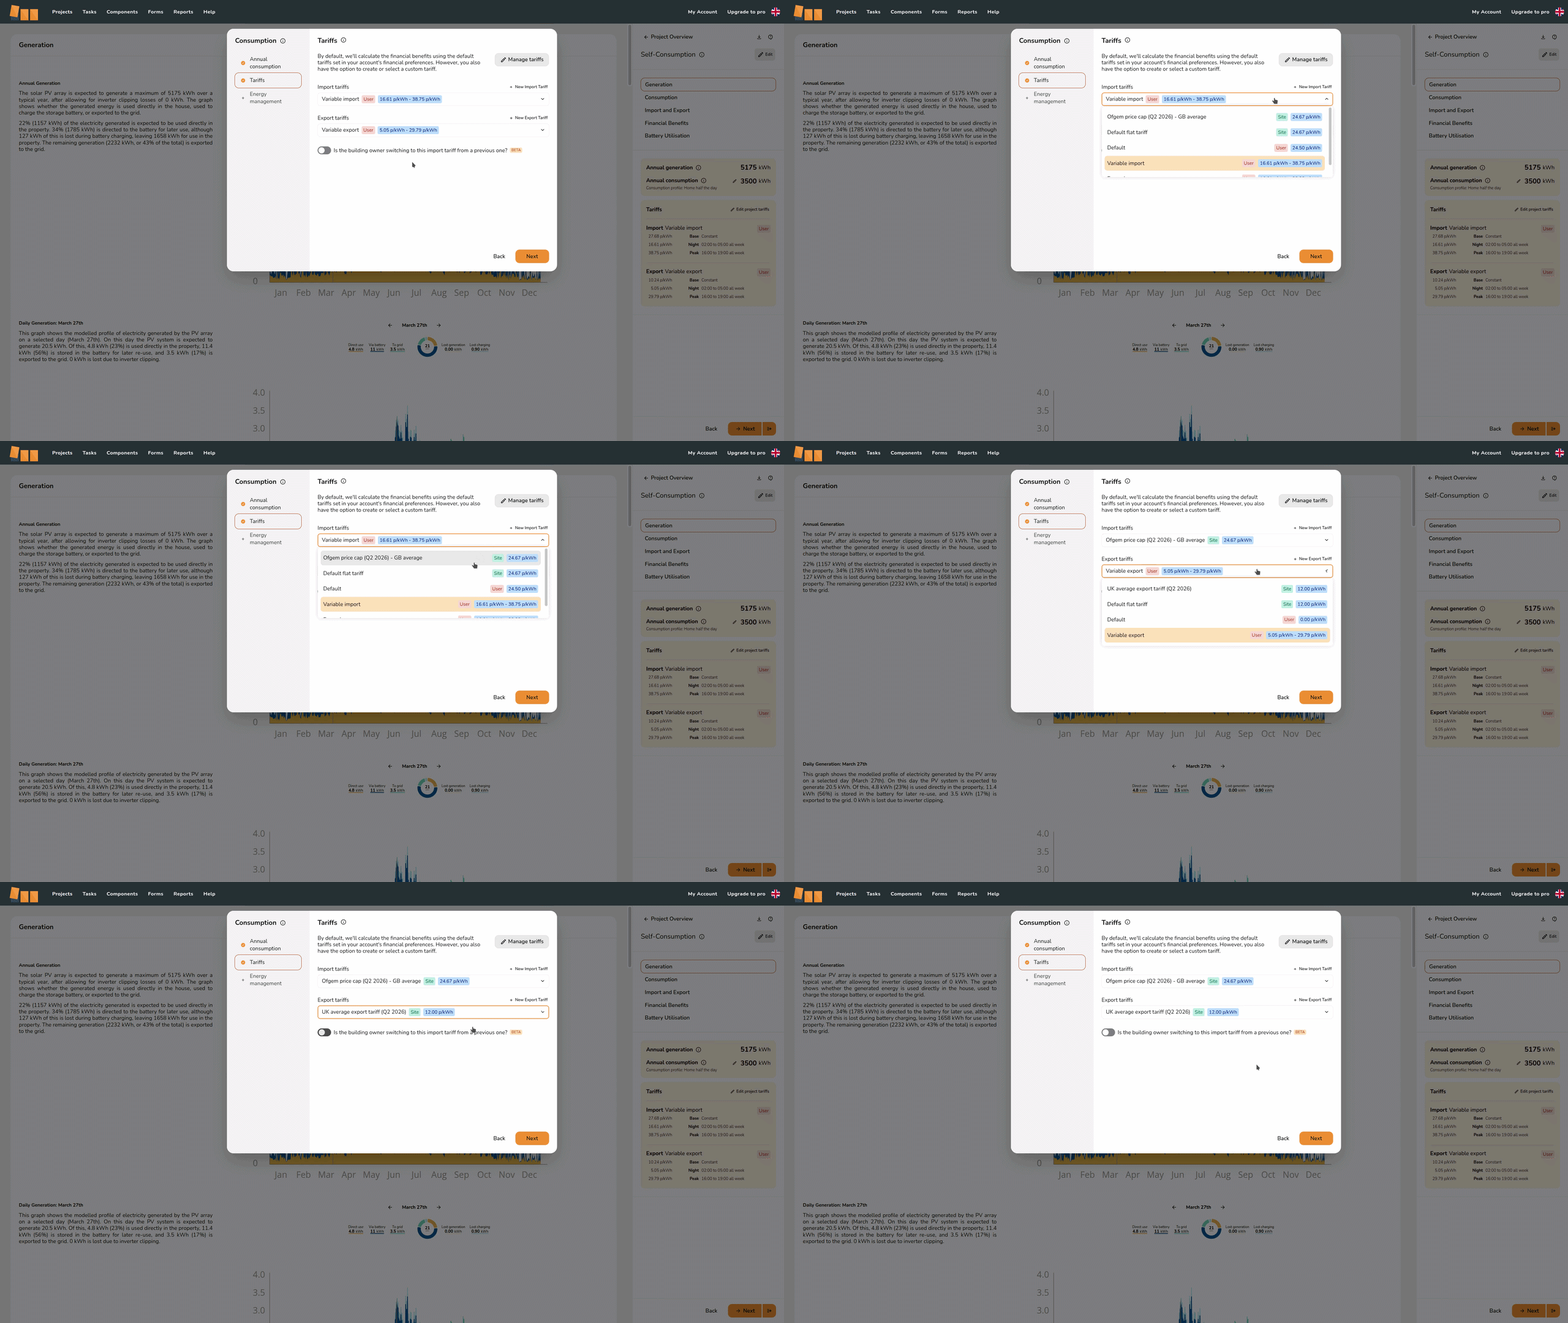
To view the tariffs you have selected on a project, navigate to the Financial task. Click Financial inputs in the top right and you will see which self-consumption method you have selected and the associated tariffs.
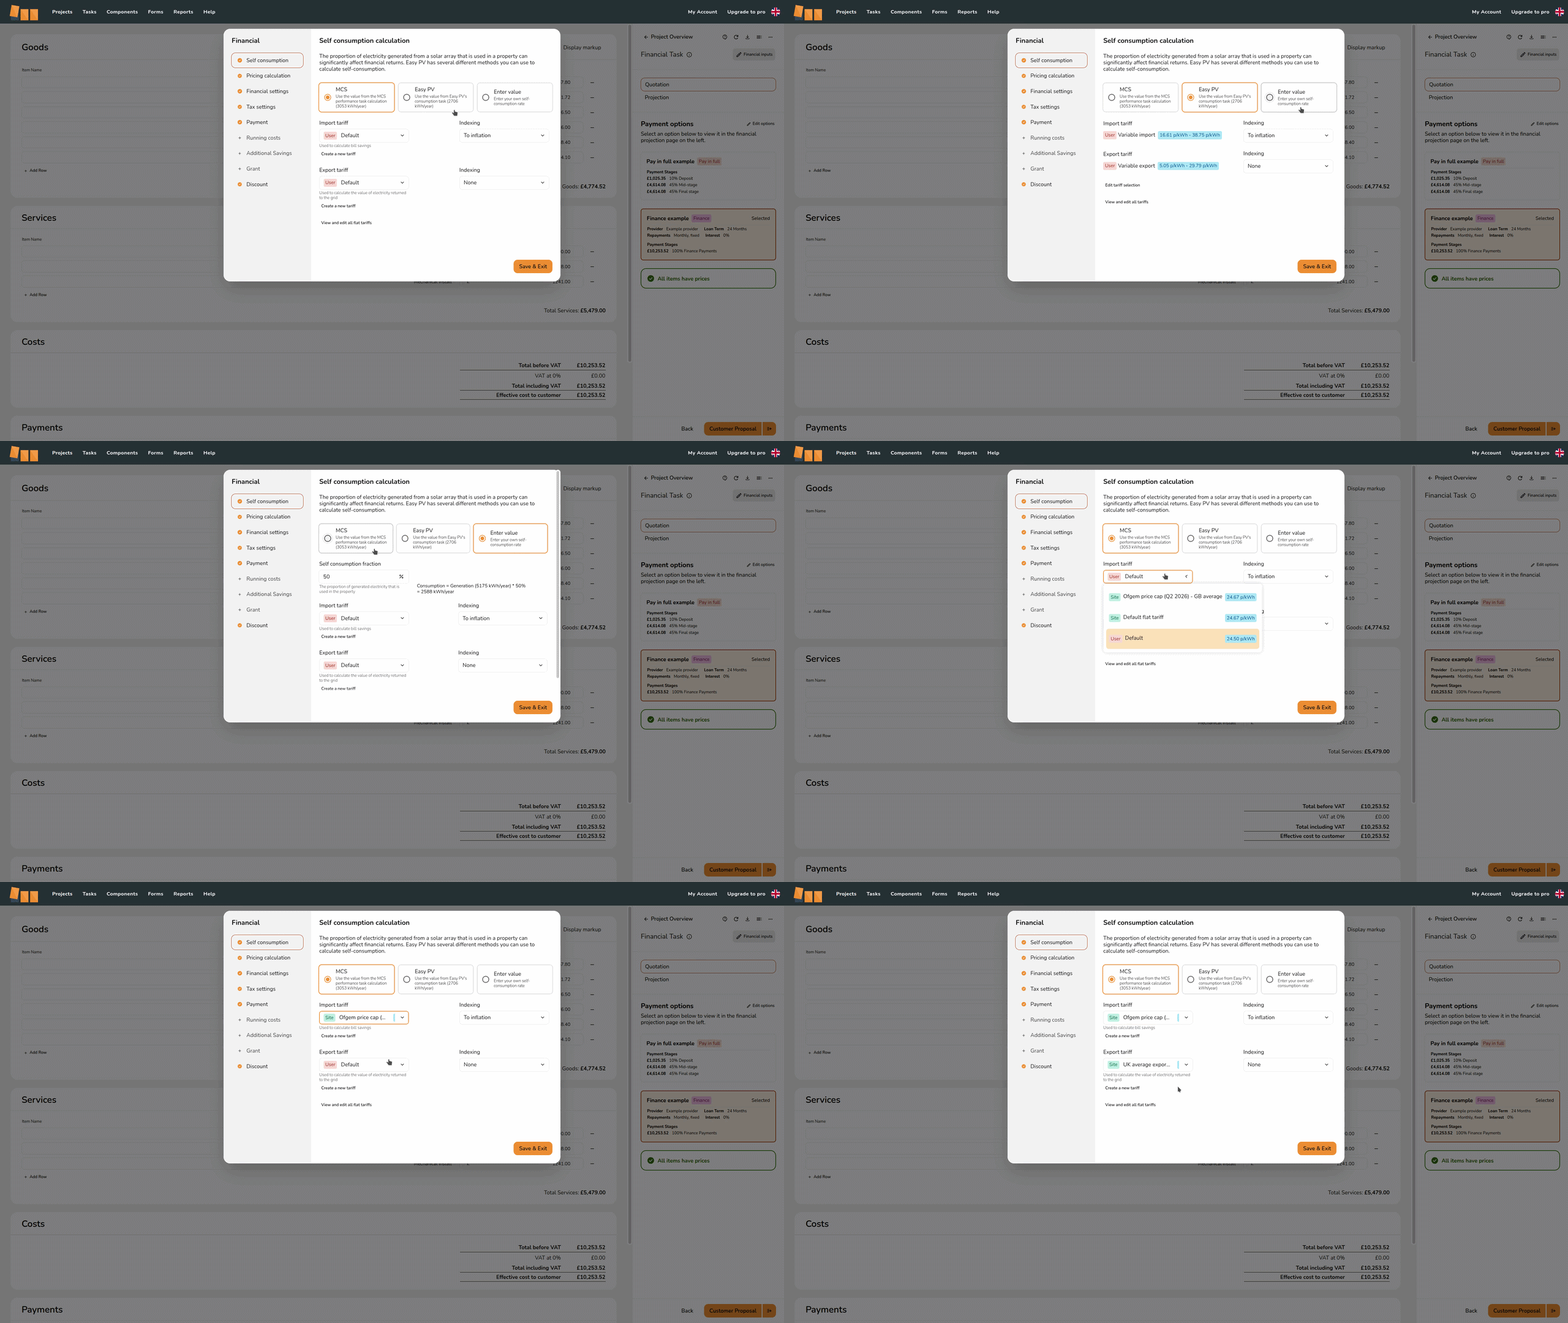
If you are using the MCS or Enter-value self-consumption calculation, you can view and edit the tariffs used on the project in the Financial task. If you are using the Easy PV calculation, you can only edit the tariff selection from the Consumption task. Navigate to the Consumption task and click Edit in the top right and select the Tariffs tab.
Inflation indexing
The rate at which tariffs change with inflation is important in calculating the savings to be made from solar and any ongoing electricity costs. Easy PV projects will have a base inflation rate (set in the Financial settings tab of the Financial task inputs).
In the Financial task inputs on the Self-consumption tab you can set the inflation indexing for the selected tariffs. Choose from:
- To inflation: Tariffs will increase with base inflation rate as the project each year
- Above inflation: Tariffs will increase at a specified percentage above the base inflation rate of the project each year
- Fixed: Tariffs will increase by a fixed percentage each year
- None: Tariffs will not increase with inflation and will remain fixed across the projection period
These can be set independently for import and export rates.
Read more: Importance of using the right financial settings.
Managing tariffs
You can view and edit your tariffs from within projects (in Financial task > Financial inputs > Self consumption or Consumption task > Edit inputs > Tariffs) or within your financial settings.
Click Manage tariffs from the Consumption task or View and Edit Team/User-level tariffs from financial settings. You will see the following options alongside the details of each tariff:
+ Add import tariff
Click this to create a new tariff- The three dots menu will allow you to duplicate, delete, or hide any payment options or providers:
 Edit
Edit
Click the pencil to make any changes to existing tariffs. These changes will affect existing projects using this tariff Hide
Hide
This will remove the tariff from the drop down list of tariffs in new projects without affecting old projects using this tariff Delete
This will delete the tariff and cannot be undone. Existing projects using this tariff will switch to your default tariff



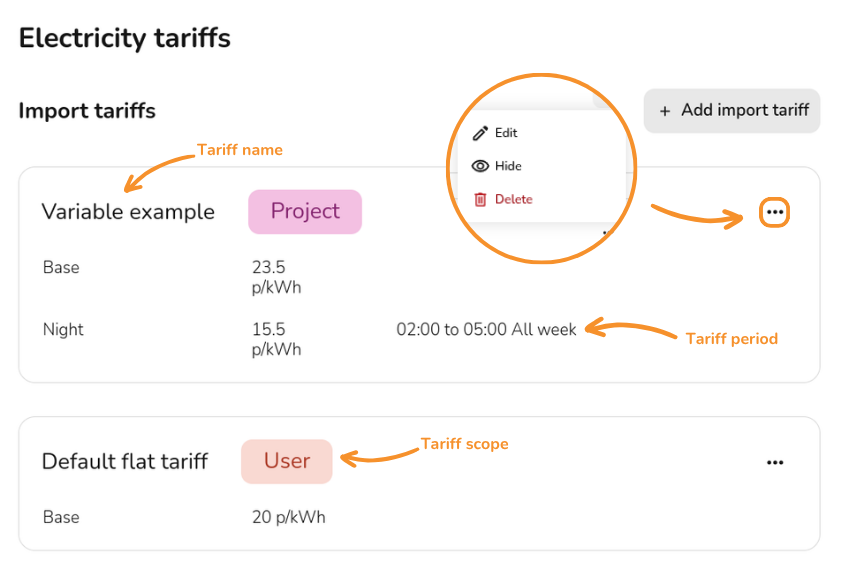
Warning: Editing or deleting existing tariffs will affect previous projects that use these tariffs. Hide any tariffs you want unavailable on new projects without affecting existing ones.
Still Need Help?
Contact Support: If you've got further questions, get in touch with our support team at help@easy-pv.co.uk (UK) or help@easy-pv.ie (IE). If you are experiencing a bug, to help us look into your issue faster, please include the email address of your account, the name of the project and screenshots of any unexpected behaviour.