New in April 2025
Updated performance & consumption tasks
We're rolling out new features and improved user interfaces across the Performance and Consumption tasks in Easy PV. These updates will help you generate system performance and consumption projections more accurately than ever.
Improved user interfaces
We've been working on improvements to many of the user interfaces in Easy PV to make them more intuitive and efficient. These UI upgrades are designed to make it quicker and easier to complete tasks and take full advantage of the new and existing features.
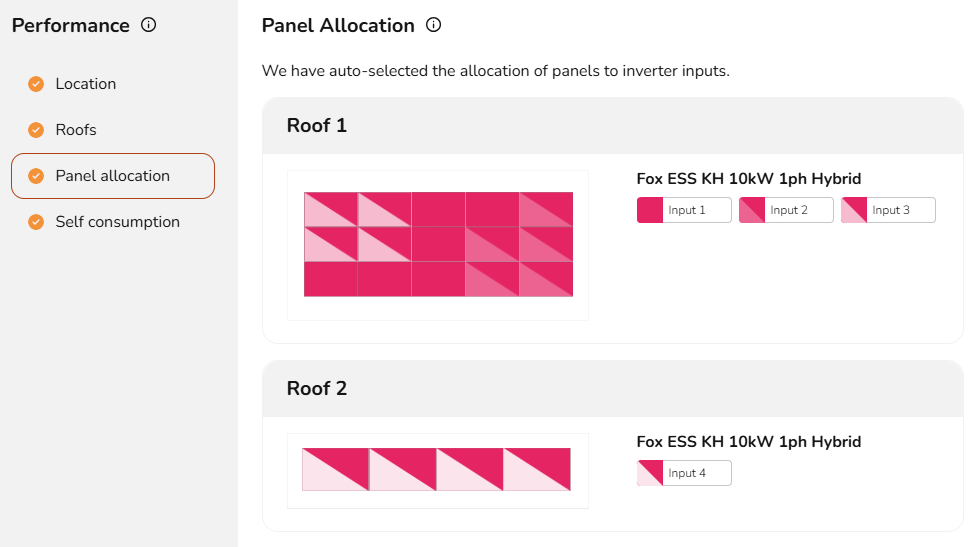
Automatic panel stringing
We've introduced automatic panel stringing, which recommends a suitable way to string panels based on the roofs and inverter inputs in your design. This new feature is a real time-saver—especially for larger systems—by helping you set up strings quickly and efficiently. You can manage preferences on your account to set how you want automatic panel stringing to apply. See below for more information.
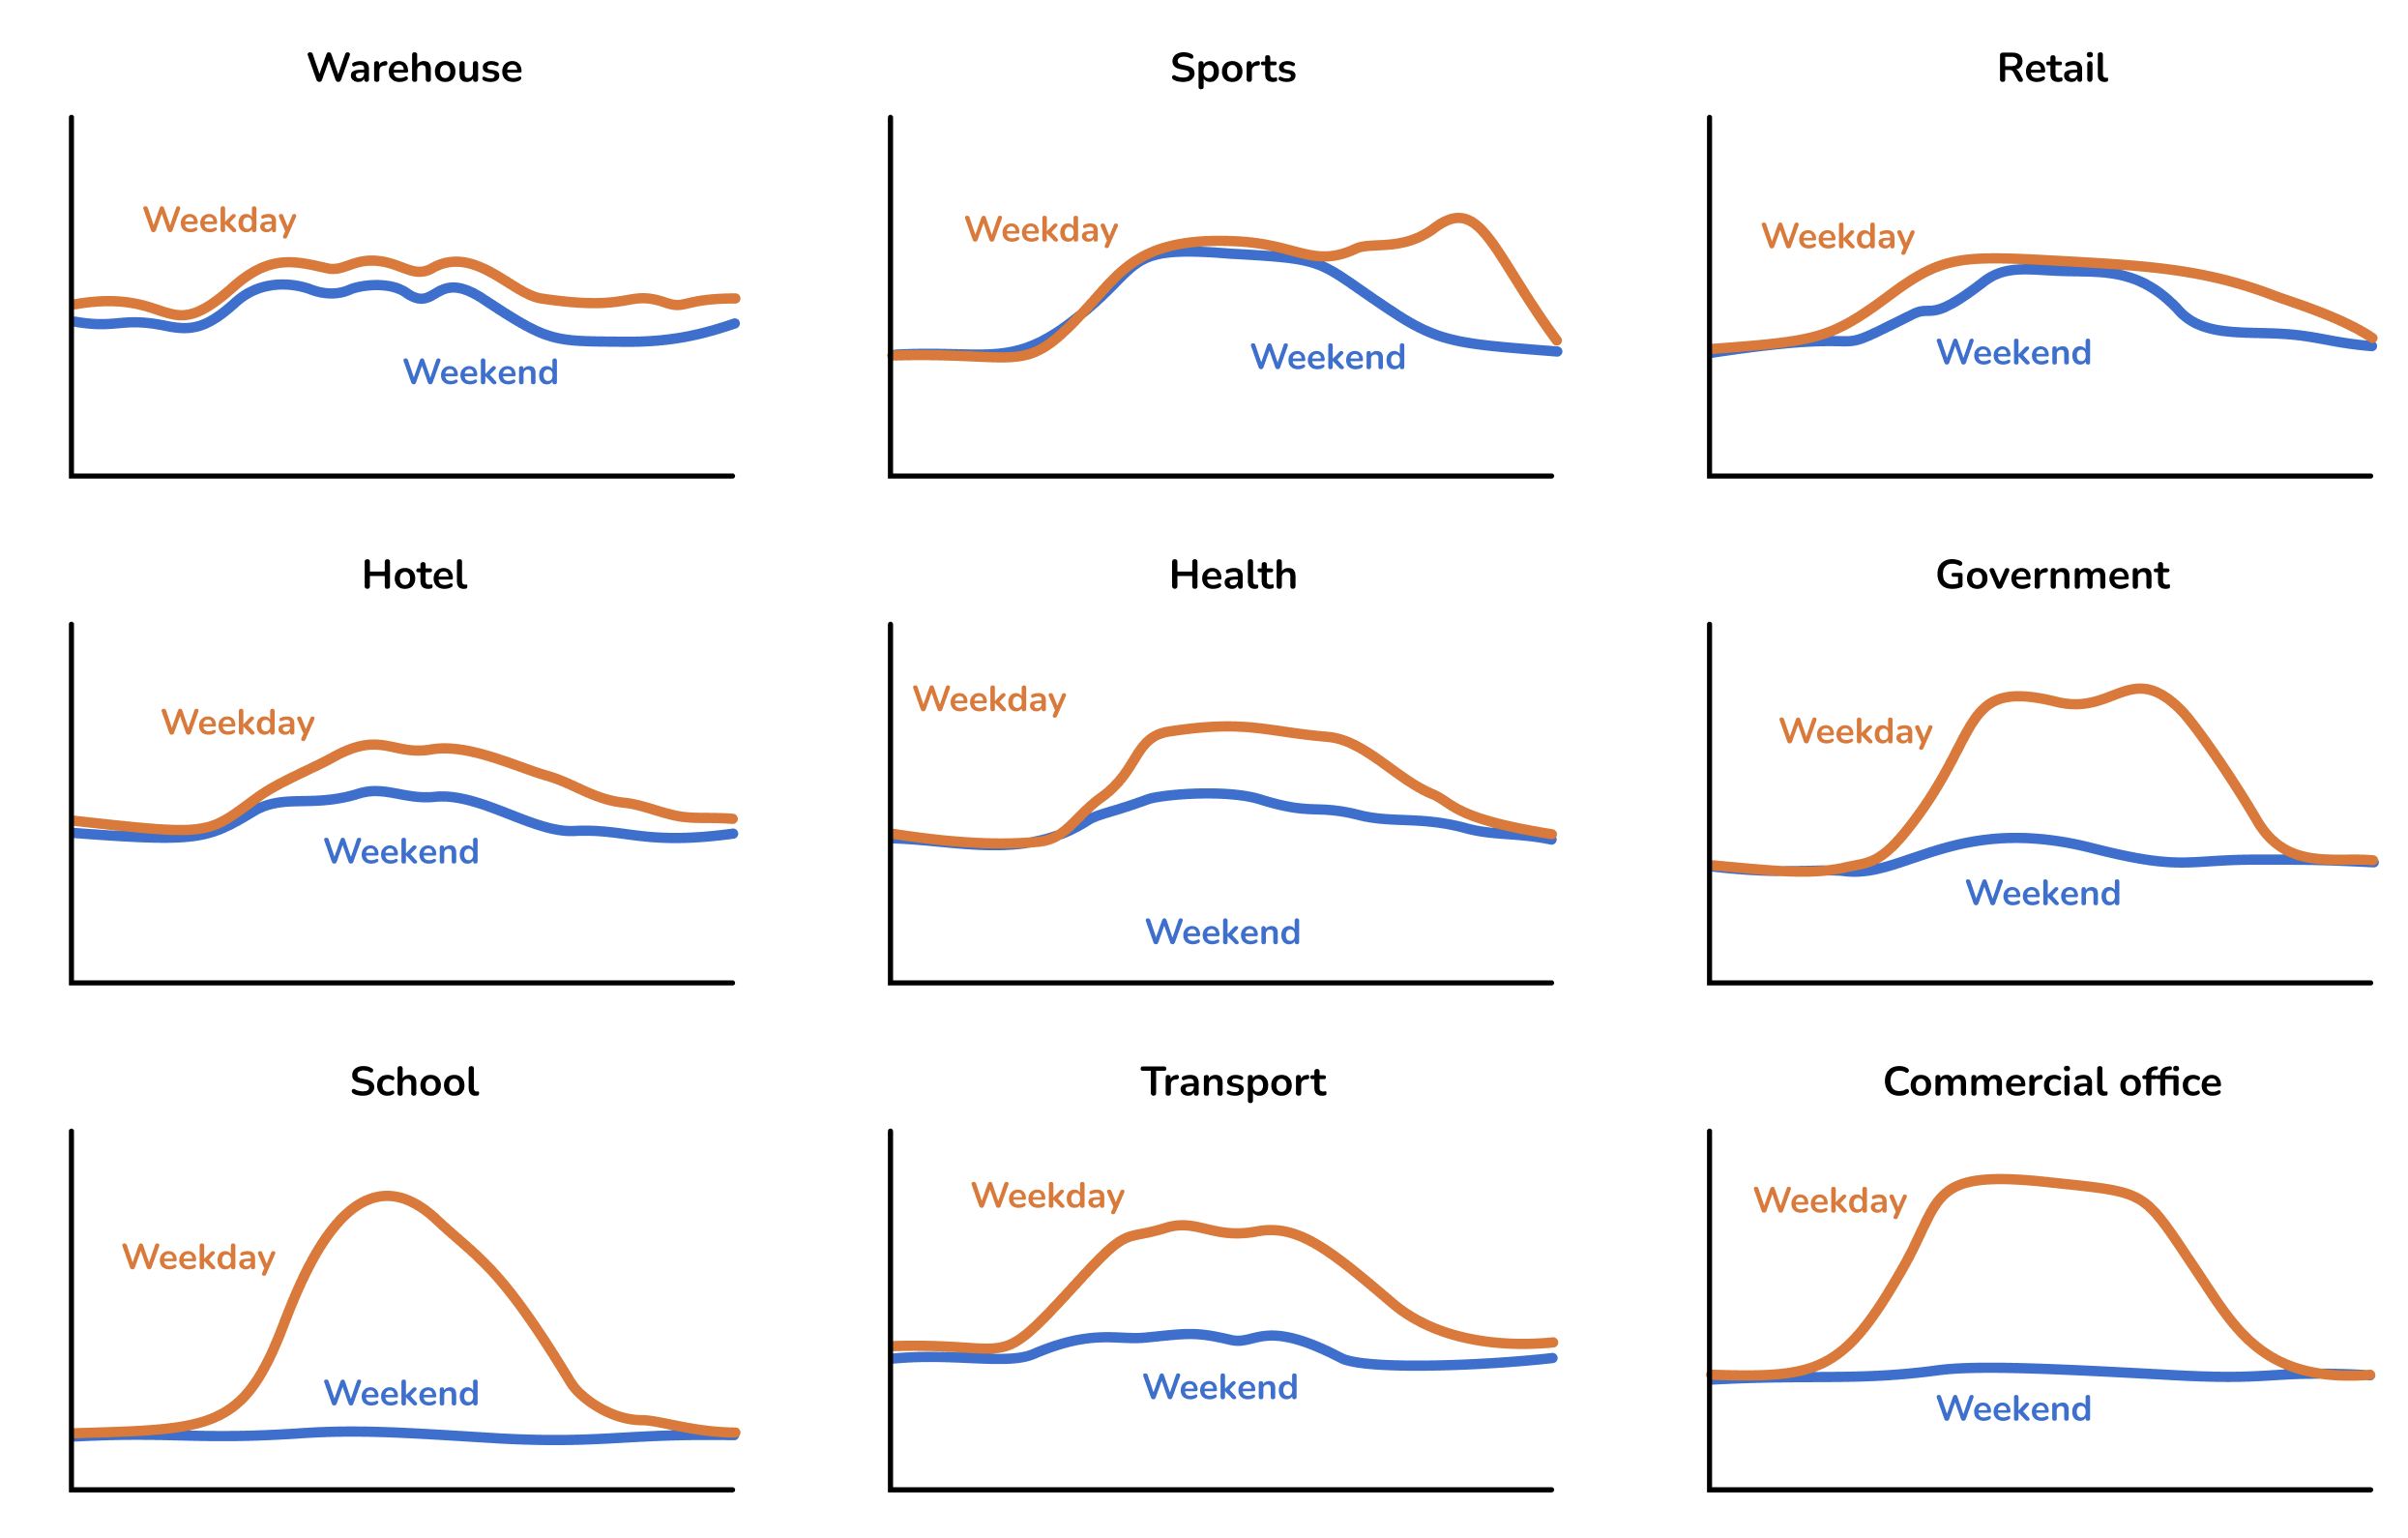
New domestic and commercial consumption profiles
You can now choose from a variety of domestic and commercial consumption profiles to build an accurate picture of energy usage throughout the year. A consumption profile calculates when energy is consumed—both annually and on a daily basis. For example, in a domestic home, most energy is typically used in the early morning and evenings. In contrast, an office profile reflects higher energy use during typical working hours, from around 09:00 to 17:00.
The following commercial profiles are available
Configure export limits and visualise export and inverter clipping
We've added support for setting export limits where required by the DNO. This ensures your system design complies with local network requirements and accurately reflects any restrictions on energy export and the potential financial benefits of the system.
You can toggle on clipping in the consumption task to show relevant information in the charts. This makes it easier to visualise when and how much potential generation is being limited by the inverter or by export limits, helping you make more informed design choices and assess whether an inverter is appropriately sized for the system.

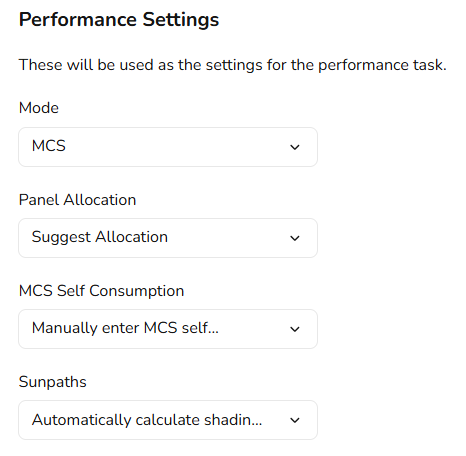
Set preferences for the Performance task
You can now set preferences on your account for how you want the Performance task to work.
- Mode: Choose between MCS and NREL methods to calculate the total annual generation
- Panel allocation: Set whether you want Easy PV to
- automatically allocate panels - this will entirely skip this step in the performance task if panels can be allocated automatically (you can return to this if you later want to change the allocation).
- Suggest allocation - this will display the suggested allocation which you can accept or edit.
- Manual allocate panels - this will ignore suggested panel allocation and you will need to allocate panels manually.
- MCS Self Consumption: Choose whether you want to
- use default values for MCS self consumption - this will let you set default values which will be used by default for each of the inputs required for the MCS consumption calculations.
- manually enter MCS self consumption - if you select this option you will need to set the inputs required for the MCS calculations on every project.
- Sunpaths: Choose whether you want Easy PV to automatically calculate shading based on the terrain and 3D buildings or whether you want this to be excluded so you can set the shading manually.
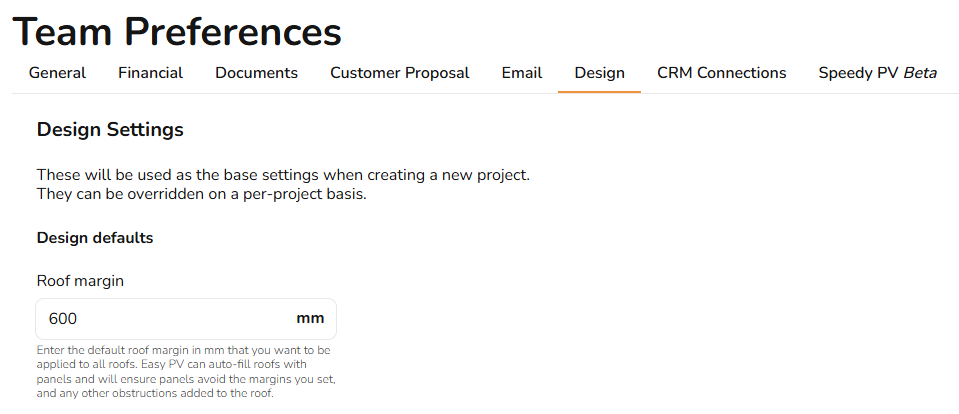
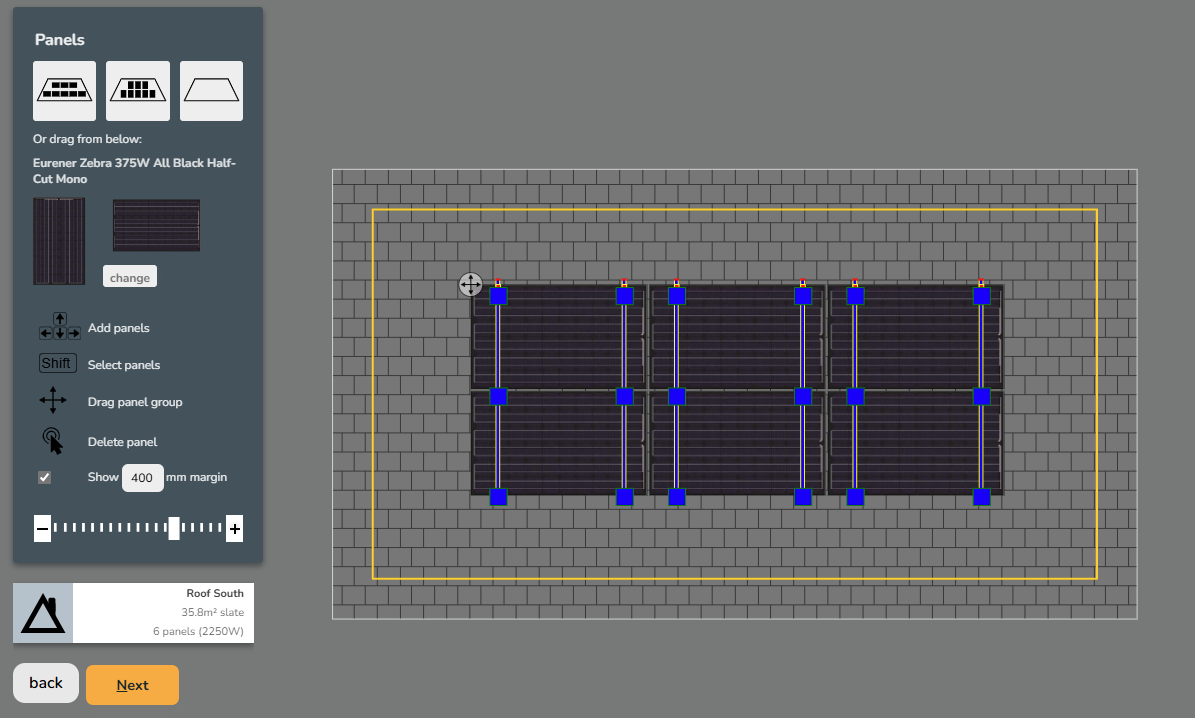
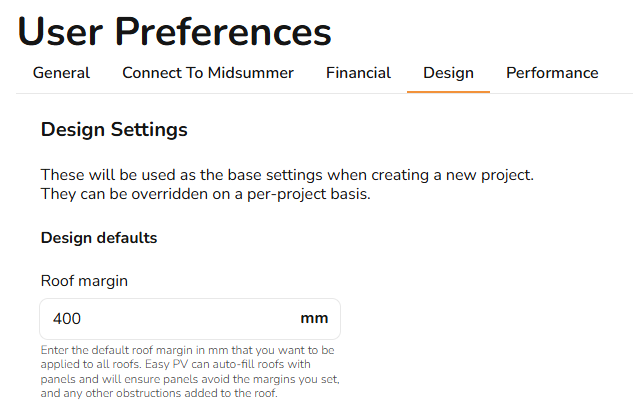
Set default roof margins
You can now set a default roof margin to apply to all your projects. This is a margin around the edges of a roof that panel arrays should not overlap. It is shown as a yellow line on the roofs in the Easy PV Panels Task. If you use the auto-fill functionality to add panels automatically to the roof, it will ensure no panels cover the roof margin.
For standard (free) Easy PV accounts
For PRO Easy PV accounts