
Custom meters
To add a custom meter in Easy PV navigate to My Components > Meters on the left-side menu or Components > Edit Meters from the top drop down menu.
Creating a meter
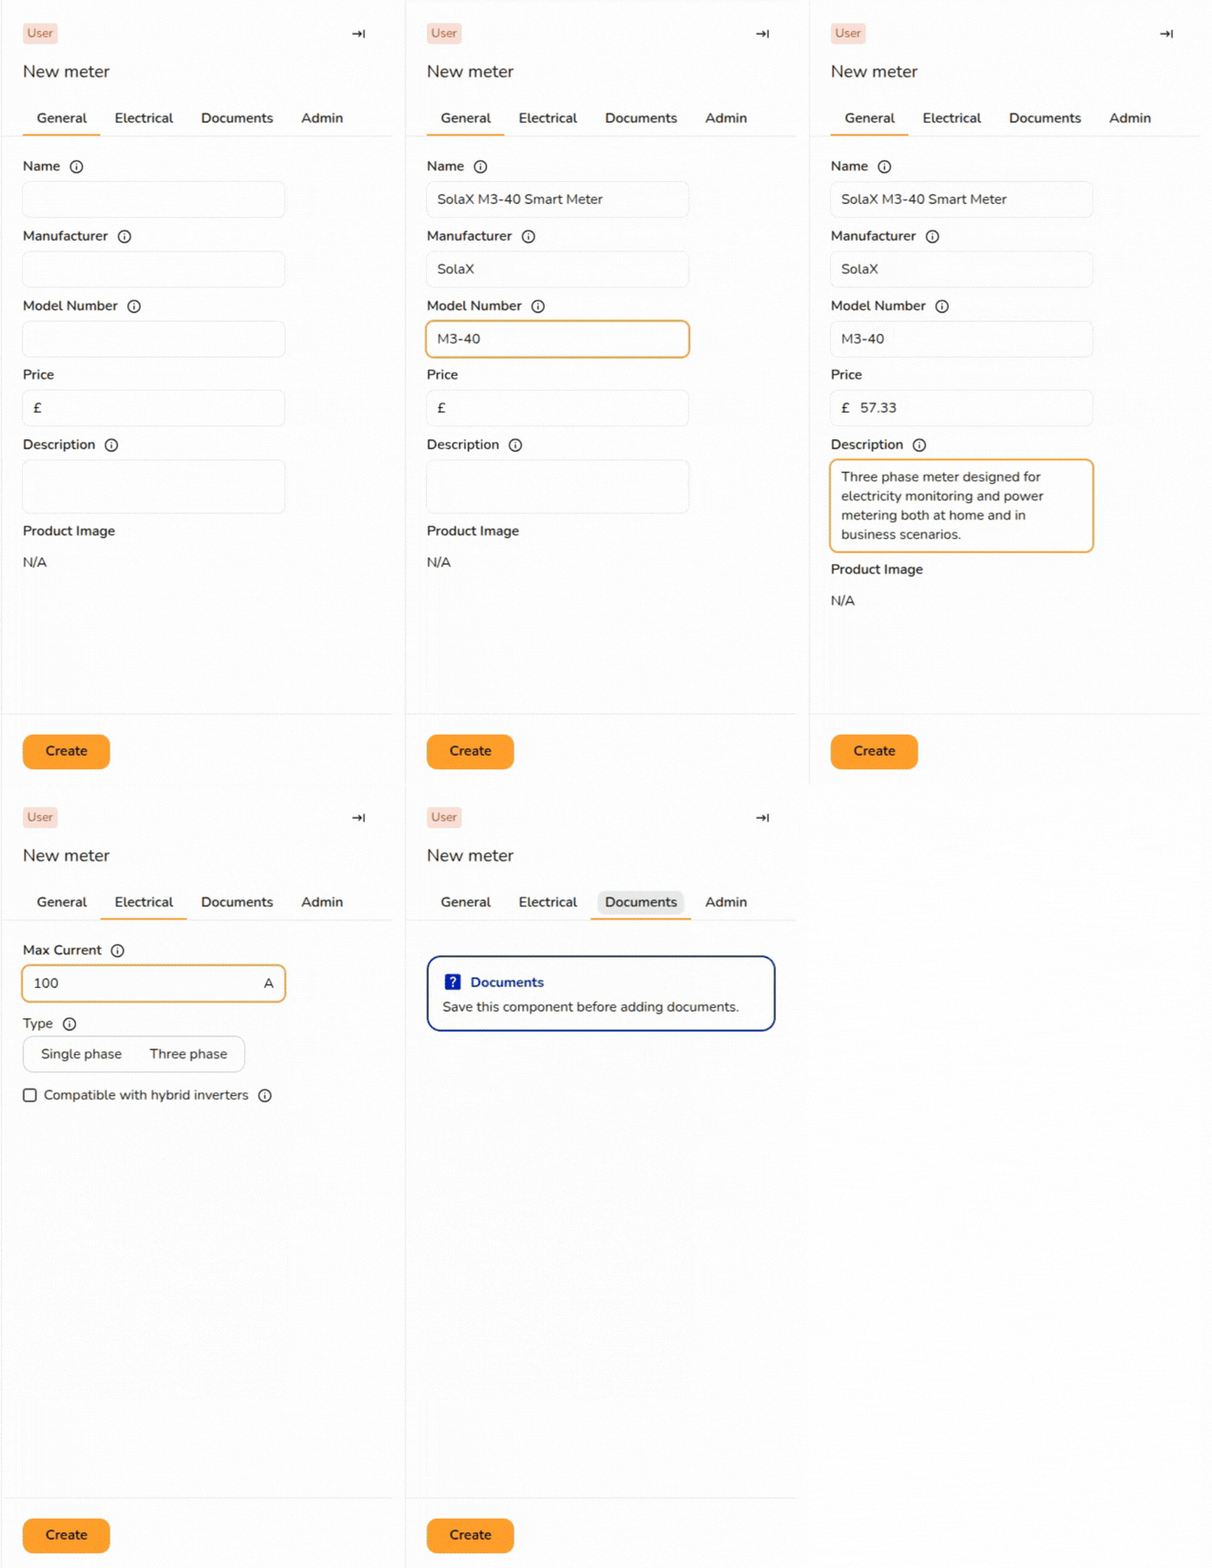
Click the + New meter button to create a meter. You will need the datasheet from the manufacturer so that you can input the correct technical specifications of your meter. This is a list of product information required to add a custom meter:
| Tab | Product info | Description |
|
General |
Name |
Name shown across Easy PV. Usually the manufacturer and model.
|
| Manufacturer |
Company that makes this meter.
|
|
| Model Number |
Manufacturer's model or part number.
|
|
| Price |
Price of the meter.
|
|
| Description |
Notes shown when selecting this component.
|
|
| Product Image |
⚠️ You must save your component before you can add a product image. |
|
|
Electrical |
Max Current |
Maximum continuous current in amps (A).
|
|
|
Type |
Single-phase or three-phase supply.
|
|
|
Hybrid |
Tick if compatible with hybrid inverters.
|
|
Documents |
Upload documents |
⚠️ You must save your component before you can upload documents. |
|
Admin |
Wholesale ID |
Optional: For products supplied by Midsummer, put the product ID here. |
|
|
Component priority |
Optional: Decides which component is recommended or listed first. A higher number wins. Blank or 0 is the lowest priority. |
|
|
Owner |
⚠️ This will be set to 'My account' when you create a new component.
You can share or change ownership after you save, if you want others on your team to have access to it. |
Click Create to save the component. Once you have added a meter successfully, you’ll be able to select it in the list of meters when creating a new project in the Electrical task.
Editing a Meter
 Edit button in the top-right corner. This will allow you to modify the product details and set some additional information:
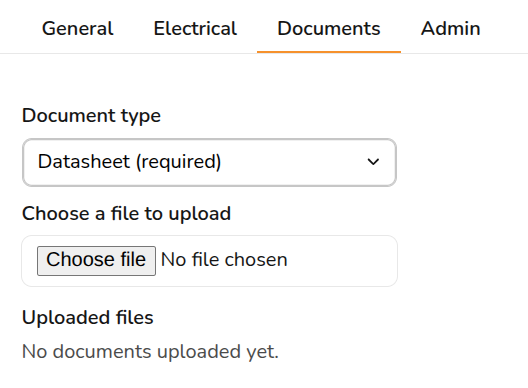
Go to the Documents tab to upload files such as data sheets, MCS certificates, installation guides, warranties, maintenance records, user guides, or ENA certificates for the component.
Select the Document type from the dropdown and choose a file from your computer to upload.
Go to the Admin tab and select an Owner from the dropdown. This controls who in your organisation has the rights to see or edit this specific meter:
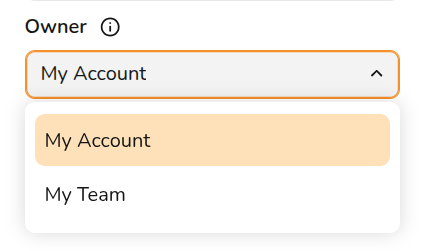
- My account: Only you can see and edit the meter.
- My team: Everyone on your team can see the meter. Only team owners and admins can edit it.
FAQs
❓Why isn’t my meter showing up as an option in my project?
-
If you can see a meter inside your Component Editor but it doesn’t appear as an option when you are working on an active project design, it is failing one of these four rules:
- The phases don't match: A 3-phase meter will not show up if your project has a single-phase supply design.
- The current rating is too low: The meter's Max Current (A) must be equal to or greater than the project's main site fuse rating.
- It lacks hybrid compatibility: If your project design uses a hybrid inverter, the meter must have the Hybrid box ticked in its settings.
- It has been hidden: Hiding a meter removes it from your dashboard view and completely disables it from the Electrical task selection. Check for hidden components using the 'Show hidden' filter.
Still Need Help? / Want to know more?