Irregular Buildings in 3D design mode
The irregular building tool allows you to create unusual roof shapes in the 3D design mode. It’s perfect for complex buildings and large commercial projects.
Step
1:Using Insertingirregular building tool
The irregular building tool can be found at the roof
bottom Scroll down inof the left-handMisc. toolbarsection andon selectthe 3D left side-bar.
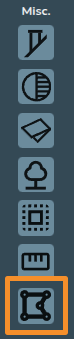
When creating a roof using the irregular building tooltool, inthere are a variety of additional handles you can use to accurately adjust the miscellaneousshape section. In this example, we will plotof the highlightedroof: roof below. We will do so by plotting out each roof face one at a time.

Step1. 2:Pink Resizingcorner handles
Click the roofpink corner handles
First,to weshow willdimensions createof the west-facingassociated roof.walls. StartYou by adding a new irregular roof andcan then dragclick eachon ofthe values to manually change these.
Click on the pink corner controlshandles to theswitch fourbetween cornersa of the roof face. If you accidentally create too many corners, click on the respective pink corner controlsquare and presscircle the bin icon to delete them.handle:
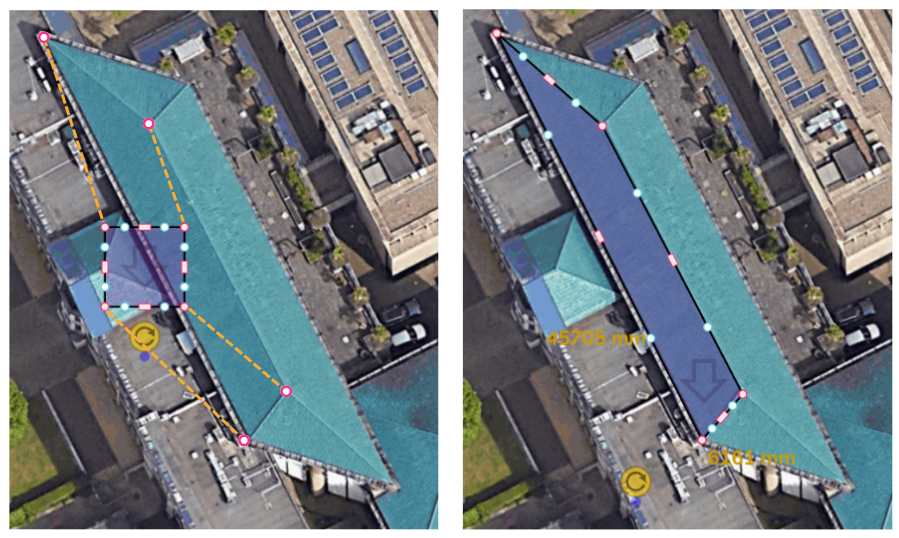
Resizing options if you click on one of the pink corner controls, it will bring up three options:
Free corner angle (default): corners move freely when dragged, e.g. Step 2.Fixed corner angle: the angle of the corner will stay fixed when you drag it (see our Quick Roof guide for more info).Delete corner: this removes the corner, e.g. it would turn a rectangular roof into a triangle
 |
|
|
|
Use the circle corner handles to move that |
2. Blue circle handles
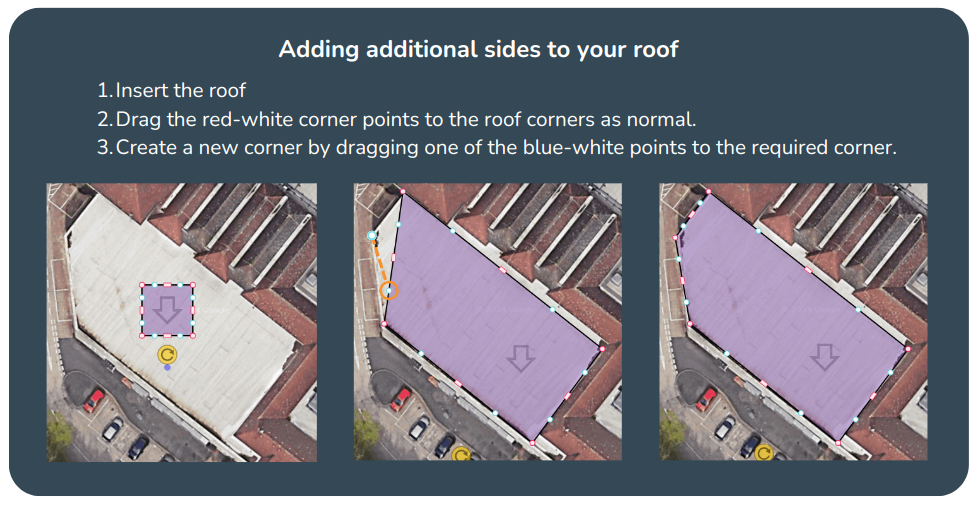
Stepand 3: Editingdrag the slopeblue directioncircle handles
to allow you to split a wall and create irregular shapes. These will then convert to pink handles which you can delete if needed.
3. Pink rectangular handles
TheUse the rectangular handle to resize the room. Click on the pink rectangular handles to toggle between a square and curved cornered handles:
 |
Use the square cornered handle to extend a wall out. |
 |
Use the curved cornered handle to extend the adjoining wall independently of the others. |
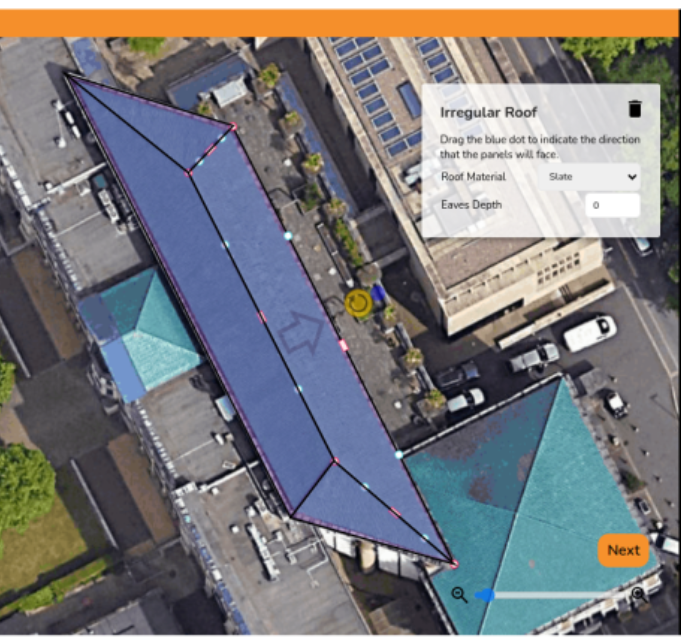
4. Blue dot
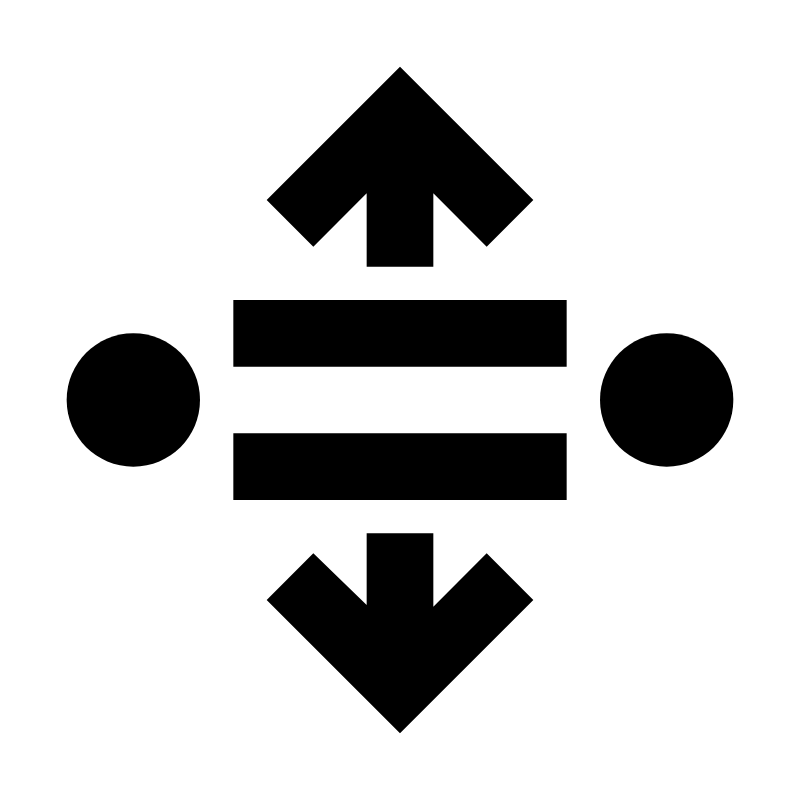
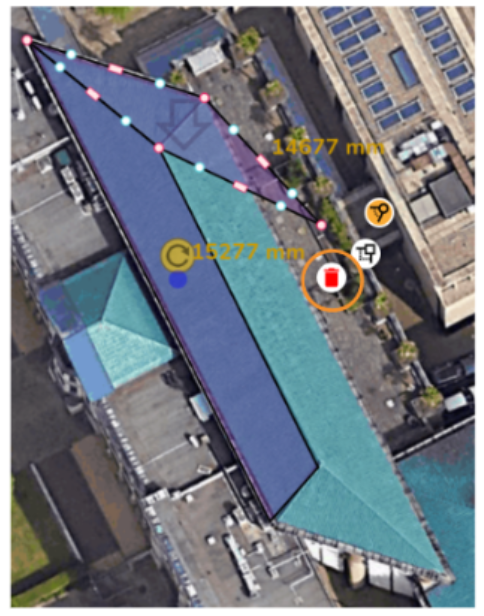
Drag the blue dot below the yellow rotation icon to indicate the direction that the roofpanels slopeswill isface. indicatedWhichever bydirection the arrow onis facing is the roof.panel and roof pitch direction.
To edit the slope direction, drag the blue dot (it can be a little hard to spot at first!). You will see that thismoves the arrow.
It is useful to watch how the slope changes in the Elevations box. It’s likely you’ll want the gutter line to be completely horizontal. When it becomes horizontal, it will snap into place in the Elevations box.
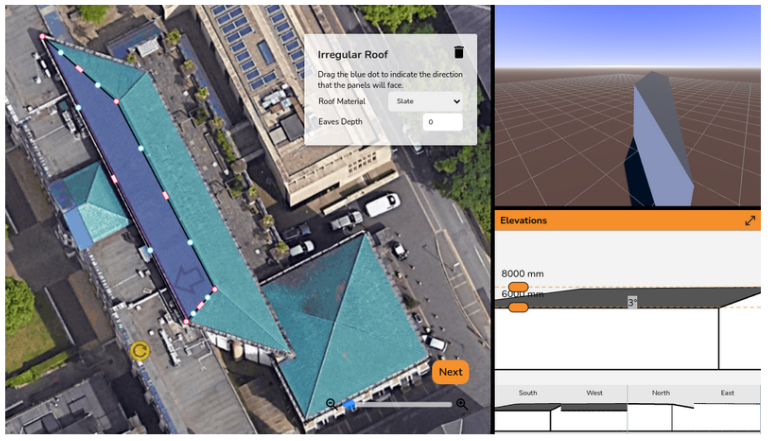
Step 4: Edit roof details
In the same way as the normal 3D design mode, edit the roof height, pitch, material, and eaves depth using the boxes shown below.
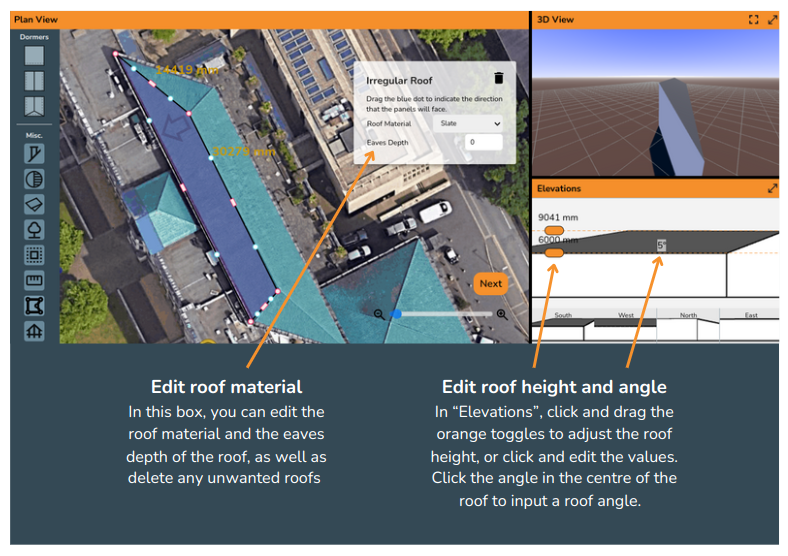
Step 5: Creating a triangular roof
You now need to create the other three roofs. To create the triangular roofs, insert a new irregular roof and drag the x3 pink-white points to their respective corners. Then simply delete the remaining corner to turn it into a triangle.
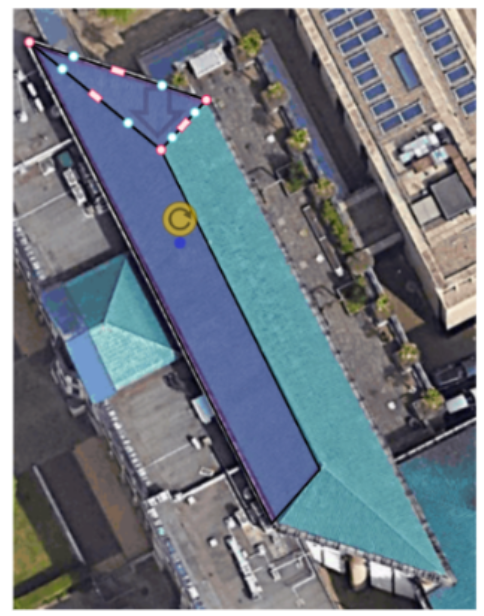
The finished result!
After inserting all four roofs and amending the various roof slopes and heights, we have designed a complete irregular building.