Buildings and roof task
- Choosing a design mode
- Quick Roof
- Irregular Building Tool in 3D design mode
- Selecting a roof in 3D design mode
Choosing a design mode
This guide applies to the easy-pv.co.uk and easy-pv.ie versions of Easy PV. The information provided here may not be accurate for easy-pv.com.
When you first create a project you will get the choice of the which design mode you would like to use. In Easy PV there are four options, each with particular applications.
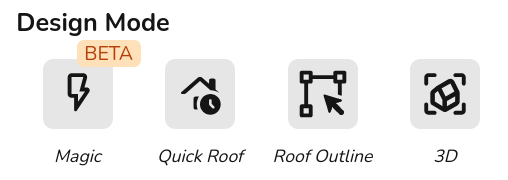
3D
- Create 3D property model by designing the roof from a satellite image (so you will need to zoom into the map or fill in the address before selecting).
- Model nearby buildings or trees that may cast shade on the roofs you're working on to get accurate shade analysis and improve the accuracy of the performance calculations.
Magic BETA
- Create an automatic 3D design, it works out the height and pitch of buildings and identifies any obstructions.
- Three free magic designs per day for standard users and unlimited for Pro.
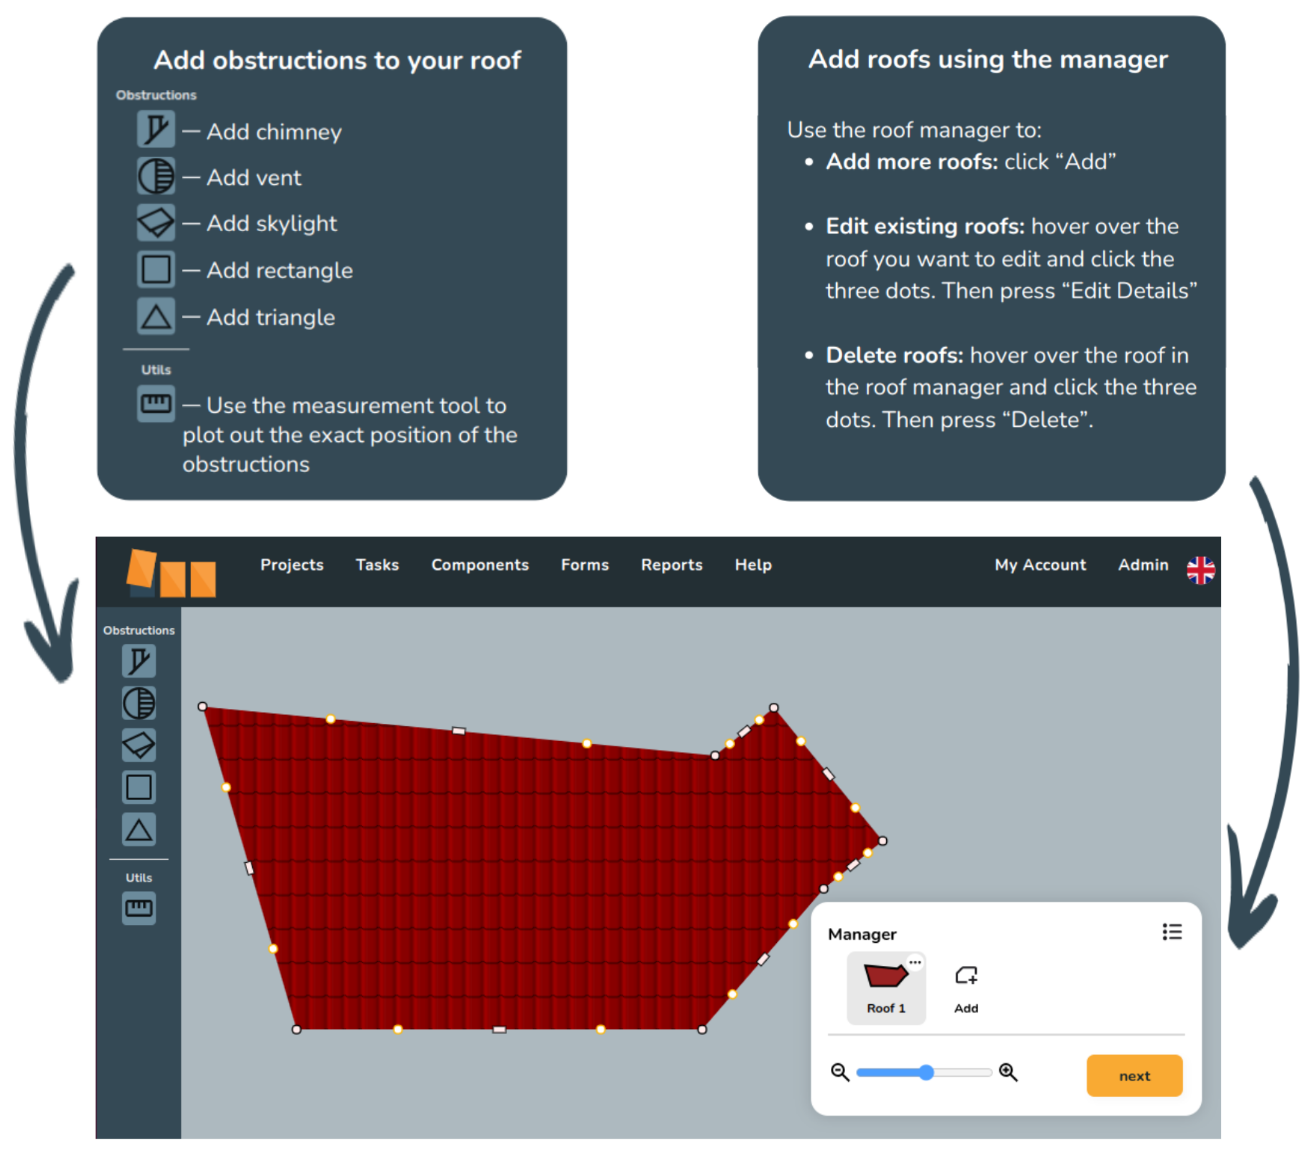
Quick Roof
- Create 2D roof using dimensions, pitch, orientation and tile type, can also spec ground mount systems.
- Does not use satellite imagery so a good option if satellite map it out of date, you're working on a new build property or if the satellite image is too blurry.
Roof outline
- Create 2D roof model by outlining the roof from a satellite image.
- Uses satellite map imagery (so you will need to zoom into the map or fill in the address before selecting) so you can accurately model the roof based on the actual size of the property.
Quick Roof
This guide applies to the easy-pv.co.uk and easy-pv.ie versions of Easy PV. The information provided here may not be accurate for easy-pv.com.
This guide explores Easy PV’s design mode “Quick Roof”, and the various tools at your disposal to create precise and complex roof designs.
Edit via the corner points
Click anywhere on the roof to get the editing points to show. Clicking and dragging the white corner points allows you to resize your roof.
Selecting one of the corner points will bring up three options:
![]() Fixed corner angle: the angle of the corner will stay fixed when you drag it (see below, left).
Fixed corner angle: the angle of the corner will stay fixed when you drag it (see below, left).
![]() Free corner angle (default): corners move freely when dragged (see below, right).
Free corner angle (default): corners move freely when dragged (see below, right).
![]() Delete corner: this removes the corner, e.g. it would turn a rectangular roof into a triangle.
Delete corner: this removes the corner, e.g. it would turn a rectangular roof into a triangle.
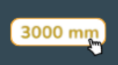
Edit roof dimensions: clicking on the white corners brings up the dimensions for the adjacent sides. If you click on this value, you will be able to input the precise dimensions for that side.
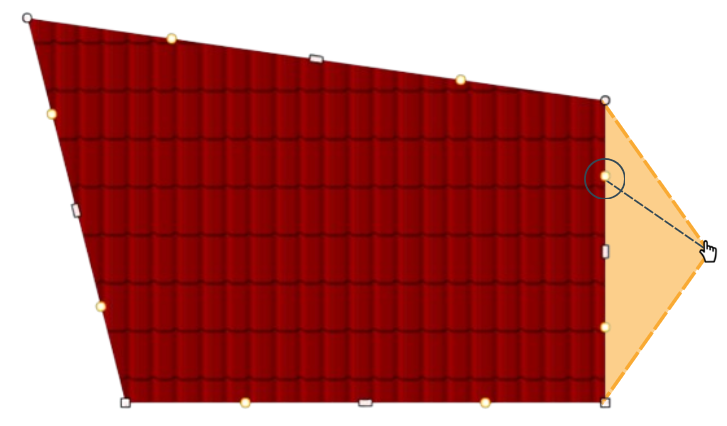
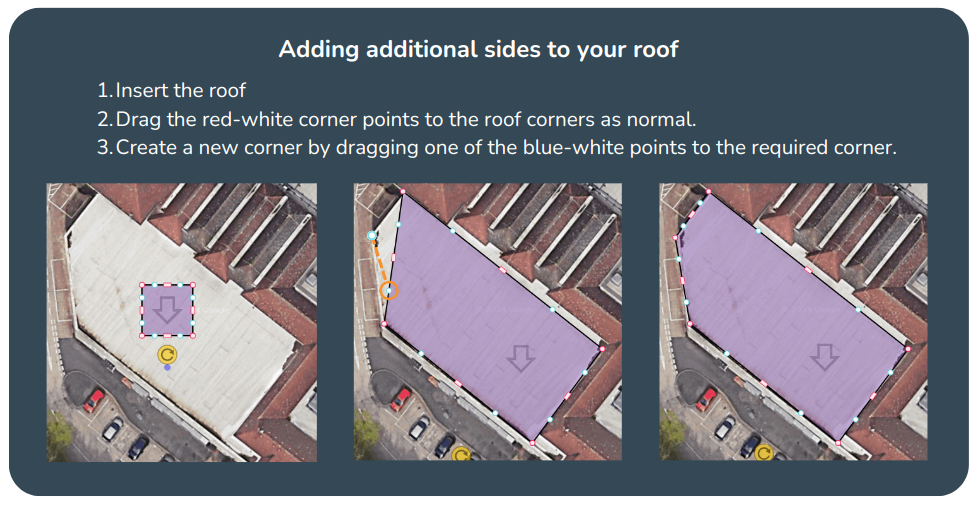
Add corners by dragging the orange points
Clicking and dragging the orange points allows you to add extra roof edges to the roof. This is great for creating unusually shaped roofs.
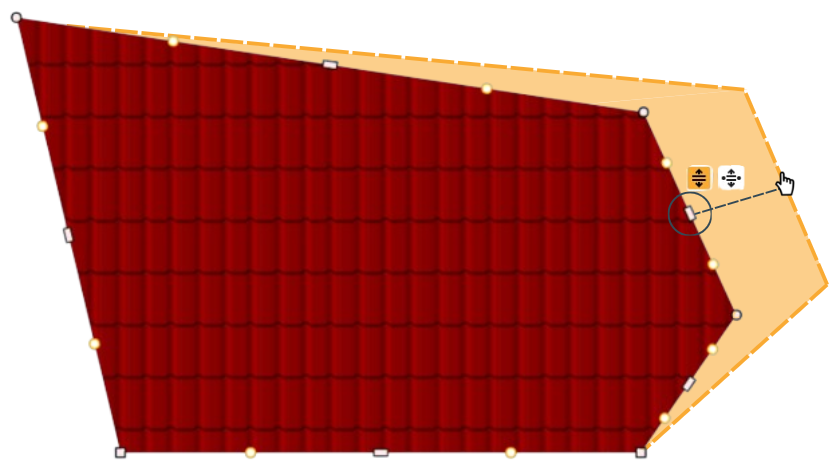
Edit via the white rectangles
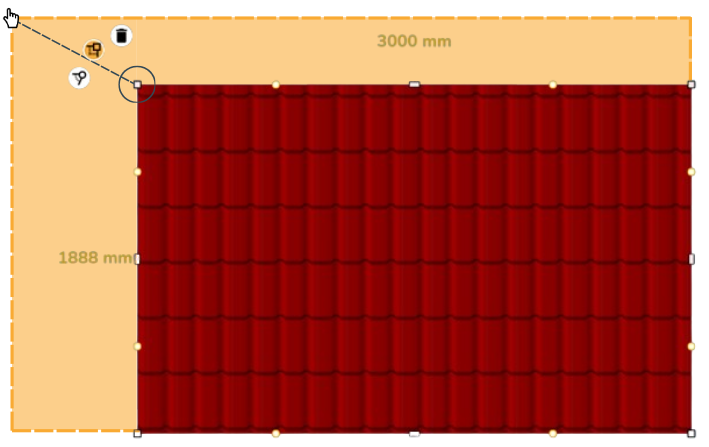
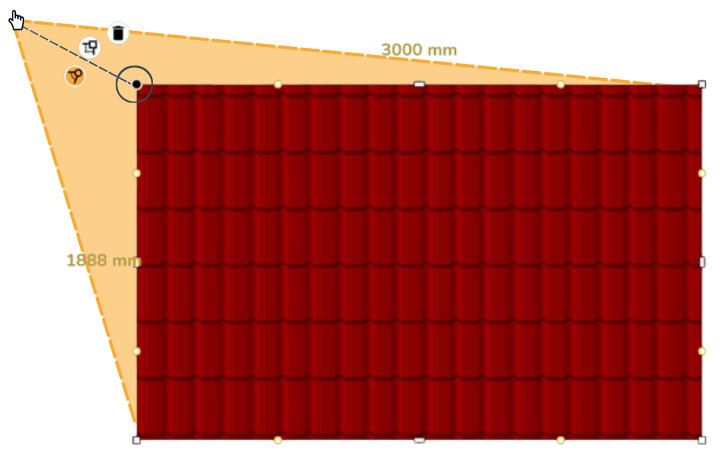
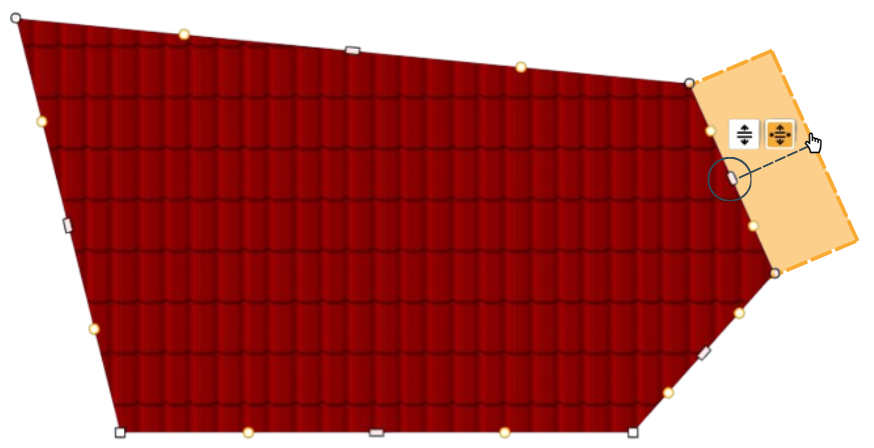
The white rectangle icons on each side allow you to amend the width/height of the roof.
If you click on the white rectangle, it gives you two options:
 Elongates the whole roof (see below, left)
 Creates a new set of corners: drags the selected roof edge out, staying parallel to the adjacent white points (see below, right)
Some final tips for the finished roof
Irregular Building Tool in 3D design mode
This guide applies to the easy-pv.co.uk and easy-pv.ie versions of Easy PV. The information provided here may not be accurate for easy-pv.com.
The irregular building tool allows you to create unusual roof shapes in the 3D design mode. It’s perfect for complex buildings and large commercial projects.
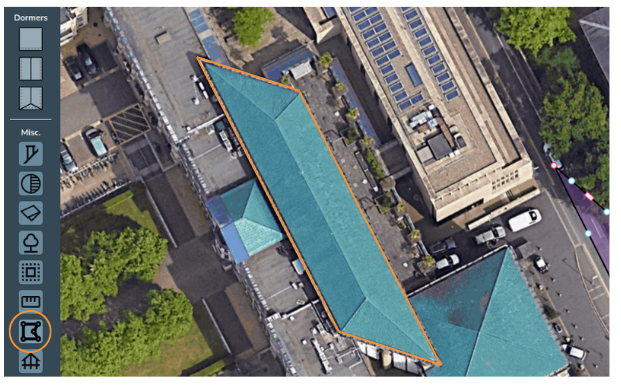
Step 1: Inserting the roof
Scroll down in the left-hand toolbar and select the irregular building tool in the miscellaneous section. In this example, we will plot the highlighted roof below. We will do so by plotting out each roof face one at a time.

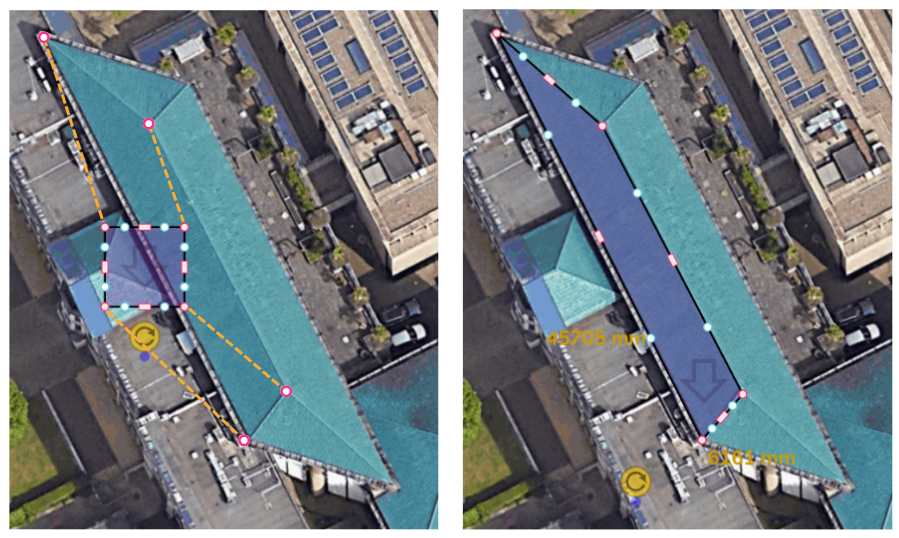
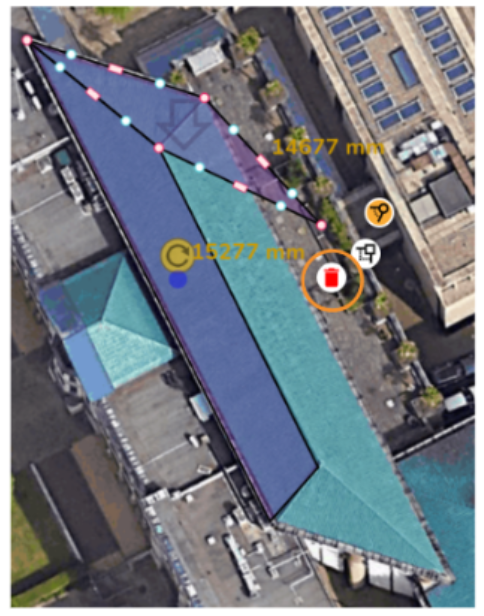
Step 2: Resizing the roof
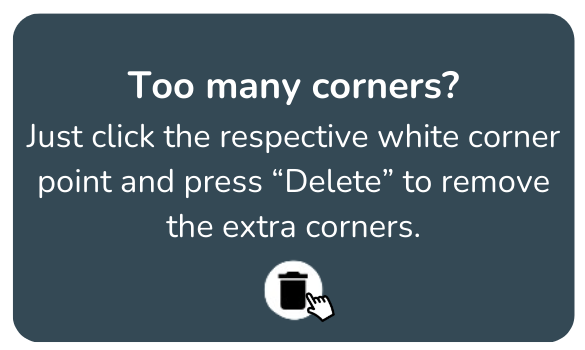
First, we will create the west-facing roof. Start by adding a new irregular roof and then drag each of the pink corner controls to the four corners of the roof face. If you accidentally create too many corners, click on the respective pink corner control and press the bin icon to delete them.
Resizing options if you click on one of the pink corner controls, it will bring up three options:
- Free corner angle (default): corners move freely when dragged, e.g. Step 2.
- Fixed corner angle: the angle of the corner will stay fixed when you drag it (see our Quick Roof guide for more info).
- Delete corner: this removes the corner, e.g. it would turn a rectangular roof into a triangle
|
Input precise roof dimensions Clicking on the white corners also brings up the dimensions for the adjacent sides. If you click on this value, you can input the precise dimensions for that side. |
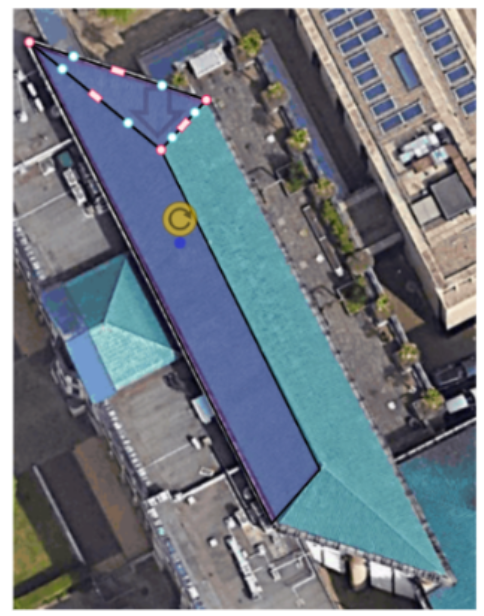
Step 3: Editing the slope direction
The direction that the roof slopes is indicated by the arrow on the roof.
To edit the slope direction, drag the blue dot (it can be a little hard to spot at first!). You will see that this
moves the arrow.
It is useful to watch how the slope changes in the Elevations box. It’s likely you’ll want the gutter line to be completely horizontal. When it becomes horizontal, it will snap into place in the Elevations box.
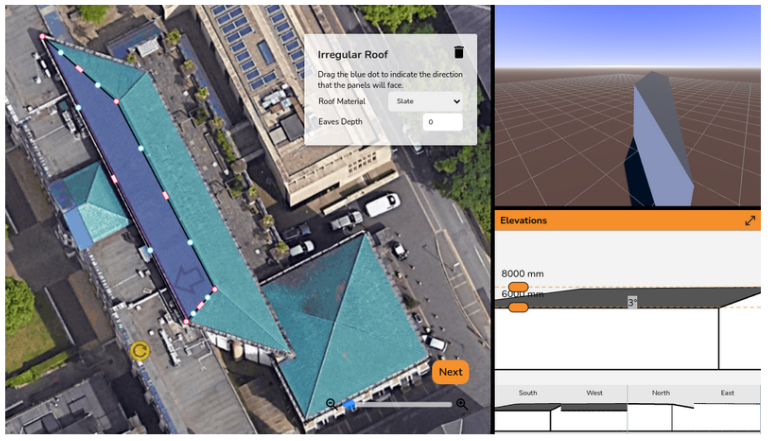
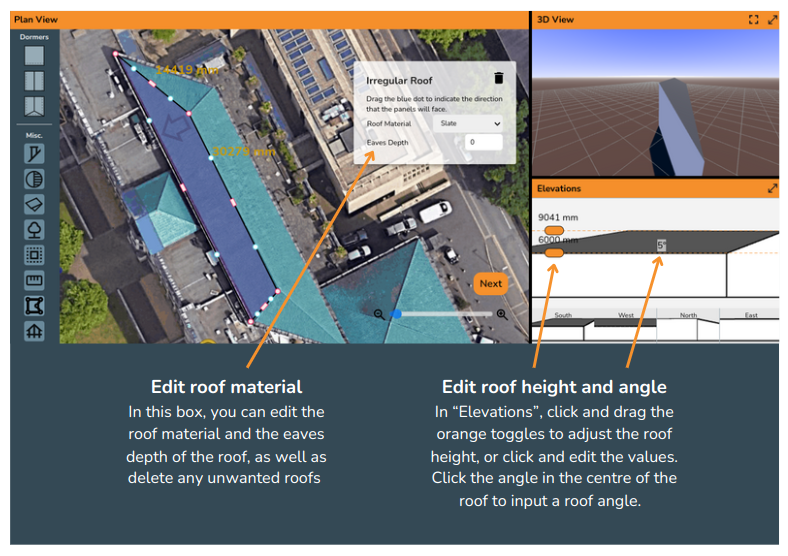
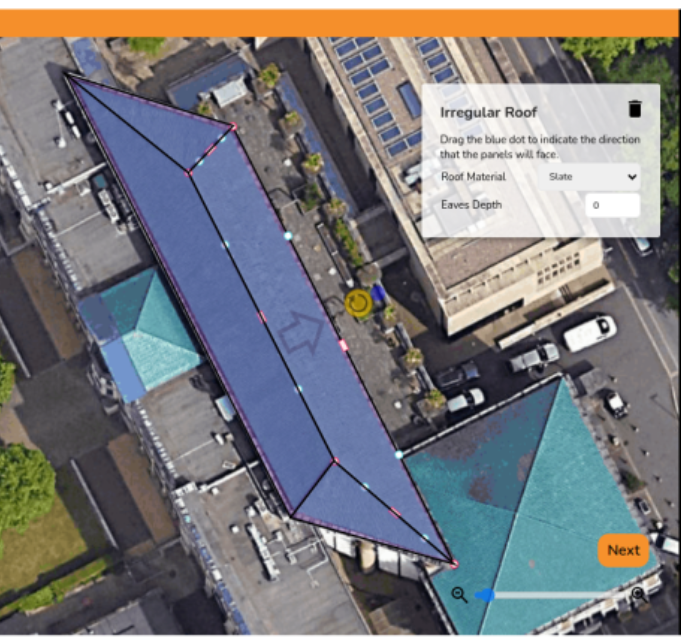
Step 4: Edit roof details
In the same way as the normal 3D design mode, edit the roof height, pitch, material, and eaves depth using the boxes shown below.
Step 5: Creating a triangular roof
You now need to create the other three roofs. To create the triangular roofs, insert a new irregular roof and drag the x3 pink-white points to their respective corners. Then simply delete the remaining corner to turn it into a triangle.
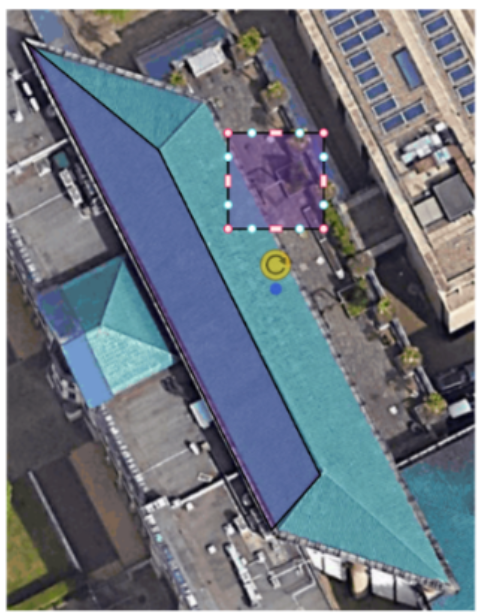
The finished result!
After inserting all four roofs and amending the various roof slopes and heights, we have designed a complete irregular building.
Selecting a roof in 3D design mode
This guide applies to the easy-pv.co.uk and easy-pv.ie versions of Easy PV. The information provided here may not be accurate for easy-pv.com.
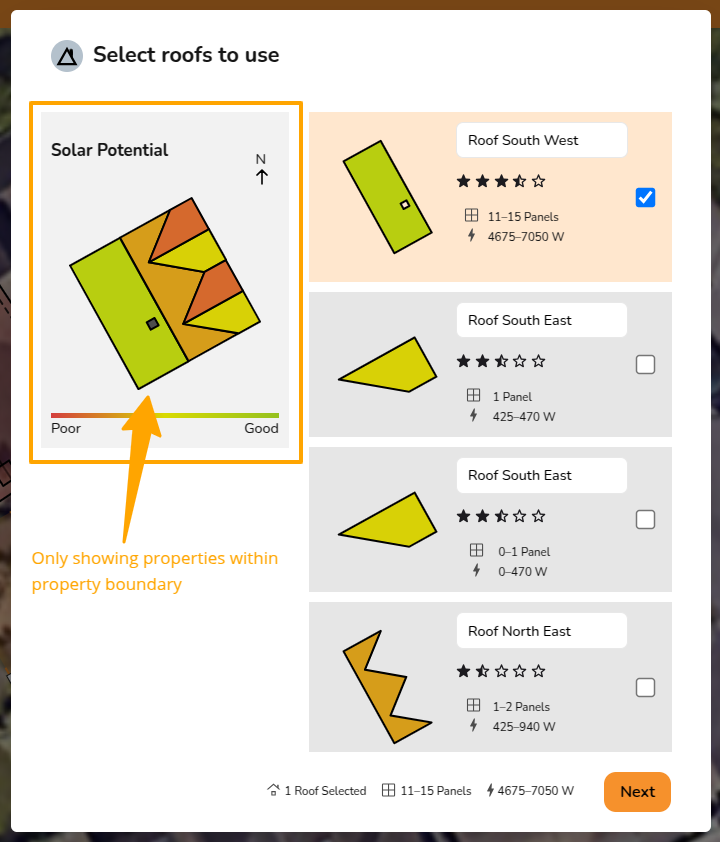
When you finish designing your property in the buildings task, click next and this menu will appear.
Here you will see each roof rated on a scale of poor to good based on our how suitable Easy PV thinks the roof will be for solar. This is based on the size of the roof as well and how much shade will be on the roof based on its pitch and orientation.
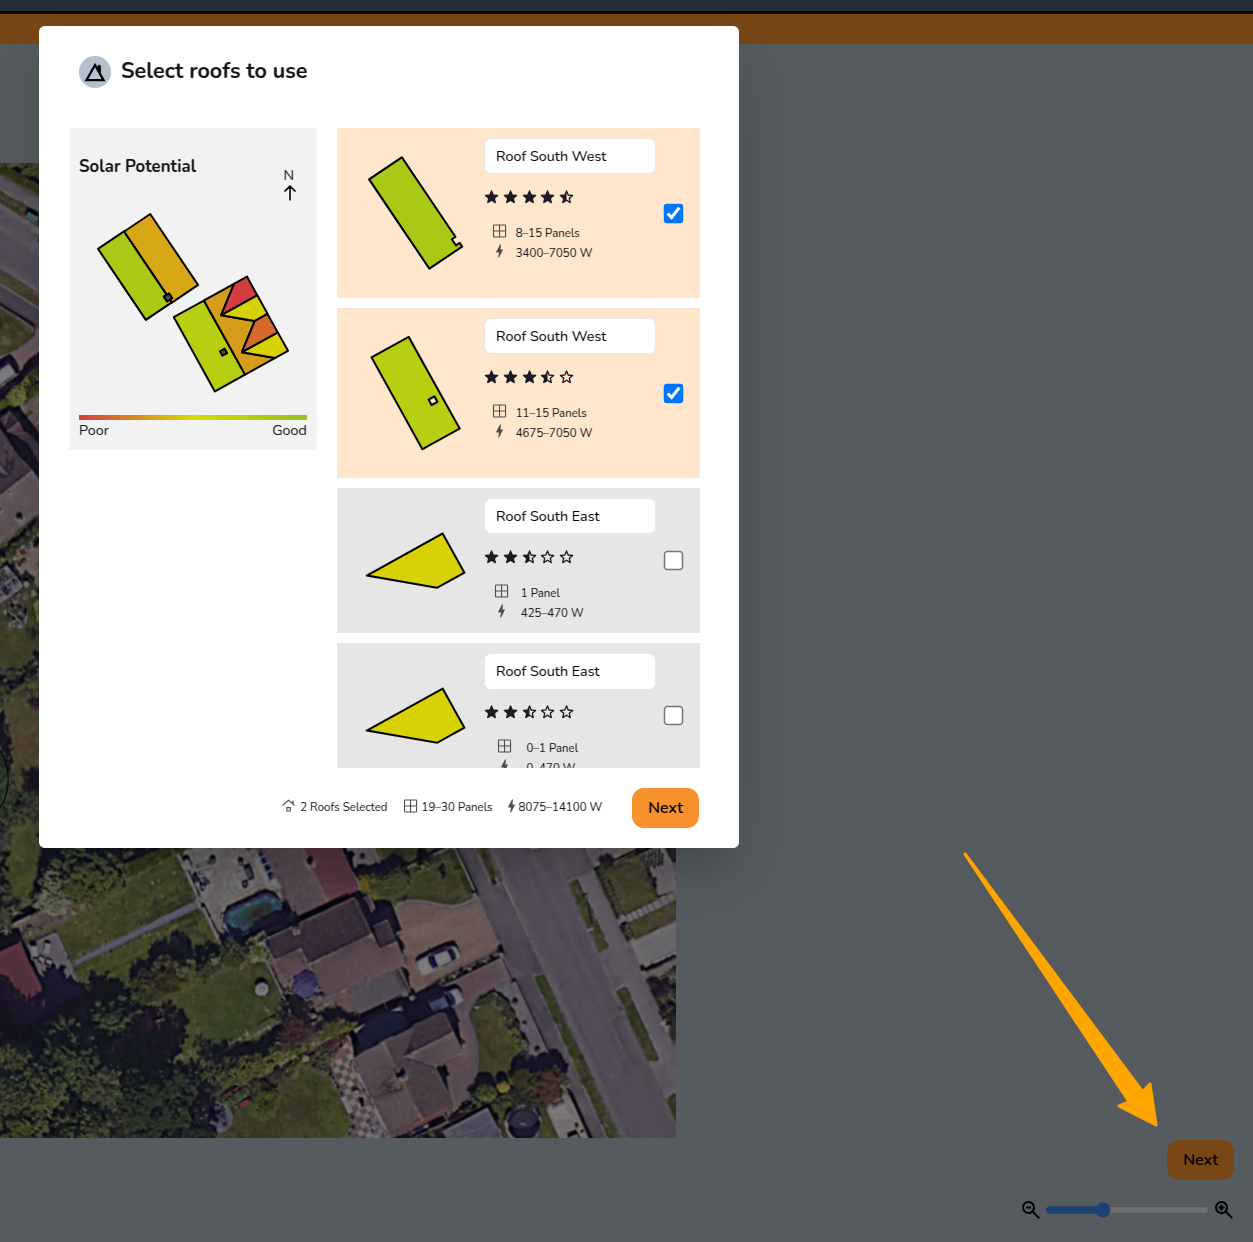
Selecting your roof
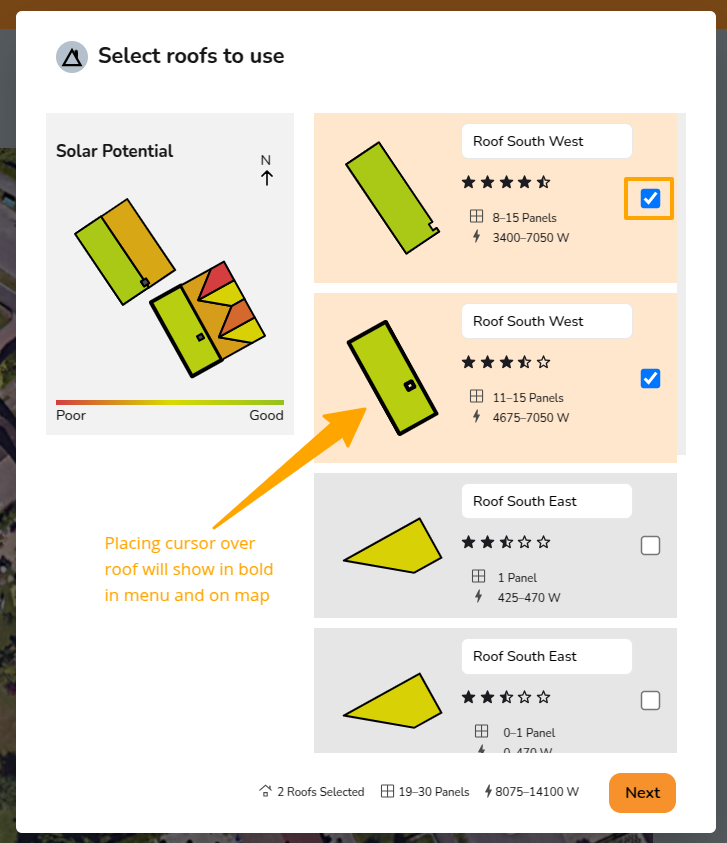
When there is a property boundary, only the roofs within that boundary will show in this menu for maximum ease of selection!