# Reports, documents and emails

# Pro: DNO Application via Connect Direct

Easy PV Pro’s DNO application feature allows you to effortlessly create and submit a DNO application directly based on your Easy PV design. It will take information from your project to pre-populate some of the fields in a specially designed online form.

---

## **Making an Application**

It is possible to begin the DNO application form once you have completed the [design stage of your project](https://help.easy-pv.co.uk/books/panels-inverter-and-electrical) and you have a bill of materials.

On the Project Overview screen, below the kit list you'll see a DNO Application section, click `<strong data-renderer-mark="true">Start</strong>` on the right-hand side:

[![image.png](https://help.easy-pv.co.uk/uploads/images/gallery/2026-07/scaled-1680-/Nql2uiC5QJnIDUjm-image.png)](https://help.easy-pv.co.uk/uploads/images/gallery/2026-07/Nql2uiC5QJnIDUjm-image.png)

This will then open up the form which you can being filling in. Many of the fields will be completed already, particularly if you've already completed the [survey task](https://help.easy-pv.co.uk/books/reports-documents-and-emails/page/pro-survey-and-installation-record-tasks "Pro: Survey and installation record tasks").

*<span class="corp-icon material-symbols-rounded icon-expand mceNonEditable" style="user-select: none;">​</span>Expand the section below for information on the form sections*

<details id="bkmrk-further-info-on-form"><summary>DNO form details</summary>

### DNO form

#### MPAN number

Firstly you need to fill in the customer’s unique **MPAN number**. This is the 13 digit unique identifier found on the customer's energy bill.

Once this is filled in, Easy PV will add the correct DNO for that address (this can also be set manually). If your DNO is not listed, you can select "Other/IDNO". Connect Direct will use the MPAN to ensure that the application is sent to the correct DNO.

#### Customer info

Your customer’s name, address, and contact details along with your own details will be pre-populated here (provided you have entered this data earlier in the design phase). These can also be edited or added here if required.

#### Device information  


Easy PV will also have pre-filled the device type and unique reference number for the component that has been used in your design.

**At this point, you need to choose an Installation Date. This date must** **be in the future**, as only pre-installation applications are supported by Connect Direct.

It is then possible to input details of any devices that may already be installed at the customer’s property, for example, an existing AC charger.

#### Supply details

For the last section ‘Supply Details’, all of these fields will need to be filled in by you as the user if they haven't already been completed in the survey task.<span style="background-color: rgb(0, 0, 0);"><mark aria-details="4ed93dc3-0f76-475f-a4c8-6afd6e644c2f" aria-expanded="false" class="cc-1ujgomf" data-has-focus="false" data-id="4ed93dc3-0f76-475f-a4c8-6afd6e644c2f" data-mark-annotation-state="active" data-mark-annotation-type="inlineComment" data-mark-type="annotation" data-renderer-mark="true" id="bkmrk--2" role="button" tabindex="0"> </mark></span>

You need to upload a clear image of the 'cut-out' of the electrical supply for the property, something like the image shown [here.](https://www.energynetworks.org/assets/images/Resource%20library/LCT_Cut-Out%20Rating%20Guidance%20to%20EV-HP%20Installers%20v1.1.docx.pdf) This image will then be verified and checked automatically, so it will need to be accurate

</details>Once all other fields are completed, click `<strong>Submit application</strong>`. This will automatically send the information as a formal application to the designated DNO. You can access your completed application from the **Forms drop-down menu** at the top of the project.

---

## **Status of the application** 

You will receive updates from the DNO directly about whether the application has been rejected or approved. You can also view the status of your application from the project overview screen.

---

## **Amending an Application**

In most circumstances, an application can't be amended. If you make an error in your application, you should submit a new application.

If your application has already been approved by the DNO, and you have not yet submitted commissioning details, it can be amended. You can do this by visiting the project overview, and clicking the Amend Application button:

<div class="rich-media-item mediaSingleView-content-wrap image-center cc-19af9e4" data-layout="center" data-node-type="mediaSingle" data-renderer-start-pos="2705" data-width="636" data-width-type="pixel" id="bkmrk--5"><div class="cc-18h2g1o"><div data-node-type="media" data-renderer-start-pos="2706"><div class="new-file-experience-wrapper cc-vwt5jj" data-media-vc-wrapper="true" data-testid="media-card-view" id="bkmrk--6"><div class="media-file-card-view cc-z40uwk" data-test-media-name="https://help.easy-pv.co.uk/uploads/images/gallery/2024-10/scaled-1680-/Y01aiLGOUJFk1Y8O-image.png" data-test-source="external" data-test-status="complete" data-testid="media-file-card-view">![image.png](https://help.easy-pv.co.uk/uploads/images/gallery/2024-10/scaled-1680-/Y01aiLGOUJFk1Y8O-image.png)</div></div></div></div></div>This will return you to the application form, where you can change your answers to any of the questions. Please note that the MPAN, Address and Post Code must all remain the same as the original application. Unlike when making a new application, it is allowed for the installation date to be in the past.

Once you have made your amendments, you can press submit application, and the amendment will be sent to the DNO to be reviewed again. You can track the status of the amendment on the project overview page.

---

## **Sending Commissioning Details**

Once the device has been installed on site, you should submit commissioning information to the DNO. You can do this by visiting the project overview, and clicking the 'Send Commissioning Details' button:

<div class="rich-media-item mediaSingleView-content-wrap image-center cc-1g9j8g0" data-layout="center" data-node-type="mediaSingle" data-renderer-start-pos="3455" data-width="520" data-width-type="pixel" id="bkmrk--8"><div class="cc-18h2g1o"><div data-node-type="media" data-renderer-start-pos="3456"><div class="new-file-experience-wrapper cc-vwt5jj" data-media-vc-wrapper="true" data-testid="media-card-view" id="bkmrk--9"><div class="media-file-card-view cc-z40uwk" data-test-media-name="https://help.easy-pv.co.uk/uploads/images/gallery/2024-10/scaled-1680-/O24tAfD3Mzc0SnfE-image.png" data-test-source="external" data-test-status="complete" data-testid="media-file-card-view">![image.png](https://help.easy-pv.co.uk/uploads/images/gallery/2024-10/scaled-1680-/O24tAfD3Mzc0SnfE-image.png)</div></div></div></div></div>The information required depends on the the size of the application - Easy PV will automatically determine which form to use, based on the information sent in the original application. Simply answer all questions presented to you, and press "submit details". You can track the progress of your submission from the project overview.

### Adding Attachments 

For larger applications, you must provide a circuit diagram for each power generating module. These can be uploaded from the Project Overview page, using the Upload button:

<div class="rich-media-item mediaSingleView-content-wrap image-center cc-ysrwwp" data-layout="center" data-node-type="mediaSingle" data-renderer-start-pos="3984" data-width="530" data-width-type="pixel" id="bkmrk--11"><div class="cc-czzn8l"><div data-node-type="media" data-renderer-start-pos="3985"><div class="new-file-experience-wrapper cc-1ns6olg" data-media-vc-wrapper="true" data-testid="media-card-view" id="bkmrk--12"><div class="media-file-card-view cc-z40uwk" data-test-media-name="https://help.easy-pv.co.uk/uploads/images/gallery/2024-10/scaled-1680-/j5BNGONcgYzGvjoL-image.png" data-test-source="external" data-test-status="complete" data-testid="media-file-card-view">![image.png](https://help.easy-pv.co.uk/uploads/images/gallery/2024-10/scaled-1680-/j5BNGONcgYzGvjoL-image.png)</div></div></div></div></div>Alternatively, the Schematic tool in Easy PV will automatically generate a circuit diagram based on your design. Make any necessary adjustments to the diagram, and press the PDF button in the schematic task to generate a PDF that can be saved to the project.

Once you have uploaded or saved a file to your project, you should be able to select it from the drop-down, and complete your submission.

[![image.png](https://help.easy-pv.co.uk/uploads/images/gallery/2024-11/scaled-1680-/17rUbTdEwpvHV5AH-image.png)](https://help.easy-pv.co.uk/uploads/images/gallery/2024-11/17rUbTdEwpvHV5AH-image.png)

---

## <span class="corp-icon material-symbols-rounded icon-support mceNonEditable" style="user-select: none;">​</span>Still Need Help?

If you've got further questions, get in touch with our support team at **help@easy-pv.co.uk** (UK) or **help@easy-pv.ie** (IE). *If you are experiencing a bug, to help us look into your issue faster, please include the email address of your account, the name of the project and screenshots of any unexpected behaviour.*

# Pro: Survey and installation record tasks

The survey task allows the surveyor to enter all information required to plan out the installation in one location. Surveyors can answer pre-set questions, upload and annotate images and add comments. Information is pulled through from the survey to a scaffolding request form and presented in a PDF report. The installation record allows you to similarly keep a consistent record of your installs should any issues arise in the future.

---

## Completing the Survey and Installation record

The **Survey** and **Installation record tasks** can be found from the **Tasks drop-down menu** or on the left-hand side of the project overview page.

Both forms are divided into sections that can be viewed and navigated between using the right-hand menu.

[![image.png](https://help.easy-pv.co.uk/uploads/images/gallery/2026-07/scaled-1680-/v7Rr7BbCavx66YPg-image.png)](https://help.easy-pv.co.uk/uploads/images/gallery/2026-07/v7Rr7BbCavx66YPg-image.png)

On the left, for each section you'll see each question to answer:

[![image.png](https://help.easy-pv.co.uk/uploads/images/gallery/2025-11/scaled-1680-/rFENcjCJ07HIE4E3-image.png)](https://help.easy-pv.co.uk/uploads/images/gallery/2025-11/rFENcjCJ07HIE4E3-image.png)

### Uploading and annotating an image

There are various places throughout the survey and installation record where pictures can be uploaded and annotated. Click on the **`Upload Images`** box and it will bring up the option to upload a picture from your files. If you are on a mobile or tablet device it will give you the option to take a photo. You can repeat this step to add multiple images.

##### [![image.png](https://help.easy-pv.co.uk/uploads/images/gallery/2024-09/scaled-1680-/jLcPo9uBJHo7vxH1-image.png)](https://help.easy-pv.co.uk/uploads/images/gallery/2024-09/jLcPo9uBJHo7vxH1-image.png)

<p class="callout warning">**Warning**: HEIC files are not supported at this time. If your phone, tablet, or camera is set to save pictures in this file format, please change this to save .jpg files in settings.</p>

Once the file has been uploaded, you can **click on the image** to bring up the **annotation options**.

[![image.png](https://help.heatpunk.co.uk/uploads/images/gallery/2025-01/scaled-1680-/CIv88TAvMJHtbhMI-image.png)](https://help.heatpunk.co.uk/uploads/images/gallery/2025-01/CIv88TAvMJHtbhMI-image.png)
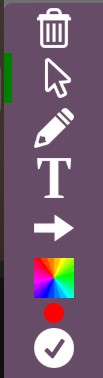
- Use the **bin** button to delete annotations or the whole image.
- The **cursor** lets you select annotations you have added to the image.
- The **pencil** allows you to draw or write free-form.
- The **T** is used to create a text box.
- The **arrow** lets you draw an arrow.
- The **colour box** is where you can change the colour of annotations.
- The **tick mark** saves your annotations and exits the annotations editor.

The green bar at the left indicates which tool you are currently using.


## Accessing your survey or installation record as a PDF report

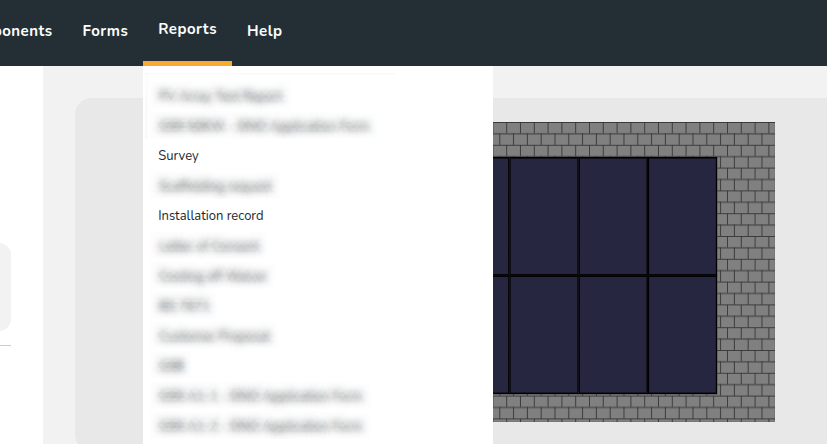
After the form is complete, the report can be found in the **Reports** drop-down menu.

[![image.png](https://help.easy-pv.co.uk/uploads/images/gallery/2025-11/scaled-1680-/WLpCWajpuB2u2yX1-image.png)](https://help.easy-pv.co.uk/uploads/images/gallery/2025-11/WLpCWajpuB2u2yX1-image.png)
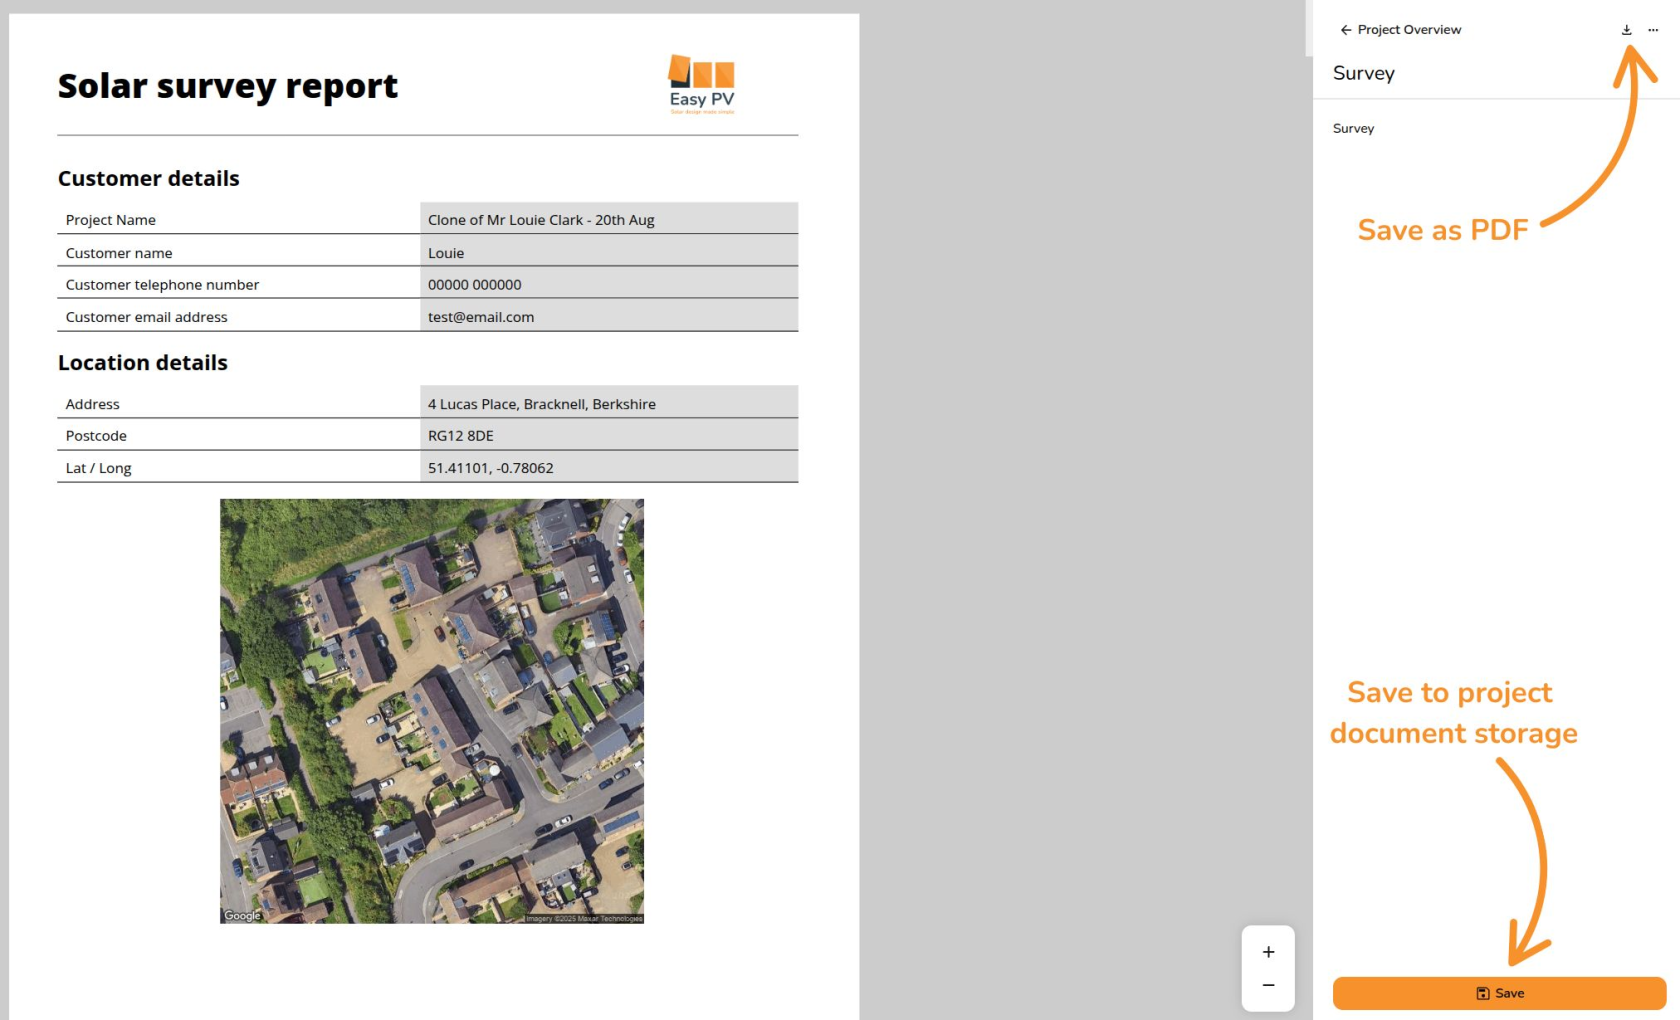
You can then scroll through the document with all your inputs, save as a PDF or save to your project's document storage.

[![image.png](https://help.easy-pv.co.uk/uploads/images/gallery/2025-11/scaled-1680-/qklKo5zX9O0ajVPU-image.png)](https://help.easy-pv.co.uk/uploads/images/gallery/2025-11/qklKo5zX9O0ajVPU-image.png)
---

## <span class="corp-icon material-symbols-rounded icon-support mceNonEditable" style="user-select: none;">​</span>Want to know more?


- **Related article**: [Help your team work more efficiently](https://help.easy-pv.co.uk/books/news-and-updates/page/easy-pv-pro-help-your-team-work-more-efficiently)
- **Further guides**: Take a look at our [Document Management](https://help.easy-pv.co.uk/books/reports-documents-and-emails/page/pro-document-management) or [Emailing](https://help.easy-pv.co.uk/books/reports-documents-and-emails/page/pro-sending-emails-from-easy-pv) guides
- **Live training:** [Book onto a live demo session](https://cal.com/easy-pv/pro-training) to see this feature in action

**Contact Support:** If you've got further questions, get in touch with our support team at **help@easy-pv.co.uk** (UK) or **help@easy-pv.ie** (IE). *If you are experiencing a bug, to help us look into your issue faster, please include the email address of your account, the name of the project and screenshots of any unexpected behaviour.*

<div class="pm-table-container with-shadow-observer" data-layout="custom" id="bkmrk-important%3A-.heic-fil"></div>

# Pro: Document Management

With Easy PV Pro's document management options, all project files – surveys, proposals, reports, customer documents – can be stored in one place, with no need for a separate QMS system. This allows you to keep track of everything you need for a project in one place. Documents uploaded here can also be attached to any [emails sent within the Easy PV](https://help.easy-pv.co.uk/books/reports-documents-and-emails/page/pro-sending-emails-from-easy-pv "Pro: Emailing").

---

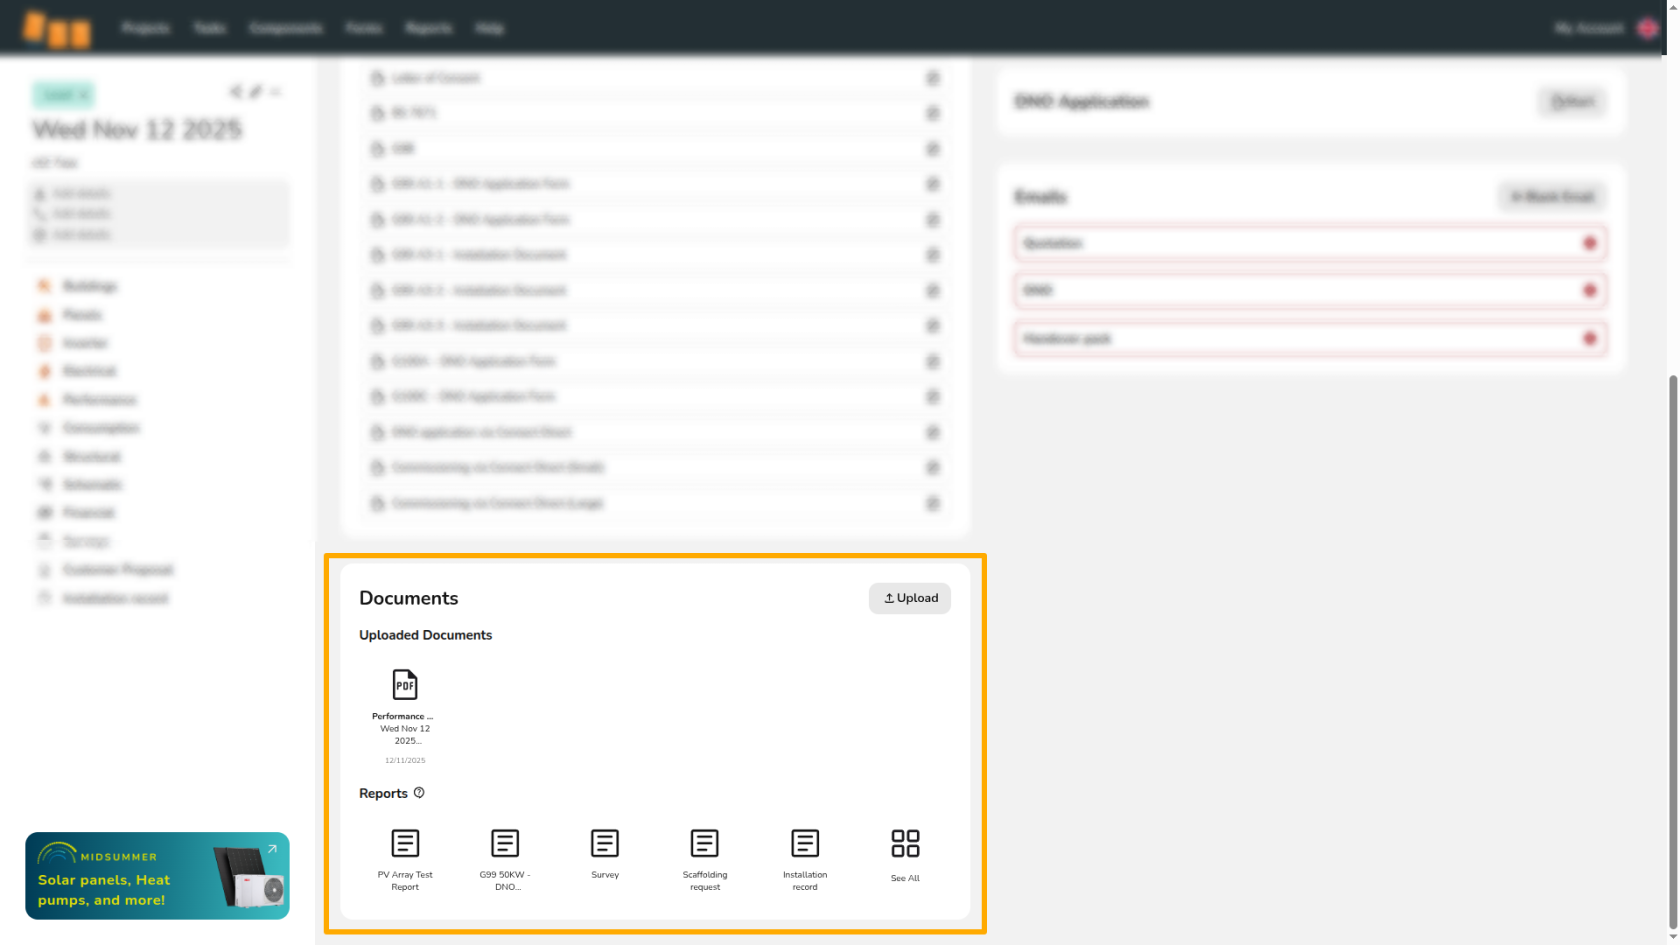
The document management section can be found at the bottom left of the project overview.

**[![image.png](https://help.easy-pv.co.uk/uploads/images/gallery/2025-11/scaled-1680-/w2JGBCgnPu6z24J8-image.png)](https://help.easy-pv.co.uk/uploads/images/gallery/2025-11/w2JGBCgnPu6z24J8-image.png)**
## **Uploading files to the document manager**

Files can be saved directly from a project or uploaded from your device. These can also be sent in emails through Easy PV. If you have team files you'd like accessible on all projects when sending emails, you can upload these to your team uploads.

### Saving an Easy PV report to the document manager

When previewing any report in Easy PV, on the **right-hand** sidebar there will be an orange **`Save`** button at the bottom. Click this to save the file to the document manager.

[![image.png](https://help.easy-pv.co.uk/uploads/images/gallery/2025-11/scaled-1680-/OFxArVahIqONDbiM-image.png)](https://help.easy-pv.co.uk/uploads/images/gallery/2025-11/OFxArVahIqONDbiM-image.png)
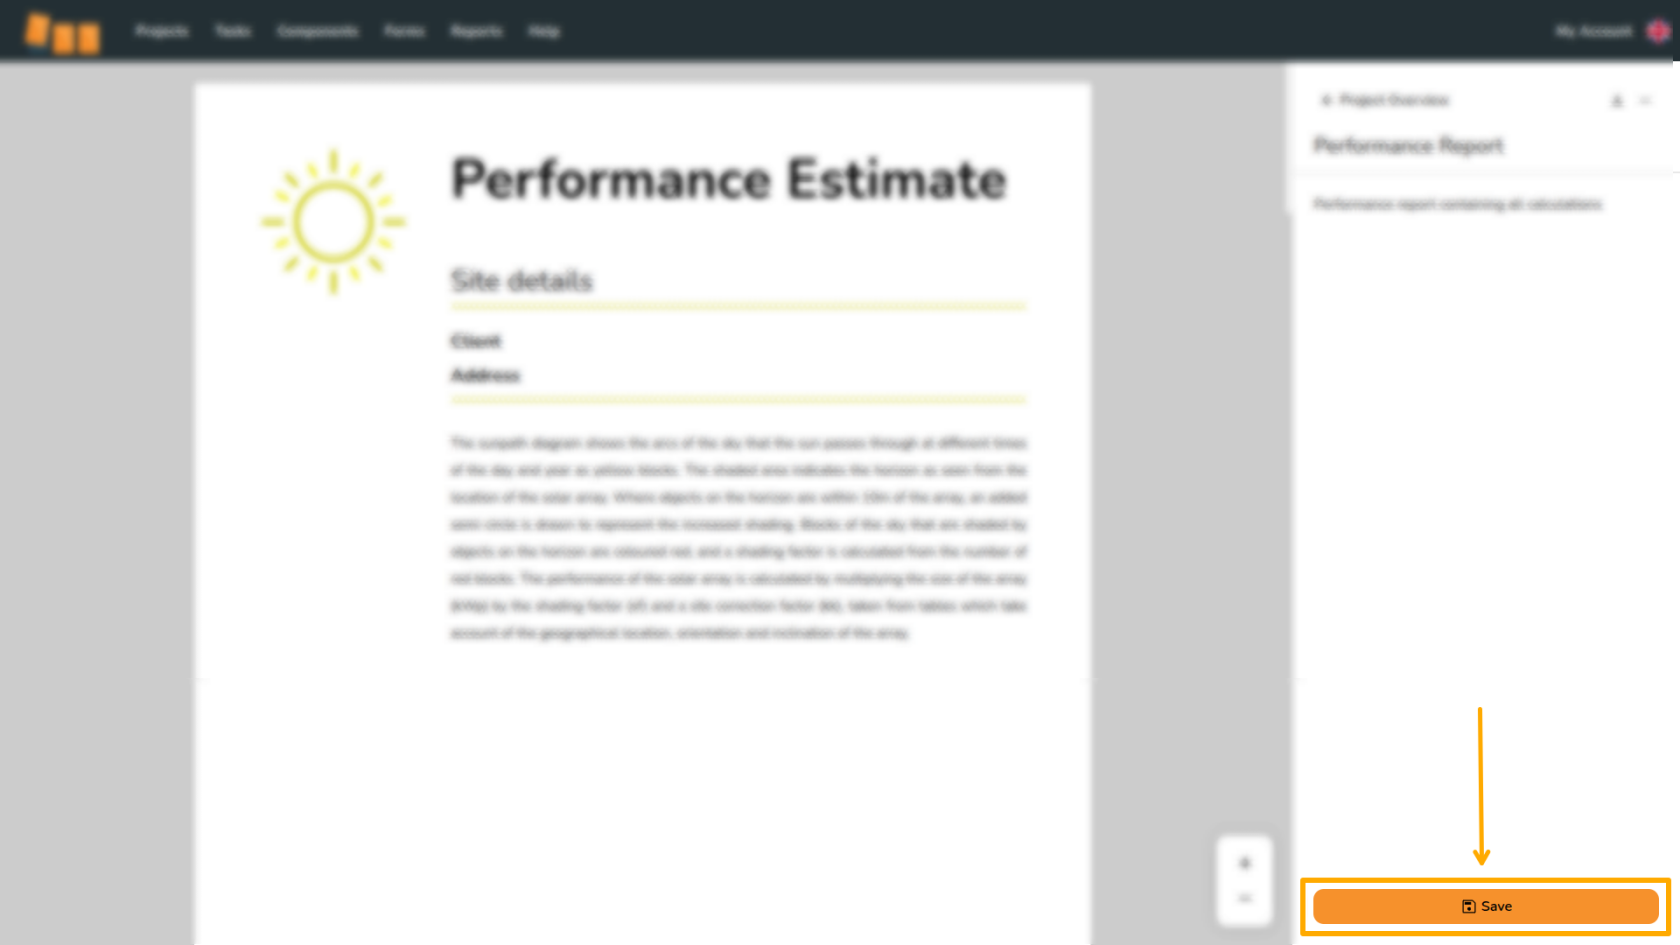
<p class="callout info">**Note**: If you make changes to a document, you will need to re-save it for the updates to appear in the document manager. When re-saving a document, the **`Save`** button will be grey and saving will override previously saved version. </p>

### Upload a document from your device

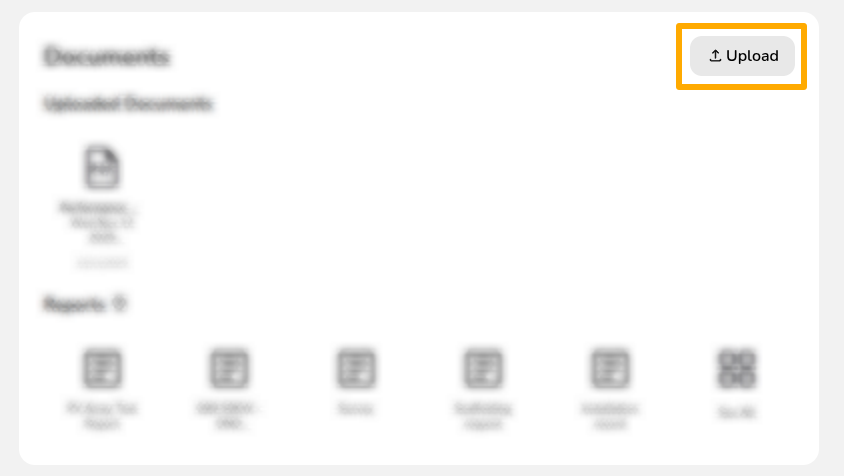
To upload a document from your device, click `<strong>Upload</strong>` . Then use the `<strong data-renderer-mark="true">Upload File</strong>` button to find the document you wish to upload.

[![image.png](https://help.easy-pv.co.uk/uploads/images/gallery/2025-11/scaled-1680-/knSK0fQwA4cIcavX-image.png)](https://help.easy-pv.co.uk/uploads/images/gallery/2025-11/knSK0fQwA4cIcavX-image.png)
---

## Options on saved files

[![image.png](https://help.easy-pv.co.uk/uploads/images/gallery/2025-11/scaled-1680-/FhQcfz1hWcLSZmjx-image.png)](https://help.easy-pv.co.uk/uploads/images/gallery/2025-11/FhQcfz1hWcLSZmjx-image.png)
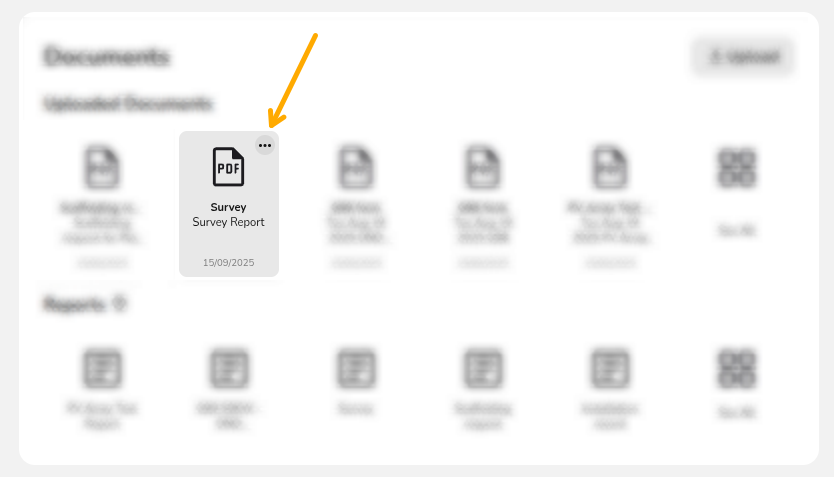
To edit the details on any saved files, click the **⋯ three dots**. You will then see the following options:

- **[![Edit.jpg](https://help.easy-pv.co.uk/uploads/images/gallery/2025-11/scaled-1680-/6M6gz1NJneGPPmZb-edit.jpg)](https://help.easy-pv.co.uk/uploads/images/gallery/2025-11/6M6gz1NJneGPPmZb-edit.jpg) Rename** Change the name of the file. Note that the file name will display if it's sent in any emails in Easy PV
- **[![Switch.jpg](https://help.easy-pv.co.uk/uploads/images/gallery/2025-11/scaled-1680-/Tq74w8GDZVKo8Md8-switch.jpg)](https://help.easy-pv.co.uk/uploads/images/gallery/2025-11/Tq74w8GDZVKo8Md8-switch.jpg)Reassign** Each file you upload has a type, this is used when [sending emails in Easy PV](https://help.easy-pv.co.uk/books/reports-documents-and-emails/page/emailing "Emailing")
- **[![Download.jpg](https://help.easy-pv.co.uk/uploads/images/gallery/2025-11/scaled-1680-/wmZ0JHkpTpkgZIgN-download.jpg)](https://help.easy-pv.co.uk/uploads/images/gallery/2025-11/wmZ0JHkpTpkgZIgN-download.jpg)Download** Download any of the files you’ve added to your project to your device
- [![Delete Red.jpg](https://help.easy-pv.co.uk/uploads/images/gallery/2025-11/scaled-1680-/4qYOMQwLrGzZWDr4-delete-red.jpg)](https://help.easy-pv.co.uk/uploads/images/gallery/2025-11/4qYOMQwLrGzZWDr4-delete-red.jpg)**Delete**  
    This will delete the saved version of the document from the file management section of your project

---

## <span class="corp-icon material-symbols-rounded icon-support mceNonEditable" style="user-select: none;">​</span>Want to know more?


- **Articles**: [Help your team work more efficiently](https://help.easy-pv.co.uk/books/news-and-updates/page/easy-pv-pro-help-your-team-work-more-efficiently)
- **Further guides**: Take a look at our [E-signing](https://help.easy-pv.co.uk/books/reports-documents-and-emails/page/pro-e-signing) or [Emailing](https://help.easy-pv.co.uk/books/reports-documents-and-emails/page/pro-sending-emails-from-easy-pv) guides
- **Live training:** [Book onto a live demo session](https://cal.com/easy-pv/pro-training) to see this feature in action

**Contact Support:** If you've got further questions, get in touch with our support team at **help@easy-pv.co.uk** (UK) or **help@easy-pv.ie** (IE). *If you are experiencing a bug, to help us look into your issue faster, please include the email address of your account, the name of the project and screenshots of any unexpected behaviour.*

# Pro: Sending emails from Easy PV

With pro, you have the option to send emails without needing to leave Easy PV. This includes sending e-signing links and uploading any attachments from your project or team documents.

---

## Sending emails in Easy PV 

Emails can be sent from the templates in the project overview or from within individual documents.

<p class="callout warning">**Warning**: If you'd like to [send a document for e-signing](https://help.easy-pv.co.uk/books/reports-documents-and-emails/page/pro-e-signing "Pro: E-signing"), these must be sent from within individual documents. See below. </p>

<div class="rich-media-item mediaSingleView-content-wrap image-center cc-pf9jv" data-layout="center" data-node-type="mediaSingle" data-renderer-start-pos="128" data-width="760" data-width-type="pixel" id="bkmrk--1"></div>### Emails from the project overview

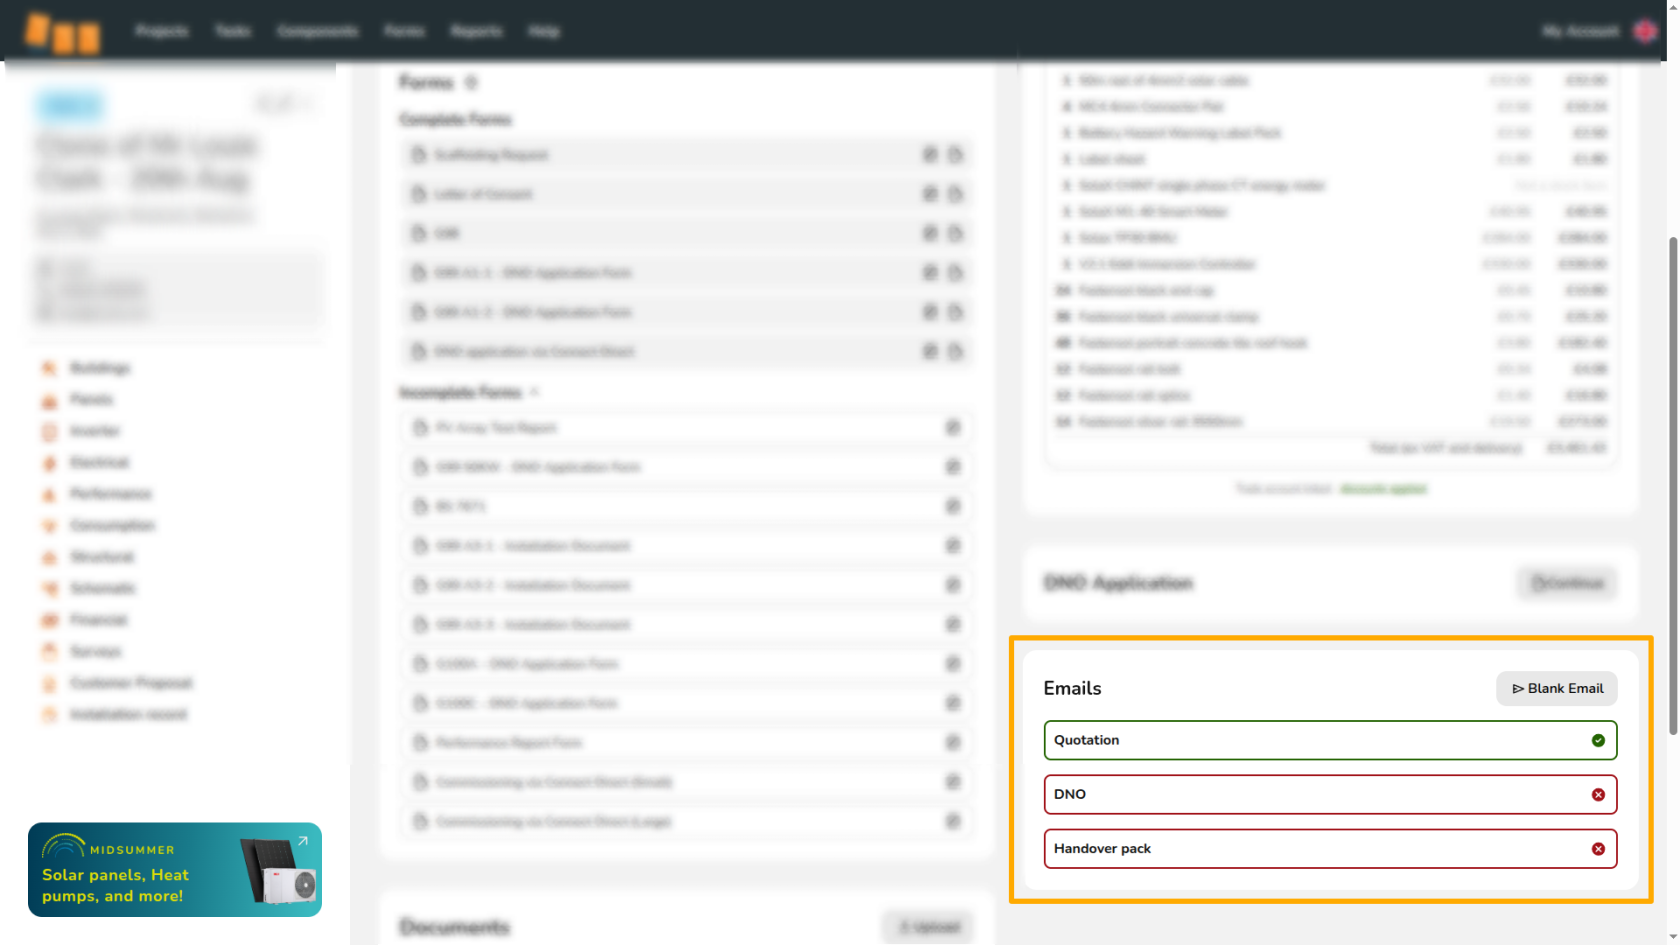
You can access the email management section via the project overview. Here you can keep track of emails that have been sent. Emails that have not yet been sent will be outlined in red with a cross. Once you have sent an email, it will be outlined in green with a tick.

To send emails from this section just click on the one you'd like to send or `<strong>Blank Email</strong>` and follow the [steps below](https://help.easy-pv.co.uk/link/81#bkmrk-editing-and-sending-).

[![image.png](https://help.easy-pv.co.uk/uploads/images/gallery/2025-11/scaled-1680-/d87Ax9IKAaYrSOHa-image.png)](https://help.easy-pv.co.uk/uploads/images/gallery/2025-11/d87Ax9IKAaYrSOHa-image.png)
#### Required attachments

Emails from the project overview each have certain required attachments. If you have already [uploaded the file to the project](https://help.easy-pv.co.uk/books/reports-documents-and-emails/page/pro-document-management "Pro: Document Management"), these will automatically attach.

<p class="callout info">**Note**: If you would like to use a different document to one generated in Easy PV, for example you would like to use a different schematic, then you can [upload this to the document management](https://help.easy-pv.co.uk/books/reports-documents-and-emails/page/pro-document-management#bkmrk-upload-a-document-fr) and [reassign the type](https://help.easy-pv.co.uk/books/reports-documents-and-emails/page/pro-document-management#bkmrk-view%2C-rename%2C-downlo) to 'Schematic'. After doing this, it will automatically attach to any emails that require a schematic. </p>

<span class="corp-icon material-symbols-rounded icon-readmore mceNonEditable" style="user-select: none;">​</span>**Learn more**: [Document management](https://help.easy-pv.co.uk/books/reports-documents-and-emails/page/pro-document-management "Pro: E-signing")

### Emails for e-signing 

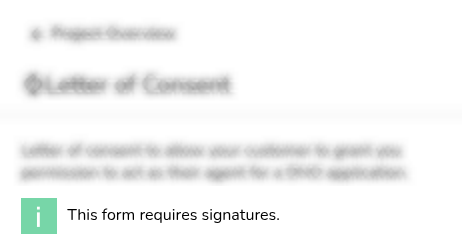
Documents that can be sent for e-signing will display this in the document form:

[![image.png](https://help.easy-pv.co.uk/uploads/images/gallery/2025-11/scaled-1680-/psVFFq2i5FONQy8H-image.png)](https://help.easy-pv.co.uk/uploads/images/gallery/2025-11/psVFFq2i5FONQy8H-image.png)
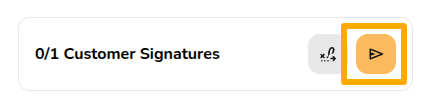
When you generate the PDF, you will then see the option in the bottom left to send the e-signing link as an email:

[![image.png](https://help.easy-pv.co.uk/uploads/images/gallery/2025-11/scaled-1680-/3EB411XSdFWisVaG-image.png)](https://help.easy-pv.co.uk/uploads/images/gallery/2025-11/3EB411XSdFWisVaG-image.png)
<span class="corp-icon material-symbols-rounded icon-readmore mceNonEditable" style="user-select: none;">​</span>**Learn more**: [E-signing](https://help.easy-pv.co.uk/books/reports-documents-and-emails/page/pro-e-signing "Pro: E-signing")

---

## Editing and sending an email

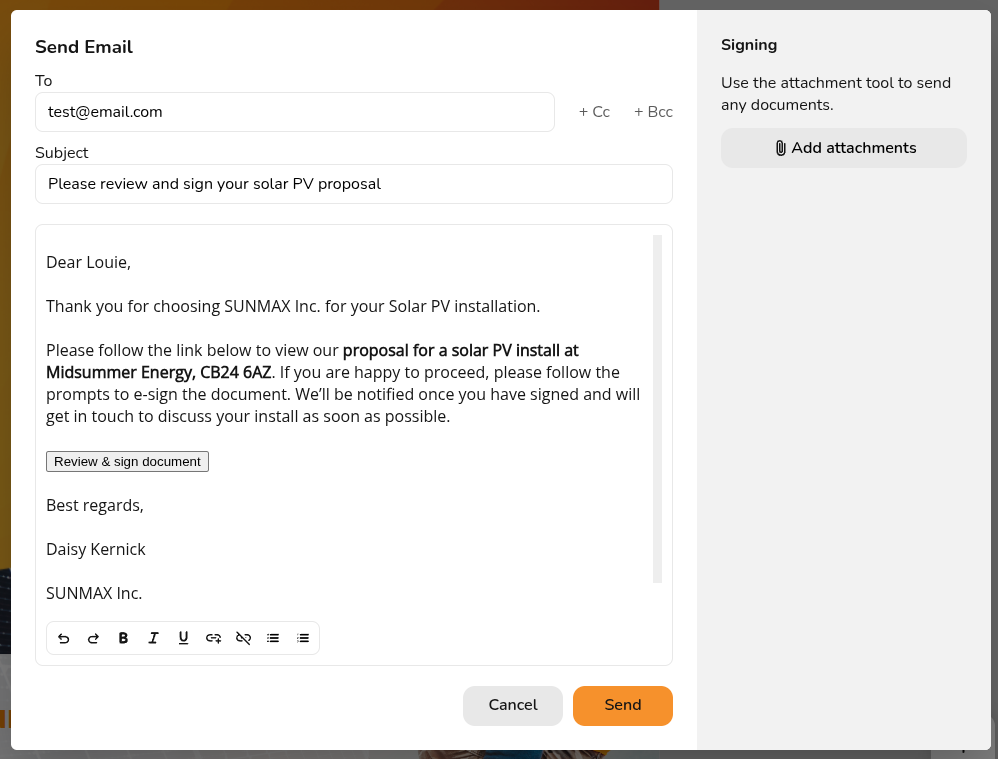
When you select one of the options detailed above, it will open an email window like the one shown below. If you have filled in the customer's email in the project details, this will automatically populate in the 'To' field.

The any required documents will automatically attach to the email if it has been saved to the file management section. You can add other attachments and then click **`Send`** when you are ready to send.

After you have sent the email, you will see on the left of the email the date and time that it was sent with a green tick.

[![image.png](https://help.easy-pv.co.uk/uploads/images/gallery/2026-07/scaled-1680-/8Tvet6XYxWGhkNMa-image.png)](https://help.easy-pv.co.uk/uploads/images/gallery/2026-07/8Tvet6XYxWGhkNMa-image.png)
<div class="rich-media-item mediaSingleView-content-wrap image-center cc-18m7r9b" data-layout="center" data-node-type="mediaSingle" data-renderer-start-pos="163" data-width="560" data-width-type="pixel" id="bkmrk--7"></div>### Sending emails from your domain

By default, emails in Easy PV will send from a no reply address but these can be set up to [send from your email address](https://help.easy-pv.co.uk/books/getting-started-with-pro/page/pro-email-credentials "Pro: Email Credentials").

---

## <span class="corp-icon material-symbols-rounded icon-support mceNonEditable" style="user-select: none;">​</span>Want to know more?


- **Related FAQs:** Check out our [Pro FAQs](https://help.easy-pv.co.uk/books/faqs/chapter/pro "Pro") for answers to common questions
- **Further guides**: Take a look at [E-signing](https://help.easy-pv.co.uk/books/reports-documents-and-emails/page/pro-e-signing), [Document management](https://help.easy-pv.co.uk/books/reports-documents-and-emails/page/pro-document-management "Pro: Document Management") or [Email settings](https://help.easy-pv.co.uk/books/getting-started-with-pro/page/pro-email-credentials)
- **Live training**: [Book onto a live demo session](https://cal.com/easy-pv/pro-training) to see this feature in action

**Contact Support:** If you've got further questions, get in touch with our support team at **help@easy-pv.co.uk** (UK) or **help@easy-pv.ie** (IE). *If you are experiencing a bug, to help us look into your issue faster, please include the email address of your account, the name of the project and screenshots of any unexpected behaviour.*

# Pro: E-signing

The e-signing functionality makes it quick and easy to get important documents signed by your team or customer.

---

## E-signing a document

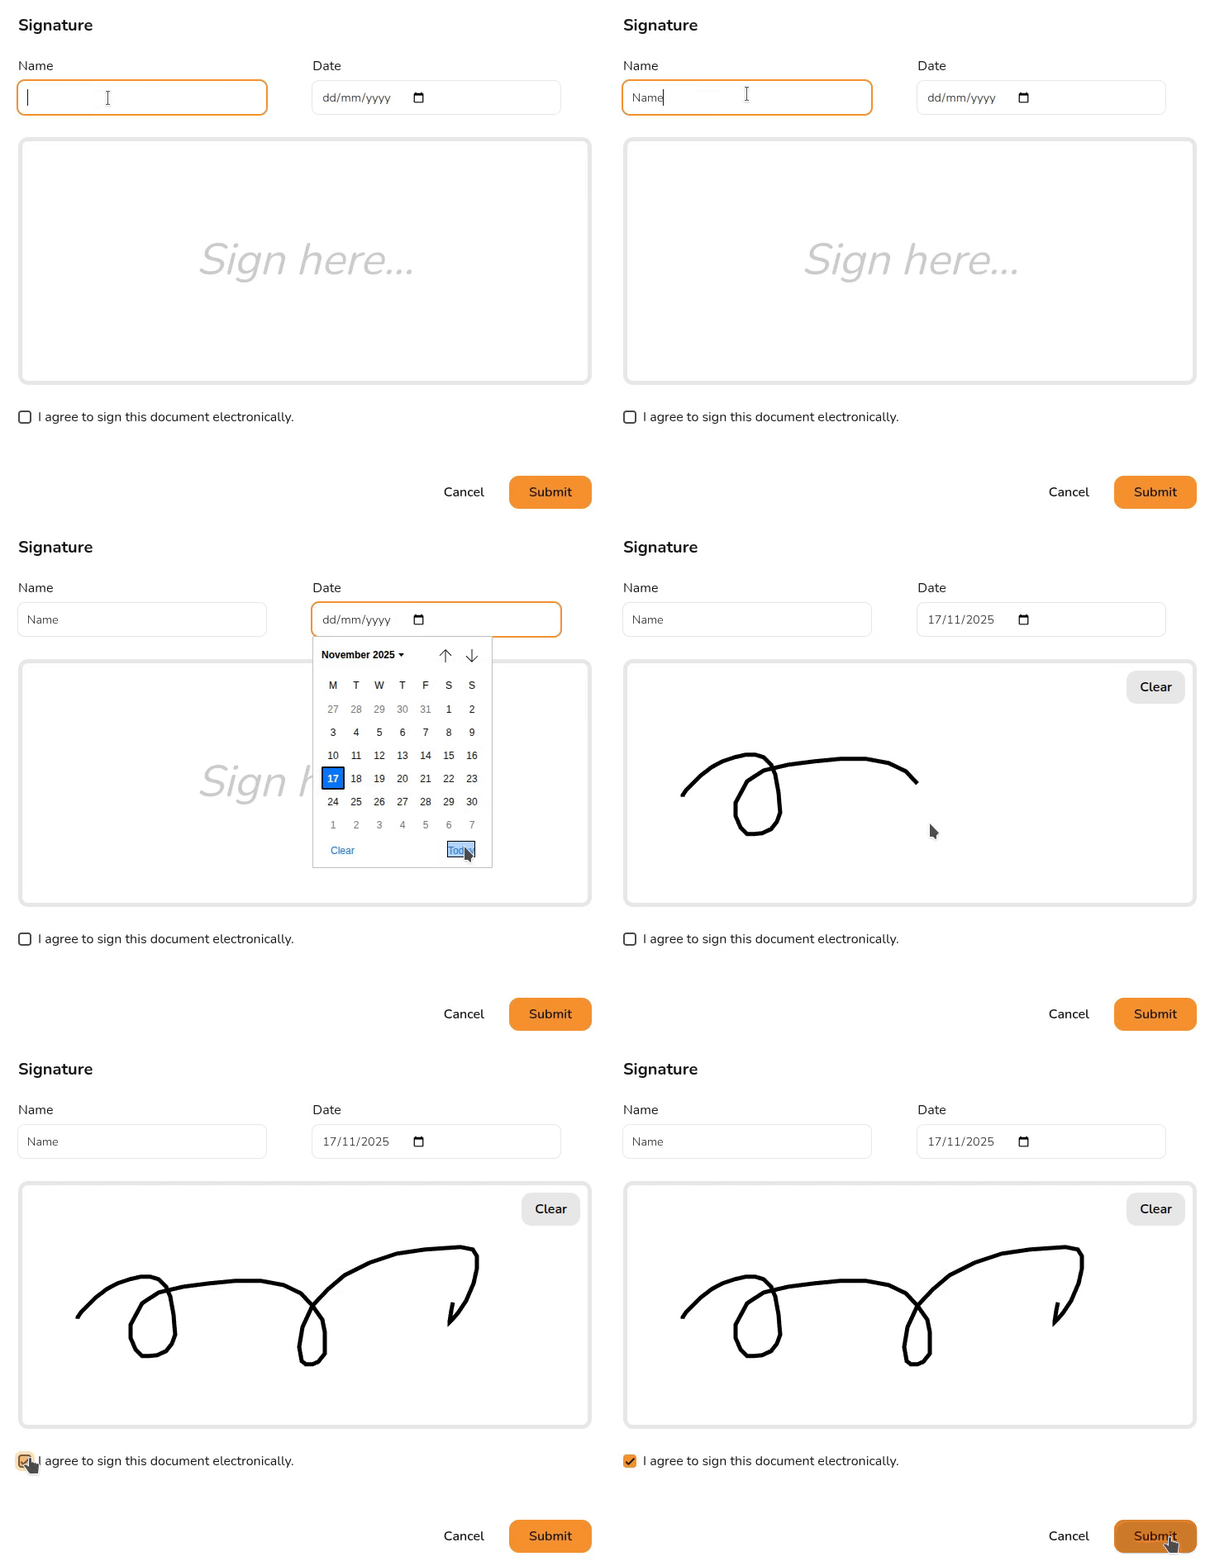
In Easy PV you will have the option to send documents for e-signing via email or to e-sign within the document.

[![simplescreenrecorder-2025-11-17_10.38.53-ezgif.com-video-to-gif-converter.gif](https://help.easy-pv.co.uk/uploads/images/gallery/2025-11/Mjnsx3p8O9DpHaVD-simplescreenrecorder-2025-11-17-10-38-53-ezgif-com-video-to-gif-converter.gif)](https://help.easy-pv.co.uk/uploads/images/gallery/2025-11/Mjnsx3p8O9DpHaVD-simplescreenrecorder-2025-11-17-10-38-53-ezgif-com-video-to-gif-converter.gif)
### Send a document for e-signing via email

Navigate to the report you want to send for signing via the **Reports drop-down** in the main site navigation. **Click the** [![image.png](https://help.easy-pv.co.uk/uploads/images/gallery/2026-07/scaled-1680-/c2PQdZ01weXTRwNK-image.png)](https://help.easy-pv.co.uk/uploads/images/gallery/2026-07/c2PQdZ01weXTRwNK-image.png) **icon** outlined below.

[![image.png](https://help.easy-pv.co.uk/uploads/images/gallery/2025-11/scaled-1680-/dODHtYfYYJZTD23p-image.png)](https://help.easy-pv.co.uk/uploads/images/gallery/2025-11/dODHtYfYYJZTD23p-image.png)
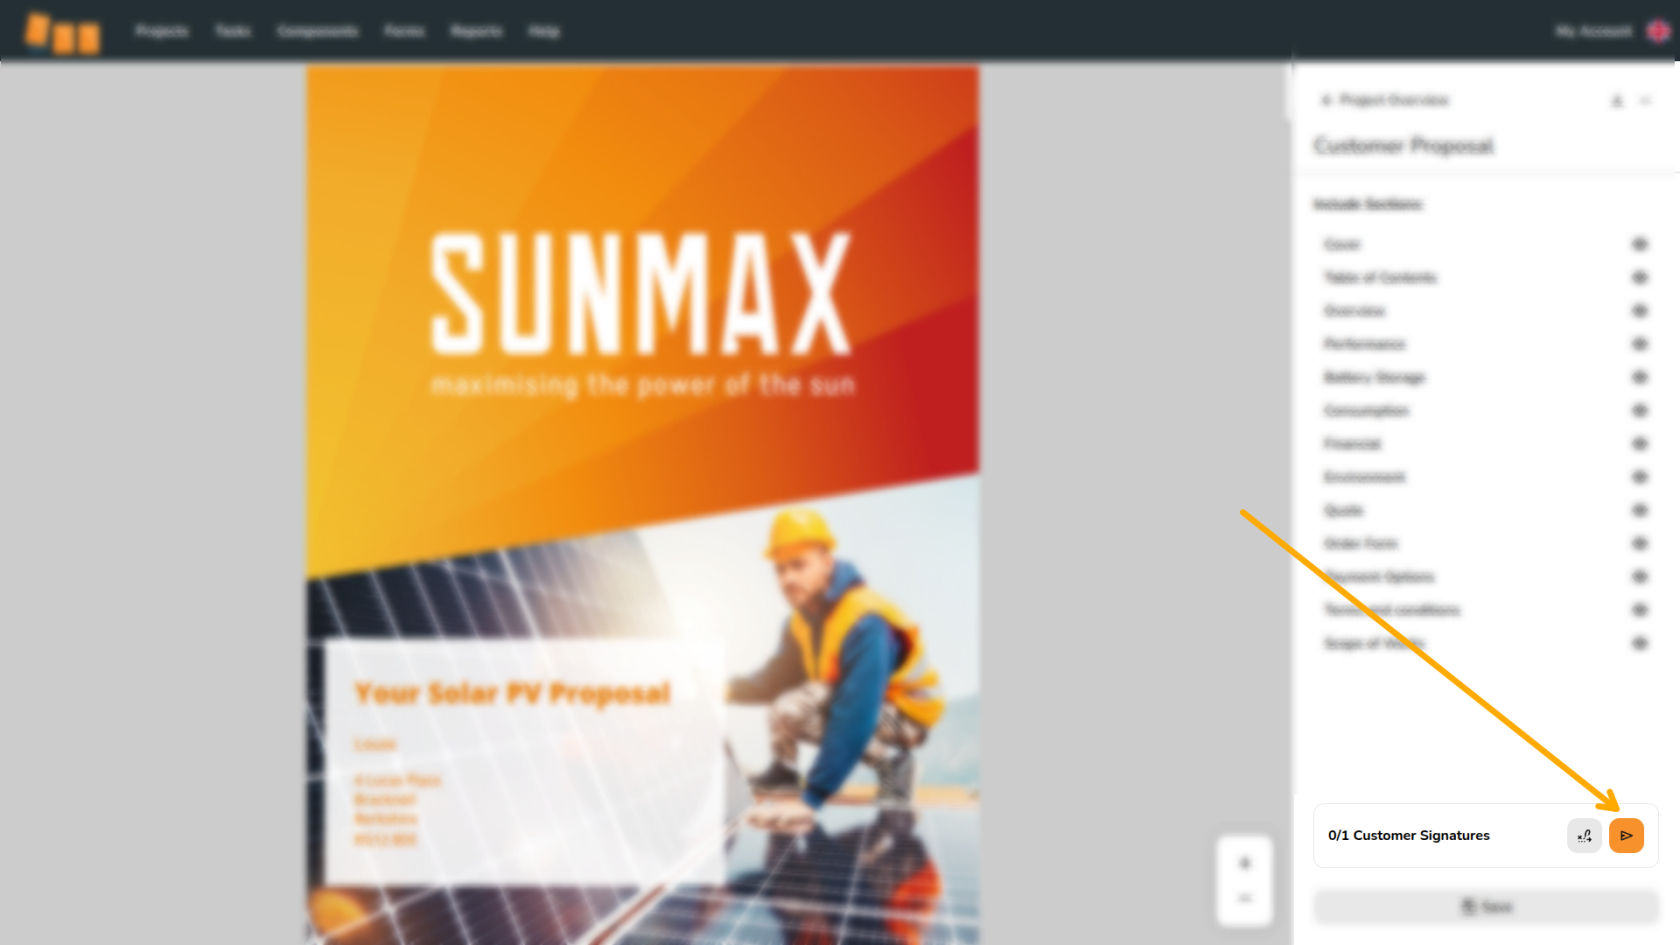
<div class="rich-media-item mediaSingleView-content-wrap image-center cc-1ufczrw" data-layout="center" data-node-type="mediaSingle" data-renderer-start-pos="666" data-width="250" data-width-type="pixel" id="bkmrk--3"></div>This will open an email menu that contains a link for signing the document. You can [edit the email as required](https://help.easy-pv.co.uk/books/reports-documents-and-emails/page/pro-sending-emails-from-easy-pv#bkmrk-editing-and-sending-), adding any additional attachments, and then click `<strong>Send</strong>`.

The recipient will receive the email which will include a link for them to review and sign the document. Once they have signed the document, you will receive an email notifying you that the document has been signed.

<span class="corp-icon material-symbols-rounded icon-readmore mceNonEditable" style="user-select: none;">​</span>**Learn more**: [Sending emails](https://help.easy-pv.co.uk/books/reports-documents-and-emails/page/pro-sending-emails-from-easy-pv "Pro: Sending emails from Easy PV")

### E-signing within a document

You also have the option to e-sign from within the documents. Click the signature [![image.png](https://help.easy-pv.co.uk/uploads/images/gallery/2026-07/scaled-1680-/IGBUiCDCnUmqYeDT-image.png)](https://help.easy-pv.co.uk/uploads/images/gallery/2026-07/IGBUiCDCnUmqYeDT-image.png) icon to navigate directly to the next e-signing location:

[![image.png](https://help.easy-pv.co.uk/uploads/images/gallery/2025-11/scaled-1680-/46rQVE7jliCYGSQi-image.png)](https://help.easy-pv.co.uk/uploads/images/gallery/2025-11/46rQVE7jliCYGSQi-image.png)
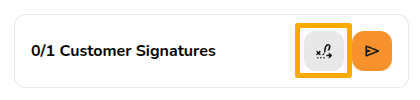
Then click `<strong>Sign</strong>` and e-sign the document.

---

## **View a signed document**

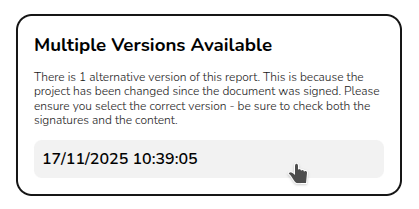
To view the signed version of the document, **navigate to the document via the reports drop-down** in the main navigation. On the right side bar it will then say **Multiple versions available** with a date below it, the signed version of the document can be loaded by selecting the date version you want to view:

[![image.png](https://help.easy-pv.co.uk/uploads/images/gallery/2025-11/scaled-1680-/mKOlCJ5Cp5r3zy35-image.png)](https://help.easy-pv.co.uk/uploads/images/gallery/2025-11/mKOlCJ5Cp5r3zy35-image.png)
---

## <span class="corp-icon material-symbols-rounded icon-support mceNonEditable" style="user-select: none;">​</span>Want to know more?


- **Related FAQs:** Check out our [Pro FAQs](https://help.easy-pv.co.uk/books/faqs/chapter/pro "Pro") for answers to common questions
- **Further guides**: Take a look at [Emailing](https://help.easy-pv.co.uk/books/reports-documents-and-emails/page/pro-sending-emails-from-easy-pv "Pro: Sending emails from Easy PV"), [Document management](https://help.easy-pv.co.uk/books/reports-documents-and-emails/page/pro-document-management "Pro: Document Management") or [Email settings](https://help.easy-pv.co.uk/books/getting-started-with-pro/page/pro-email-credentials)
- **Live training**: [Book onto a live demo session](https://cal.com/easy-pv/pro-training) to see this feature in action

**Contact Support:** If you've got further questions, get in touch with our support team at **help@easy-pv.co.uk** (UK) or **help@easy-pv.ie** (IE). *If you are experiencing a bug, to help us look into your issue faster, please include the email address of your account, the name of the project and screenshots of any unexpected behaviour.*