Pro features
- Share projects and components
- DNO Application via Connect Direct
- Document Management
- E-signing
- Emailing
- Survey and installation record tasks
Share projects and components
This guide applies to easy-pv.ie and easy-pv.co.uk pro versions of Easy PV. The information provided here may not be accurate for easy-pv.com.
With Easy PV pro you're able to collaborate with your team by sharing projects and components. See below how you can configure your sharing settings.
Default sharing
Each user in a Pro team can configure default sharing settings for the projects and components they create. Navigate to My account > Preferences > General and then Default sharing.
In this section, simply select which sharing permissions you would like to be granted automatically when creating a project or component.

Understanding permission types and sharing options
- View: users will be able to view projects or use the component, but not edit it.
- Edit: users will be able to make changes to the project or component.
- Delete: users will be able to permanently delete the project or component.
- Change owner: users will be able to transfer ownership of the project or component to another user.
Manual sharing
Sharing a project or component
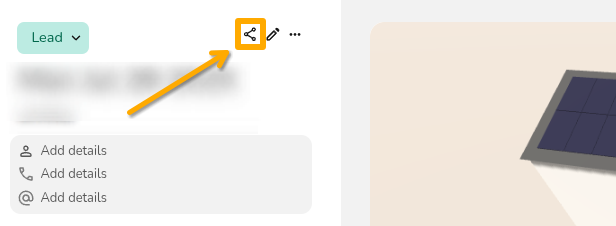
- From your project list on the My Projects page - click on the share icon on the project you want to share

- From the project overview page of a specific project - click on the share icon in the top left of the project.


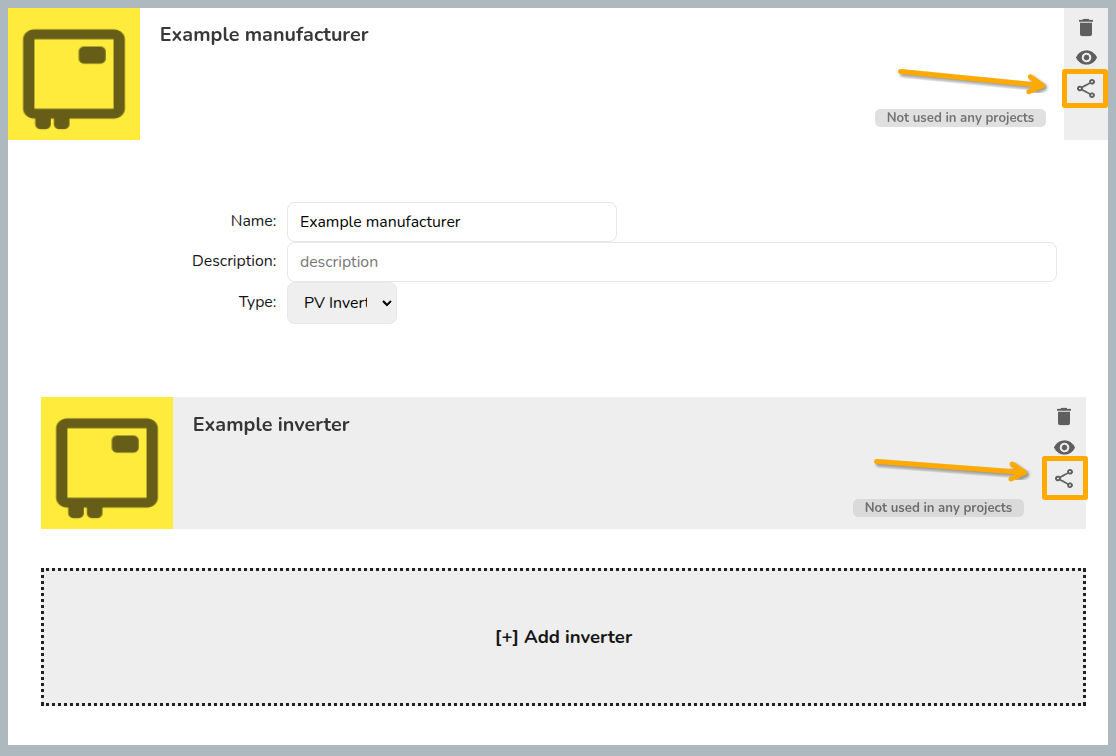
If you are using custom components in Easy PV, you can share those owned by you with other members of your team. Hover over the Components option in the main site navigation and then select the component type to find the component you want to share. Click on the share icon to configure sharing for the component.
For custom inverters and solar panels, you need to share both the manufacturer group and the individual component.
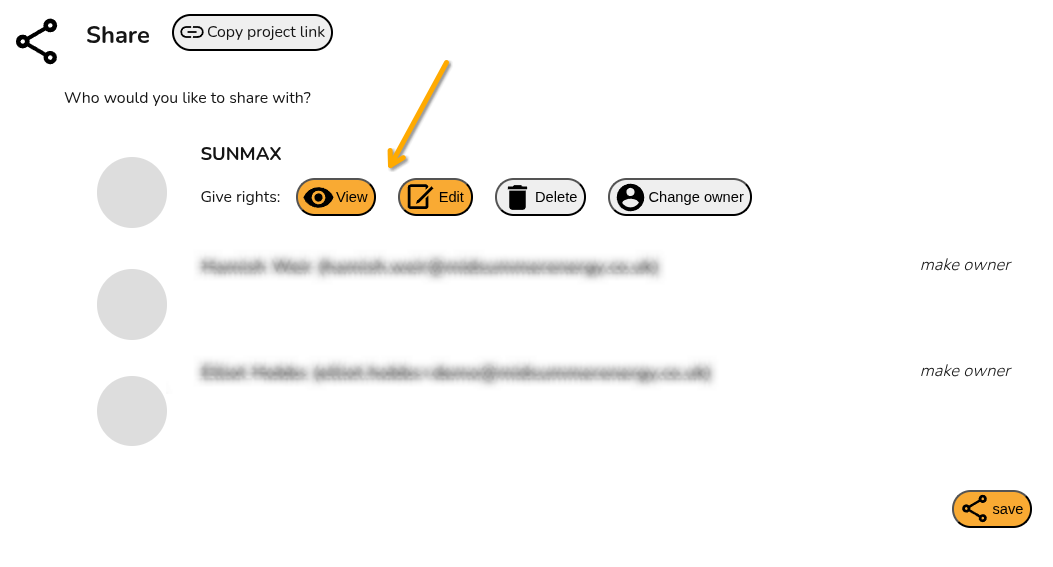
Selecting which permissions to give
Once you have chosen the project or component you want to share, you can then select the team you want to share with and set the permissions you want to apply. Click save in the bottom right corner. If you have lots of members in your team, you may need to scroll down to see the save option.
If you want to change ownership of the product or component, click on the make owner button beside the name of an individual user in your team. This will assign ownership to that user and you will no longer have permissions to configure sharing.
Viewing projects shared with you
To view projects shared with you, make sure this option is selected in the project list page:

Projects owned by others will say Owned by [name] in the top right corner of the project:

If you're having trouble with any of these permissions or would like to share with individual members of your team rather than the whole team, get in touch with our support team on help@easy-pv.co.uk or help@easy-pv.ie!
DNO Application via Connect Direct
Easy PV Pro’s DNO application feature allows you to effortlessly create and submit a DNO application directly based on your Easy PV design. It will take information from your project to pre-populate some of the fields in a specially designed online form.
Making an Application
It is possible to begin the DNO application form once you have completed the design stage of your project and you have a bill of materials. At the Project Overview screen select Start on the DNO Application box on the right-hand side.
Further info on form sections
MPAN number
Firstly you need to fill in the customer’s unique MPAN number. This is the 13 digit unique identifier found on the customer's energy bill.
Once this is filled in, Easy PV will add the correct DNO for that address (this can also be set manually). If your DNO is not listed, you can select "Other/IDNO". Connect Direct will use the MPAN to ensure that the application is sent to the correct DNO.
Customer info
Your customer’s name, address, and contact details along with your own details will be pre-populated here (provided you have entered this data earlier in the design phase). These can also be edited or added here if required.
Device information
Easy PV will also have pre-filled the device type and unique reference number for the component that has been used in your design.
At this point, you need to choose an Installation Date. This date must be in the future, as only pre-installation applications are supported by Connect Direct.
It is then possible to input details of any devices that may already be installed at the customer’s property, for example, an existing AC charger.
Supply details
For the last section ‘Supply Details’, all of these fields will need to be filled in by you as the user.
You need to upload a clear image of the 'cut-out' of the electrical supply for the property, something like the image shown here. This image will then be verified and checked so it will need to be accurate
Once all other fields are completed, you can press submit application, which will automatically send the information as a formal application to the designated DNO.
Status of the application
You will receive updates from the DNO directly about whether the application has been rejected or approved. You can also view the status of your application from the project overview screen and refresh to check back for updates.
Amending an Application
In most circumstances, an application can't be amended. If you make an error in your application, you should submit a new application.
If your application has already been approved by the DNO, and you have not yet submitted commissioning details, it can be amended. You can do this by visiting the project overview, and clicking the Amend Application button:

This will return you to the application form, where you can change your answers to any of the questions. Please note that the MPAN, Address and Post Code must all remain the same as the original application. Unlike when making a new application, it is allowed for the installation date to be in the past.
Once you have made your amendments, you can press submit application, and the amendment will be sent to the DNO to be reviewed again. You can track the status of the amendment on the project overview page.
Sending Commissioning Details
Once the device has been installed on site, you should submit commissioning information to the DNO. You can do this by visiting the project overview, and clicking the 'Send Commissioning Details' button:

The information required depends on the the size of the application - Easy PV will automatically determine which form to use, based on the information sent in the original application. Simply answer all questions presented to you, and press "submit details". You can track the progress of your submission from the project overview.
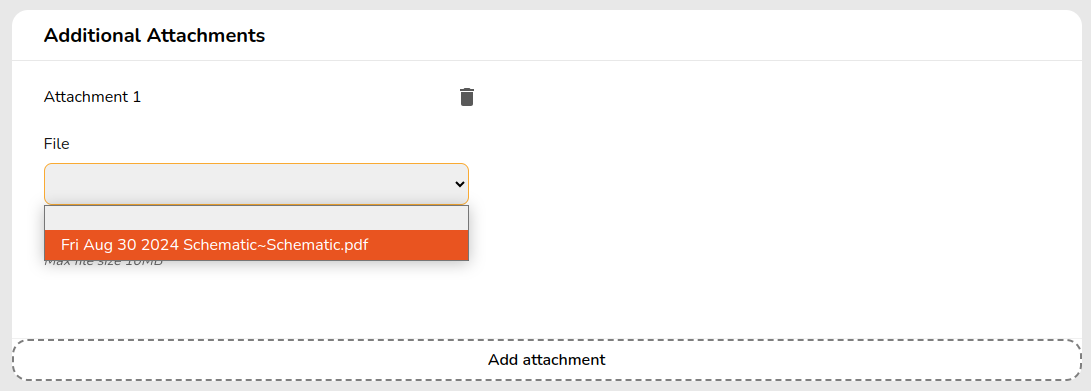
Adding Attachments
For larger applications, you must provide a circuit diagram for each power generating module. These can be uploaded from the Project Overview page, using the Upload button:

Alternatively, the Schematic tool in Easy PV will automatically generate a circuit diagram based on your design. Make any necessary adjustments to the diagram, and press the PDF button in the schematic task to generate a PDF that can be saved to the project.
Once you have uploaded or saved a file to your project, you should be able to select it from the drop-down, and complete your submission.
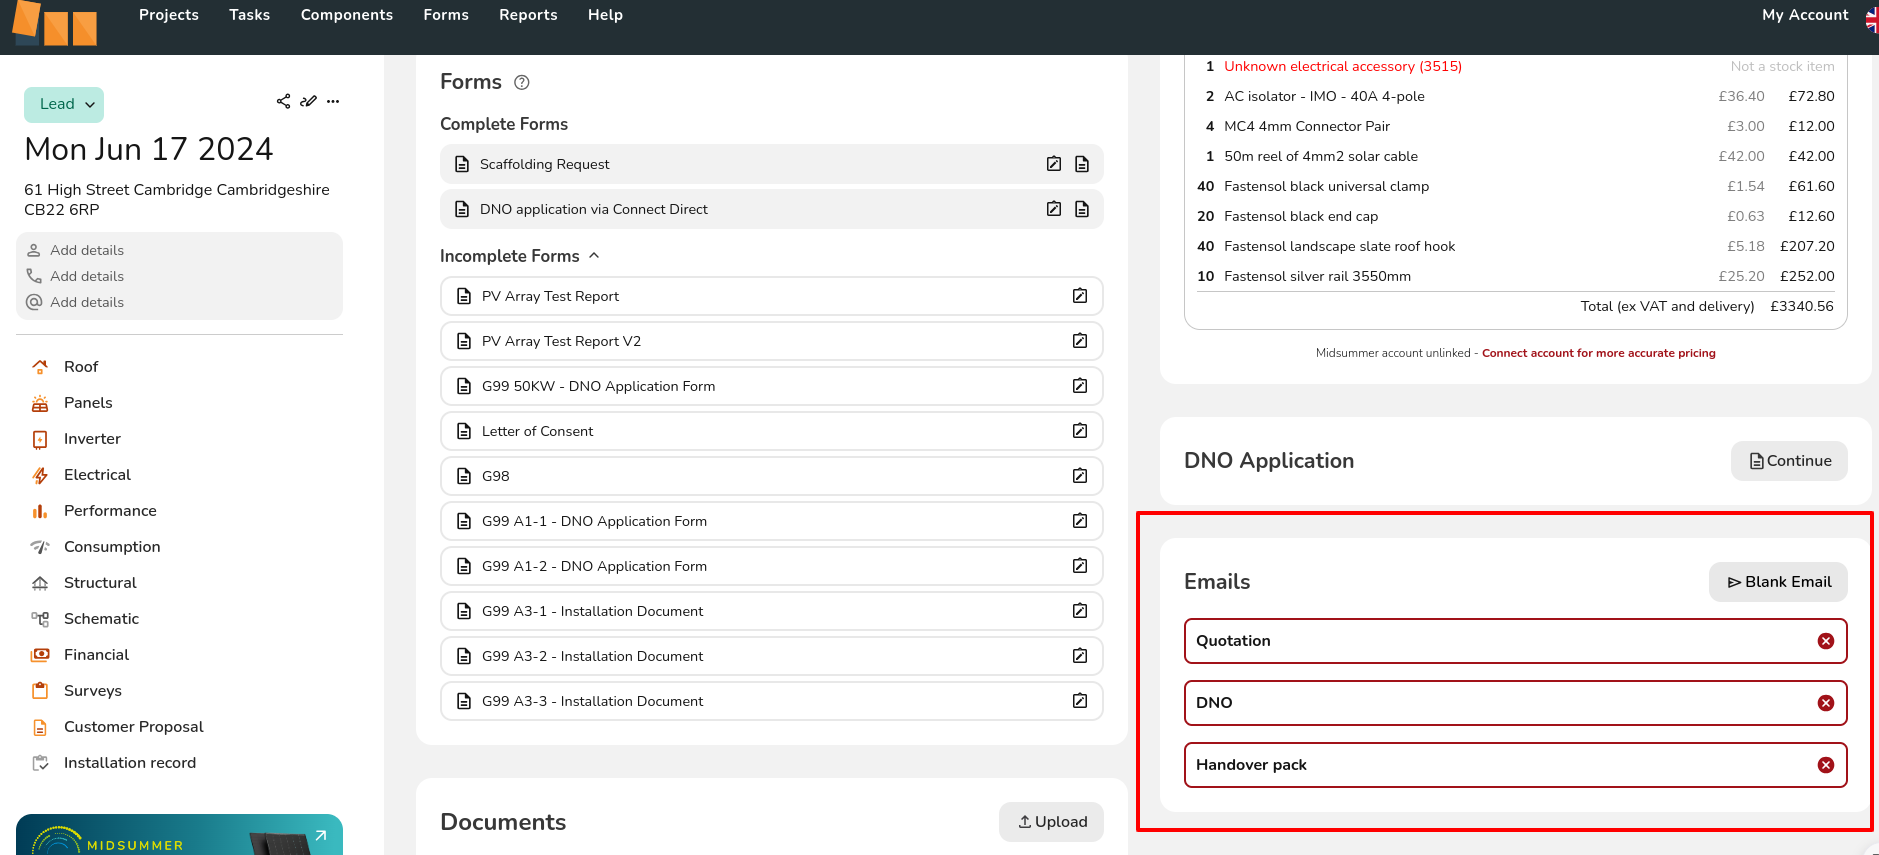
Document Management
The document management section can be found at the bottom of the project overview. It allows you to keep track of all the documents you need for a project in one place. When a document is shown in red, it means it has not been saved/uploaded to the file management section of your project yet.
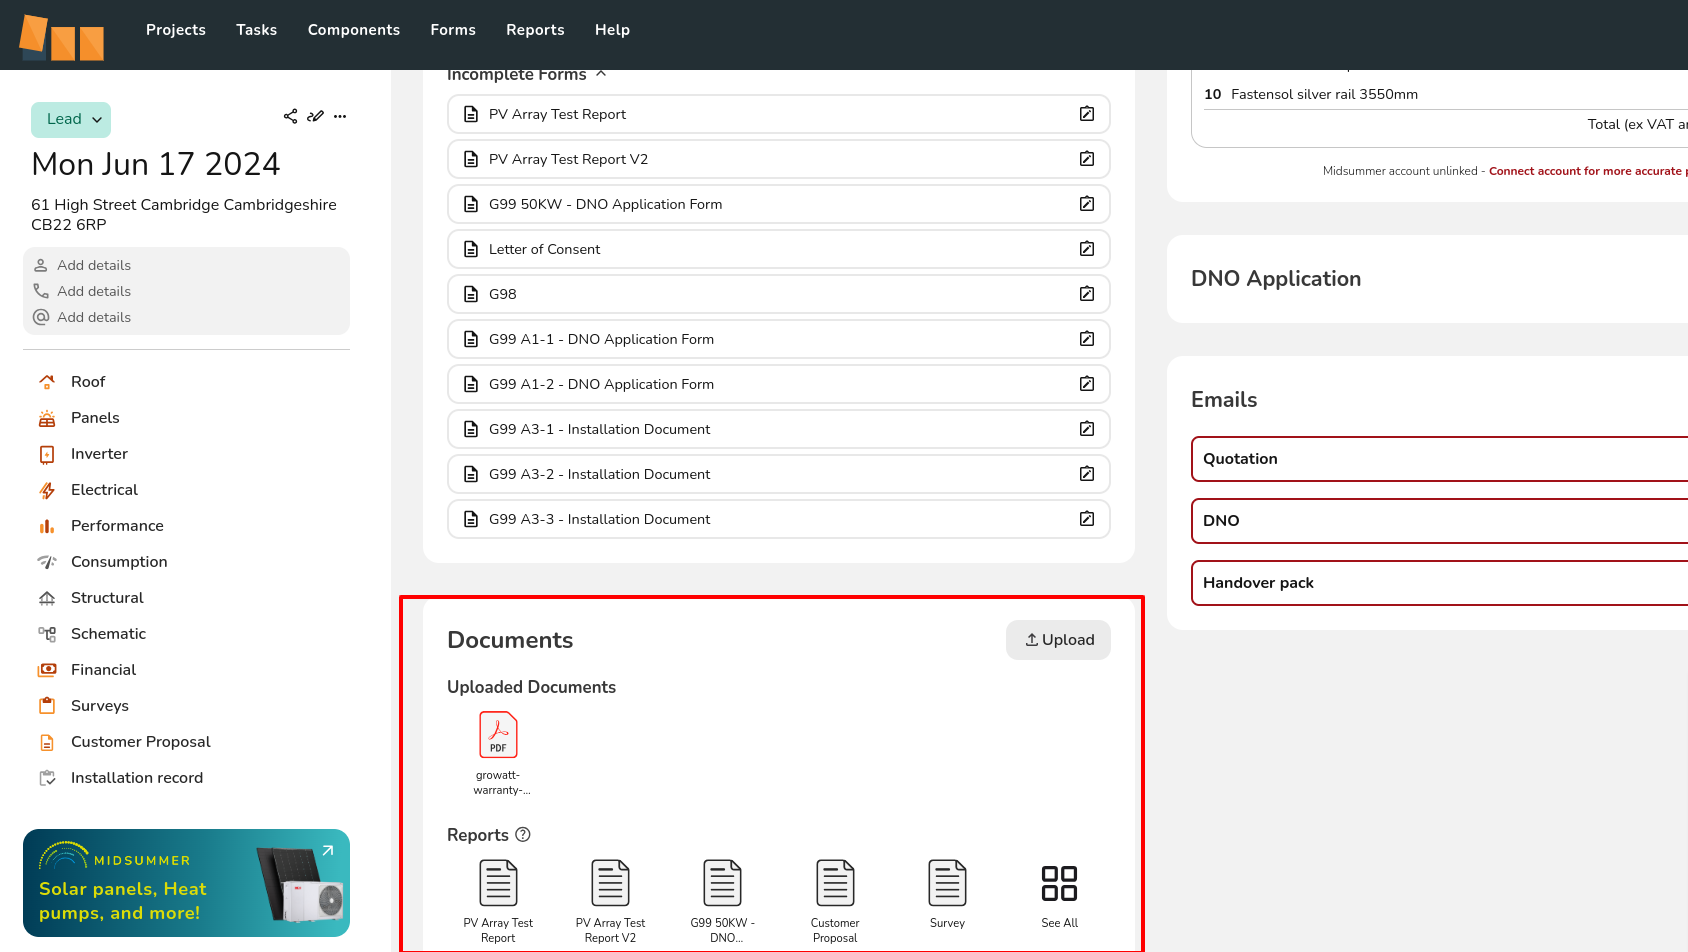
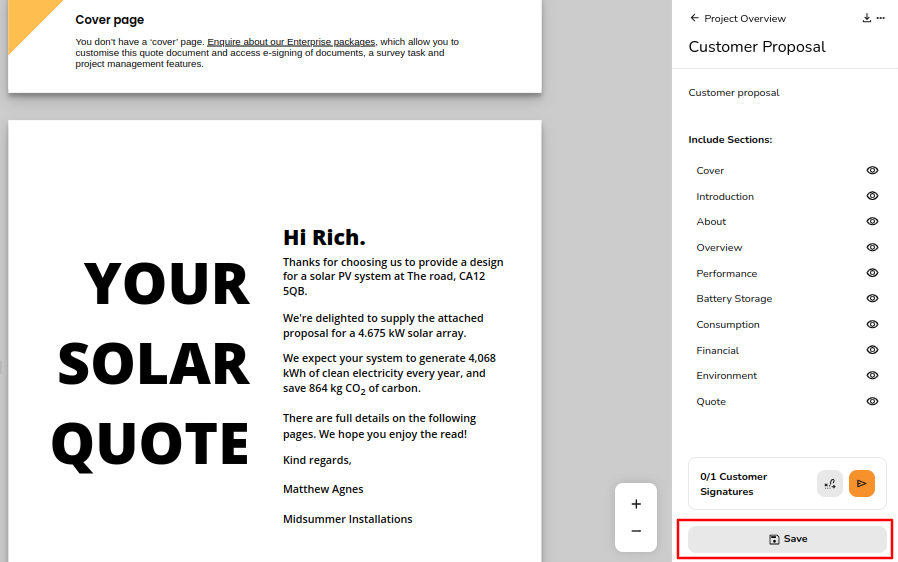
Saving an Easy PV report to the document manager
Let’s use the quote as an example of how to save a document to the document management section. When previewing the customer proposal report, you will see a menu on the right-hand side with a save button at the bottom. After clicking the save button, you can go back to the Project Overview and see that the quote has been saved to the document section.
Upload a document from your device
To upload a document from your device, click the Upload button. Then drag and drop the file, or use the Upload File button to find the document you wish to upload.
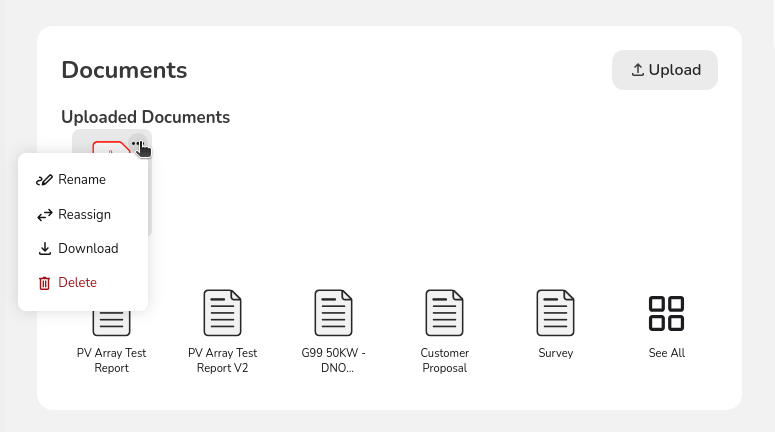
View, rename, download, or delete files you’ve saved to your project
-
If you’d like to download any of the files you’ve added to your project, click the Download button.
-
You can change the name of a file by clicking the three dots and choosing Rename.
-
To categorise your saved files, click the three dots and select Reassign.
-
To delete a document, click the three dots and then Delete. This will delete the saved version of the document from the file management section of your project.
E-signing
The e-signing functionality makes it quick and easy to get important documents signed by your team or customer. Several reports have e-signing capabilities including the customer proposal, G98, G99 A1-1, G99 A1-2, and PV Array Test.
Send a document for e-signing by email

Signing a document
When viewing a document that requires e-signing, the customer (or your team members) can click the signature field and then enter their name, the date, and their signature. They must tick the box to indicate they agree to the contents of the document.
After the document is signed after being sent via email, the recipient will receive an email with the signed document attached and you will receive an email confirming that the recipient has signed the document.
View a signed document
To view the signed version of the document, navigate to the document via the reports drop-down in the main navigation. The signed version of the document can be loaded by selecting the date version you want to view.
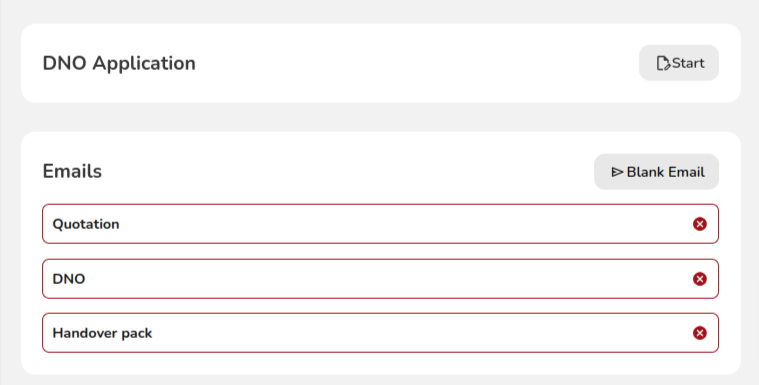
Emailing
You can access the email management section via the project overview. Here you can keep track of emails that have been sent.
If you would like emails to send from your email and domain, rather than no-reply@easy-pv.co.uk, then follow the steps outlined here.
Editing and sending an email 
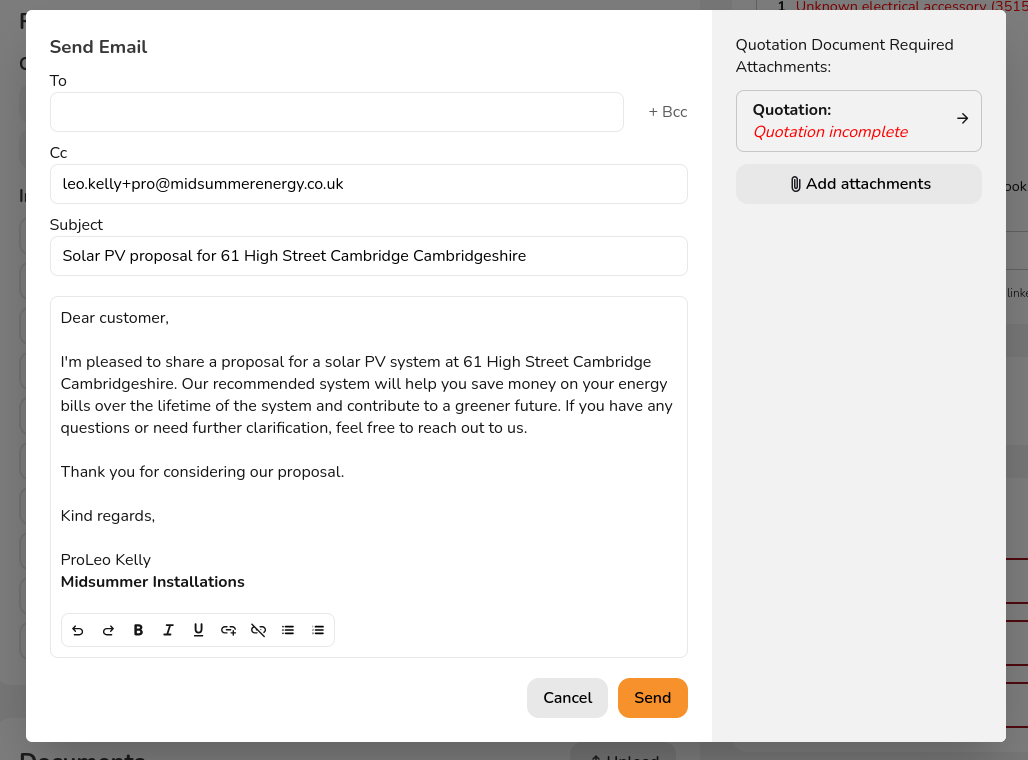
Using the Quotation email as an example, when you click on the Quotation email option it will open an email window, like the one shown above. The the customer’s email address will automatically be filled (if it has been added to the project). Your email will populate in the ‘Cc’ field.
The quotation will be automatically attached to the email if it was saved to the file management section. You can add other attachments and then click Send when you are ready to send.
Adding additional attachments
You can add additional files to the email by clicking Add attachments. Please note you will only be able to upload files you previously uploaded/saved to the file management section or component management section.
Important: Please note that if you send the quote to the customer via this method, it will be sent as a PDF attachment. Follow the instructions here to send documents for e-signing.
Survey and installation record tasks
The survey task allows the surveyor to enter all information required to plan out the installation in one location. Surveyors can answer the questions and add additional comments. Information is pulled through from the survey to a scaffolding request form which you can also access from the Forms drop-down.
The installation record works in many of the same ways as the survey task, it instead allows you to keep a good record of your install should any issues arise in the future.
In both forms you can upload images and apply image annotations. A PDF report of the survey and installation record can be generated from the reports drop-down in the main navigation.
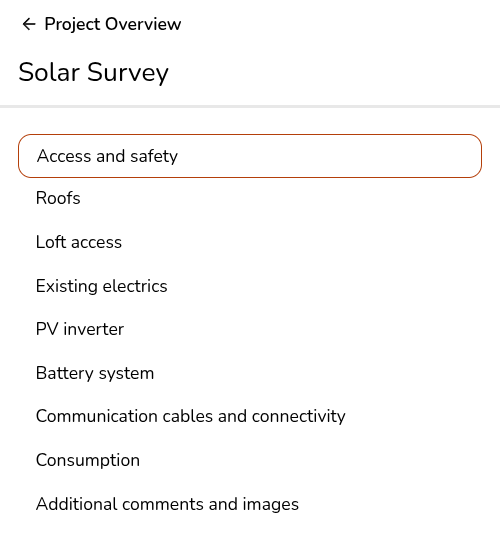
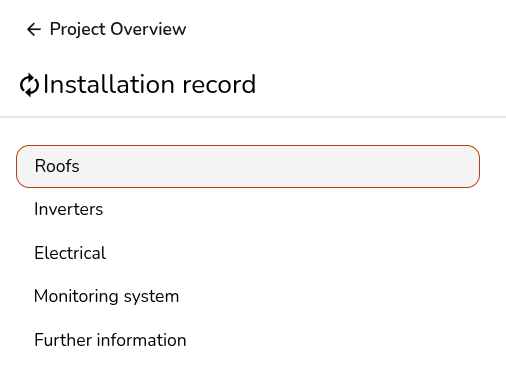
Accessing the survey and installation record
From any project, click the Tasks option in the main navigation menu, then select Surveys or Installation record.
Filling out
Both forms are divided into sections that can be viewed and navigated between using the right-hand menu.
Uploading an image
There are various places throughout the survey and installation record where pictures can be uploaded and annotated. Click on the Upload Images box and it will bring up the option to upload a picture from your files. If you are on a mobile or tablet device it will give you the option to take a photo. You can repeat this step to add multiple images.
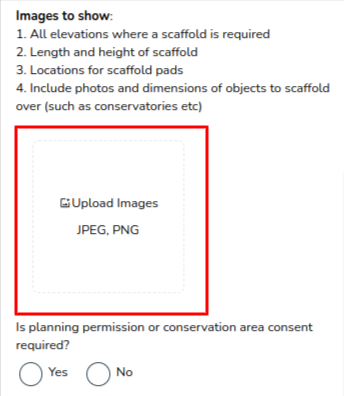
Note that .heic files (usually from mobile devices) are not supported at this time. If your phone, tablet, or camera is set to save pictures in this file format, please change this to save .jpg files in settings.
Adding annotations to your images
Once the file has been uploaded, you can click on the picture to bring up the annotation options.
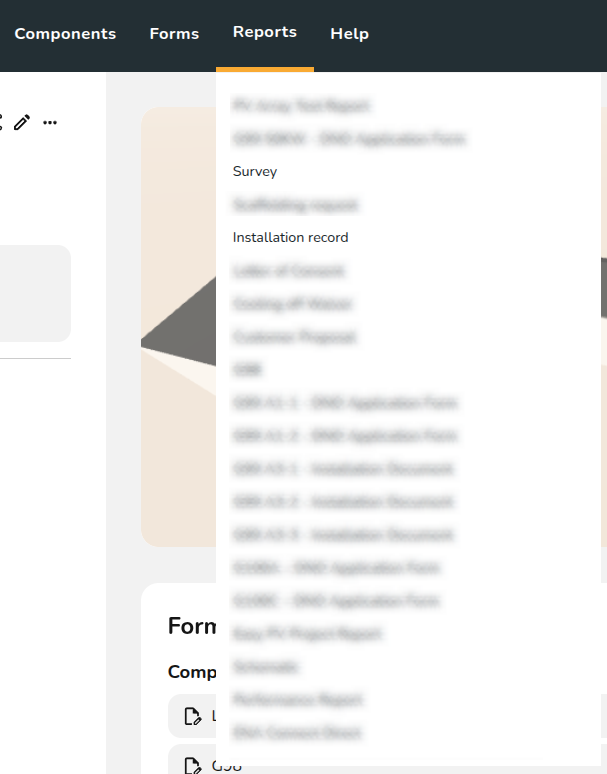
Accessing your survey and installation record as a PDF report
After the form is complete, the report can be found in the Reports drop-down.